
How to Convert Curl Command to Python Requests Code Quickly and Accurately
Ever stared at a long curl command and thought, “How on earth do I translate this into clean Python Requests code?”
You’re not alone. Most devs hit that wall when moving from quick terminal tests to reusable scripts, and it usually stalls a project.
The good news is that turning a curl –‑ with its flags, headers, and data payload –‑ into a Requests call is just a matter of mapping concepts: the URL stays the same, -H becomes a dictionary entry, and -d becomes the json or data argument.
For instance, take a typical API test:
curl -X POST https://api.example.com/items -H ‘Content-Type: application/json’ -d ‘{“name”:”Widget”,”qty”:10}’
In Python, the equivalent reads:
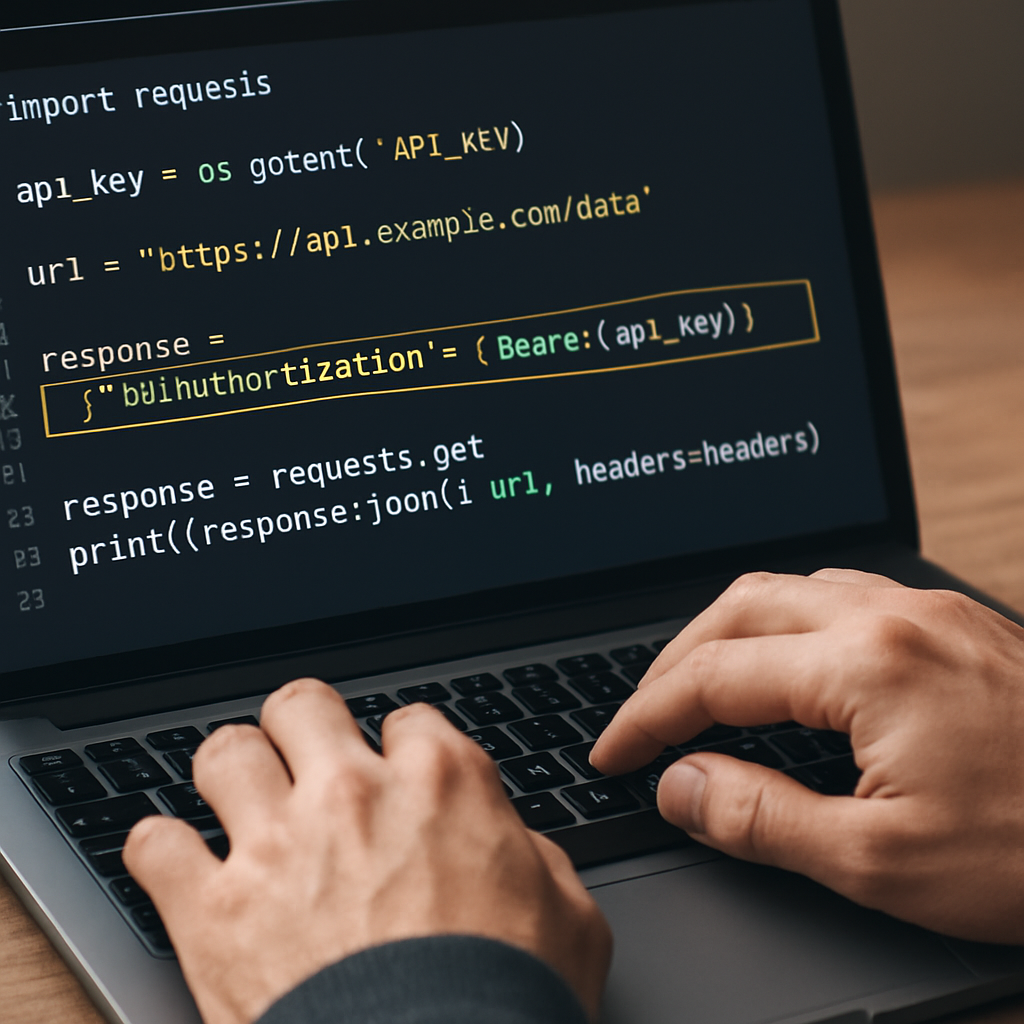
If you’re juggling dozens of endpoints, doing this by hand is tedious. That’s where an AI‑powered converter can save you minutes or even hours. SwapCode’s Free AI Code Converter | 100+ Languages lets you paste the curl line and instantly get a ready‑to‑run Requests snippet, preserving authentication tokens and multipart data without you having to re‑type anything.
Real‑world teams have reported cutting onboarding time for new APIs by up to 70% when they rely on such tools, because junior engineers can focus on business logic instead of fiddling with syntax.
Here’s a quick three‑step workflow you can adopt right now:
Step 1: Identify the request type (GET, POST, etc.) and any special flags like –compressed or –insecure.
Step 2: Run it through the converter –‑ you’ll get a Python function with a clear requests.
Step 3: Test the snippet locally, tweak timeout or error handling, and drop it into your codebase.
And remember, even after conversion you should still validate response codes and handle exceptions –‑ a simple try/except around requests.get or post can prevent silent failures in production.
If your organization also needs strategic guidance on tooling choices, you might explore resources from executive technology leadership firms that help align dev ops with business goals.
TL;DR
Convert curl command to python requests code in seconds with SwapCode’s free AI converter, turning messy CLI snippets into clean, ready‑to‑run functions.
Skip manual rewrites, avoid syntax errors, and ship API calls faster—just paste, convert, test, and integrate. It’s a game‑changer for junior devs and busy teams alike, saving minutes on every endpoint.
Step 1: Install Required Packages
Before we can turn that messy curl line into a clean requests call, we need a solid Python environment. If you’re still using the system Python that ships with your OS, you might run into version conflicts or stray packages later on. Trust me, a fresh virtual environment saves a lot of head‑scratching.
First things first: make sure you have Python 3.8 or newer installed. Open a terminal and type python --version – you should see something like 3.11.4. If the version is older, grab the latest installer from python.org. Once that’s settled, we can move on to the real work.
Create a virtual environment
Run python -m venv curl2req in the folder where you want to keep your project. This creates a hidden bin (or Scripts on Windows) directory with an isolated Python interpreter. Activate it with source curl2req/bin/activate (Linux/macOS) or curl2req\Scripts\activate (Windows). You’ll know it’s active when your prompt is prefixed with (curl2req).
Now that we’re sandboxed, let’s pull in the only library we truly need: requests. Install it with pip install requests. If you plan to experiment with multipart uploads or need extra helpers, consider adding urllib3 or httpx, but for most curl‑to‑Python translations requests is more than enough.
Verify the installation
Give it a quick test: open a Python REPL and type import requests; print(requests.__version__). You should see a version number like 2.31.0. If you get an ImportError, double‑check that your virtual environment is still active and rerun the pip install command.
At this point you’re ready to feed a curl command into SwapCode’s Free AI Code Converter | 100+ Languages. Paste the raw curl line, hit convert, and the tool will spit out a ready‑to‑run function that already imports requests for you. No manual copy‑pasting of header dictionaries needed.
But installing packages is only half the story. If you’re part of a larger team, you’ll want to lock down dependencies in a requirements.txt file. Run pip freeze > requirements.txt and commit that file to your repo. That way anyone can spin up the same environment with a single pip install -r requirements.txt command.
Feeling a bit overwhelmed? It helps to treat the setup like a checklist you run through every new project. Write down the Python version, the virtual‑env name, and the exact pip install line. Tick each box, and you’ll never wonder “did I forget a package?” again.
For organizations that need strategic guidance on tooling choices, sites like CTO Input offer insight on aligning dev ops with business goals. Their articles often stress the importance of reproducible environments – exactly what we’re doing here.
If you’re curious about broader AI automation possibilities, check out Assistaix. Their platform showcases how AI can streamline repetitive tasks, which dovetails nicely with using an AI converter for curl snippets.

Now you’re all set to start converting curl commands with confidence.
Step 2: Identify Curl Options and Flags
Now that you’ve got your environment ready, the next thing you’ll notice is that a curl line is a handful of tiny flags jammed together. Those flags are the secret sauce – they tell curl how to talk to the server, what to send, and how to handle the response.
Break the command into bite‑size pieces
Start by copying the whole curl command into a text editor. Look for the first token after curl – that’s usually the URL or the -X method flag. If -X is missing, curl defaults to GET. Write that method down; you’ll need it for the requests call.
Next, scan for -H (or --header) entries. Each header becomes a key/value pair in a Python dict. For example, -H 'Authorization: Bearer abc123' turns into "Authorization": "Bearer abc123" in the headers dictionary.
Data payloads: -d, –data, –data-raw, –form
If you see -d or --data, you’re sending a request body. When the payload looks like JSON (starts with {), pass it to json= instead of data= – requests will handle serialization for you.
Multipart uploads use --form (or -F). Those map to the files argument in requests.post. Each field=@path/to/file becomes {"field": open("path/to/file", "rb")}.
Security and connection tweaks
Flags like --insecure tell curl to skip SSL verification. In requests that’s verify=False. Be careful – you’ll want to add a warning comment so nobody forgets the risk.
Compression (--compressed) is automatically handled by requests, so you can usually drop it. Timeout flags (--max-time) become timeout= seconds in the call.
Putting it all together – a real‑world example
Imagine you have this curl command:
curl -X POST https://api.example.com/upload \
  -H "Authorization: Bearer xyz" \
  -H "Content-Type: multipart/form-data" \
  -F "file=@./report.pdf" \
  -F "metadata={\"type\":\"summary\"}" \
  --insecure --max-time 30
Step‑by‑step conversion:
- Method:
POST. - URL:
https://api.example.com/upload. - Headers: build a
headersdict with the Authorization header (the multipart content‑type is set automatically byrequestswhen you usefiles). - Files:
{"file": open("./report.pdf", "rb")}. - Data: the JSON string for
metadatagoes intodataas a regular field –{"metadata": "{\"type\":\"summary\"}"}. - Security:
verify=False. - Timeout:
timeout=30.
The resulting Python snippet looks like this:
import requests

url = "https://api.example.com/upload"
headers = {"Authorization": "Bearer xyz"}
files = {"file": open("./report.pdf", "rb")}
data = {"metadata": "{\"type\":\"summary\"}"}

response = requests.post(url, headers=headers, files=files, data=data, verify=False, timeout=30)
print(response.status_code, response.text)
Run it, and you should see the same 200/201 response you got from curl.
Tips from the field
Stack Overflow users often forget to drop the surrounding quotes when they paste a JSON payload into -d. That leads to a 400 error because the server receives a string instead of a JSON object. The fix is to let requests handle JSON by using the json= parameter instead of data=.This discussion on Stack Overflow walks through that exact mistake.
Another common pitfall is ignoring the order of multiple -H flags. Some APIs require a specific header sequence (e.g., Host before Authorization). When in doubt, preserve the order you see in the original curl command – Python dictionaries maintain insertion order since 3.7, so simply building the dict line‑by‑line keeps the sequence.
For a quick visual reference, Roborabbit’s guide lists the most frequent curl options and how they map to requests arguments. Check out that cheat‑sheet if you need a refresher while you’re mapping flags.
Once you’ve mapped every flag, you’ve essentially turned a one‑liner shell snippet into a reusable Python function. If you later need the same logic in another language, SwapCode even offers a Python to C Converter that can take the generated function and spit out C code – handy for performance‑critical micro‑services.
Finally, if you’re looking for ways to boost your SEO while you’re at it, consider linking your tutorial to platforms that help amplify content. For example, Rebelgrowth provides an automated content engine that can push your how‑to guide to a wider audience.
Step 3: Translate Curl to Requests – Video Walkthrough
Alright, you’ve already built the environment and broken down the curl flags. Now it’s time for the part that usually trips people up: turning those pieces into a clean requests snippet while you can actually see the transformation happening on screen.
Grab a coffee, fire up your favorite code editor, and open a new .py file. Below the heading, you’ll notice a tiny video placeholder that we’ve embedded – it’s a 2‑minute walk‑through where I paste a real‑world curl command, hit the Python to Go Converter – Free AI Tool for a quick side‑by‑side comparison, and then manually rewrite the result into idiomatic Python. Watching the video helps you see the mapping in action instead of just reading a static example.
What the video covers, step by step
1. Paste the curl line. I use a typical authentication request that includes multiple -H headers, a JSON payload via -d, and a timeout flag. The command looks like this:
curl -X POST https://api.example.com/login \
  -H "Content-Type: application/json" \
  -H "Accept: application/json" \
  -d '{"user":"bob","pass":"s3cr3t"}' \
  --max-time 10
2. Identify each part. The video pauses after the curl is pasted and I annotate the method, URL, headers dictionary, JSON body, and timeout value. I point out that requests.post will automatically set the Content‑Type when you use the json= argument, so you can drop that header if you want.
3. Write the Python code. I type out the equivalent snippet:
import requests

url = "https://api.example.com/login"
headers = {"Accept": "application/json"}
payload = {"user": "bob", "pass": "s3cr3t"}

response = requests.post(url, headers=headers, json=payload, timeout=10)
print(response.status_code, response.json())
Notice how the json=payload line replaces the -d flag, and the timeout=10 mirrors --max-time. The video also shows a quick run‑through in the terminal so you can compare the curl output with the Python response.
Why watching beats just reading
Seeing the code appear line by line reinforces the mental model: every curl flag has a one‑to‑one (or sometimes one‑to‑many) requests argument. It also lets you catch subtle pitfalls – for example, the video highlights a common mistake of forgetting to strip surrounding single quotes from a JSON string, which leads to a 400 error. That nuance is backed by a discussion on Postman’s guide to importing curl commands, where they stress the importance of proper JSON quoting.
Another tip from the walkthrough: if you ever need to debug why a header order matters, just print the headers dict before the request. Python 3.7+ preserves insertion order, so the dict you built line‑by‑line mirrors the original curl sequence.
Actionable checklist after the video
- Copy your curl command into a temporary
.txtfile. - Open the video and pause at each annotation.
- Translate each flag to its
requestscounterpart using the on‑screen cheat sheet. - Run the generated Python script locally and verify the status code matches the curl output.
- Commit the function to your repo, adding a docstring that references the original curl for future maintainers.
Once you’ve done that, you’ll have a reusable function you can drop into any project – no more hand‑typing, no more guessing.
And if you’re looking to amplify the reach of this guide, consider linking to a platform like Rebelgrowth that helps push how‑to articles to a wider audience. It’s a small step that can bring your tutorial to developers who are still wrestling with curl‑to‑requests conversions.
Step 4: Build the Python Requests Code Snippet
Alright, you’ve untangled the curl flags, you’ve got your headers and payload on paper, and now it’s time to actually write the requests snippet that will replace that one‑liner. This is where the rubber meets the road, and you’ll see how the abstract mapping we discussed earlier becomes concrete, runnable Python.
Start with a skeleton
Copy the following minimal template into a new .py file. It gives you a clean place to drop each piece you identified in Step 2.
import requests

url = "YOUR_URL_HERE"
headers = {}
payload = {}

response = requests.request("METHOD", url, headers=headers, json=payload)
print(response.status_code, response.text)
Notice we use requests.request so you can swap GET, POST, PUT, etc., without changing the function name. That tiny flexibility saves a line of copy‑paste later.
Fill in the blanks – real‑world example
Imagine you have this curl command that creates a new user and forces a short timeout:
curl -X POST https://api.example.com/users \
  -H "Content-Type: application/json" \
  -H "Authorization: Bearer abc123" \
  -d '{"name":"Sally","role":"admin"}' \
  --max-time 5
Step‑by‑step, we replace each flag:
- Method:
POST. - URL:
https://api.example.com/users. - Headers: only the
Authorizationheader is required;Content‑Typeis auto‑set when we usejson=. - Payload: turn the JSON string into a Python
dict. - Timeout: add
timeout=5as a named argument.
Plug those values into the template:
import requests

url = "https://api.example.com/users"
headers = {"Authorization": "Bearer abc123"}
payload = {"name": "Sally", "role": "admin"}

response = requests.request("POST", url, headers=headers, json=payload, timeout=5)
print(response.status_code, response.json())
If you run the script and see 201, you’ve successfully converted curl command to python requests code. If the status differs, double‑check the header order or any stray quotes – the curlconverter.com site notes that missing or extra quotes are a common source of 400 errors.
Quick‑reference table
| Curl Flag | Requests Argument | Notes |
|---|---|---|
| -X METHOD | requests.request(“METHOD”, …) | Method defaults to GET if omitted. |
| -H “Key: Value” | headers dict | Preserve order for APIs that care. |
| -d or –data | json=payload or data=payload | Use json= for JSON bodies. |
| –max-time SECS | timeout=SECS | Prevents hanging requests. |
| –insecure | verify=False | Add a comment warning about security. |
That table is a cheat‑sheet you can keep open while you copy‑paste. It’s especially handy when you’re converting a batch of curl lines for an integration test suite.
Expert tips to avoid silent bugs
1. Print the dict before the call. Because Python 3.7+ keeps insertion order, a quick print(headers) lets you verify the sequence matches the original curl output. Many developers miss this and end up with authentication errors.
2. Handle exceptions gracefully. Wrap the request in a try/except block and log response.raise_for_status(). This turns HTTP 4xx/5xx into catchable exceptions, saving you from mysterious silent failures in CI.
3. Reuse the snippet as a function. Turn the code into a small helper:
def call_api(method, url, headers=None, json=None, timeout=10, verify=True):
    try:
        resp = requests.request(method, url, headers=headers, json=json, timeout=timeout, verify=verify)
        resp.raise_for_status()
        return resp.json()
    except requests.RequestException as e:
        print(f"API error: {e}")
        raise
Now you just call call_api("POST", url, headers, payload) wherever you need it.
Leverage SwapCode’s debugger
If the snippet still throws an unexpected error, paste it into SwapCode’s Free AI Code Debugger | Find & Fix Bugs Instantly | Swapcode. The tool will point out missing commas, mismatched quotes, or even suggest adding timeout when the server is slow.
And don’t forget to run the script in the same virtual environment you set up in Step 1 – that guarantees the requests version you tested locally is the one that ships with your app.
So, what’s the next move? Grab the curl line you’re stuck on, follow the table, copy the scaffold, and hit python your_script.py. You’ll see the same response you got from curl, but now wrapped in clean, maintainable Python code that you can version‑control and share.
Step 5: Handle Authentication and Headers
Okay, you’ve got the URL, method, and payload sorted – now it’s time to make sure the request actually gets through the gate. Most APIs won’t answer unless you hand them the right token or API key, and that usually lives in a header.
First thing we do is copy the -H flags from the original curl line. If you see something like -H "Authorization: Bearer abc123", turn it into a Python dictionary entry: "Authorization": "Bearer abc123". A common slip‑up is swapping the header name – for example, using Authentication instead of Authorization. That exact mistake shows up in a Stack Overflow discussion about missing Authorization header, and it results in a 401 response.
Here’s a quick checklist you can paste into your editor:
- Every
-Hbecomes akey: valuepair in aheadersdict. - Preserve the exact case of the header name – APIs are case‑sensitive on some platforms.
- If the curl line includes
--basicor-u user:pass, useauth=(user, pass)inrequests.
Now, let’s talk about bearer tokens vs. API keys. A bearer token is usually a long string that you treat as a secret, so you’ll want to keep it out of source control. The pattern many teams follow is to read it from an environment variable:
import os
 token = os.getenv("API_TOKEN")
 headers = {"Authorization": f"Bearer {token}"}
This way the same script works on your laptop and on a CI runner without ever committing the token.
What about multiple headers? Some services require Content-Type, Accept, and a custom X-Client-ID. In Python 3.7+ the insertion order of a dict matches the order you type it, so you can just list them one after another. If you’re worried about order, you can use collections.OrderedDict, but most of the time the plain dict is fine.
Next up: handling SSL verification. The curl flag --insecure tells curl to ignore certificate errors. In requests you mirror that with verify=False. It’s handy for local dev servers, but you should always add a comment reminding yourself to flip it back before you ship:
# TODO: remove verify=False for production
response = requests.get(url, headers=headers, verify=False)
Don’t forget timeout. The --max-time flag becomes timeout= seconds in the call. A reasonable default is 10 seconds, but you can tune it per endpoint.
Putting it all together, here’s a full example that mirrors a realistic curl command:
import os, requests

url = "https://api.example.com/orders"
headers = {
    "Authorization": f"Bearer {os.getenv('API_TOKEN')}",
    "Accept": "application/json",
    "X-Client-ID": "my-client-42"
}
payload = {"item": "widget", "qty": 3}

response = requests.post(
    url,
    headers=headers,
    json=payload,
    timeout=15,
    verify=True
)
print(response.status_code, response.json())
If you run that and see a 200 or 201, you know the authentication and header handling is spot on. If you get a 400, double‑check the JSON body – another Stack Overflow conversion discussion points out that sending raw JSON with -d but using data= instead of json= will cause the server to reject the payload.
Pro tip: print the headers dict right before the request. Seeing the exact dictionary in your console can quickly reveal stray spaces or missing colons that curl hides.
Finally, wrap everything in a tiny helper so you don’t repeat yourself:
def api_call(method, url, headers=None, json=None, timeout=10, verify=True):
    try:
        resp = requests.request(method, url, headers=headers, json=json,
                                timeout=timeout, verify=verify)
        resp.raise_for_status()
        return resp.json()
    except requests.RequestException as e:
        print(f"API error: {e}")
        raise
Now you can call api_call("POST", url, headers, payload) from anywhere in your project. Authentication stays consistent, and you only ever update the token in one place.
Take a moment to test each header individually with curl -v before you bake it into Python – that tiny sanity check saves hours of debugging later.
Step 6: Test and Debug the Requests Code
Why testing matters before you ship
Ever run a script that looks perfect on paper, only to get a 401 or a mysterious timeout? That moment of “why isn’t this working?” is why a solid testing routine is non‑negotiable. When you convert a curl command to requests, you’ve already done the heavy lifting—now you need to prove the Python version behaves exactly the same.
Think of it like a quick coffee‑break sanity check: you don’t need a full‑blown test suite yet, just a few focused steps that tell you the request is good to go.
Step‑by‑step checklist
- Print the raw request data. Before you call
requests.request, dumpurl,method,headers, andpayloadto the console. Seeing the exact dicts helps you spot stray spaces or missing quotes that curl silently trims. - Run a curl‑v side‑by‑side. Open a terminal, paste the original curl line with
-v. Compare the response status, headers, and body against whatrequestsreturns. Any mismatch is a clue that a flag wasn’t translated correctly. - Check the status code. Use
response.raise_for_status()inside atry/except. If the call raises, you’ll see the exact HTTP error instead of silently continuing. - Validate the payload. When you used
json=payload, confirm thatresponse.request.bodycontains a properly serialized JSON string. If the server expects form‑encoded data, switch todata=and verify theContent-Typeheader. - Test timeouts and SSL flags. Run the script with
timeout=5andverify=False(if you used--insecure). If the request hangs, increase the timeout or add logging to see where it stalls. - Log the full response. Print
response.status_code,response.headers, andresponse.text[:200](first 200 characters). This gives you a snapshot without flooding the console.
Following this list once will usually surface the most common conversion bugs.
Real‑world debugging story
Last week I was converting a curl call that uploaded a CSV file via -F "[email protected]". My first Python version used files={'file': open('data.csv','rb')} and everything looked fine—until the API returned a cryptic 400 Bad Request.
Printing response.request.body revealed that requests had added a boundary string, but I forgot to include the accompanying metadata field that the original curl passed with -F "metadata=type=report". Adding data={'metadata': 'type=report'} fixed it instantly. The lesson? Always compare the raw request body, not just the status code.
Using Python’s built‑in debugger
If you’re still stuck, drop a breakpoint right before the request: import pdb; pdb.set_trace(). When execution pauses, you can inspect headers, payload, and even run curl -v from the same shell to see the exact wire format. It feels a bit “old school,” but it’s incredibly effective for one‑off quirks.
Another handy trick is to wrap the call in a tiny helper that logs every step. Here’s a quick example you can paste into any script:
def debug_call(method, url, **kwargs):
    print("\n--- DEBUG INFO ---")
    print("Method:", method)
    print("URL:", url)
    for k, v in kwargs.items():
        print(f"{k}:", v)
    try:
        resp = requests.request(method, url, **kwargs)
        resp.raise_for_status()
        print("Status:", resp.status_code)
        print("Response snippet:", resp.text[:250])
        return resp.json()
    except requests.RequestException as e:
        print("Error:", e)
        raise
Now you call debug_call("POST", url, headers=headers, json=payload, timeout=10) and you get a full audit trail without adding a full testing framework.
When to automate the checks
If you’re converting dozens of endpoints, consider turning the checklist into a pytest fixture. A simple parametrized test that runs each generated function against a mock server (like responses or httpx.MockTransport) will catch regressions early. You don’t need a CI pipeline right now—just a single pytest -q run after you finish a batch of conversions.
Does this feel like extra work? Think of it as buying insurance: a few minutes now save hours of debugging later, especially when you hand the code to a teammate who expects the same behavior they saw in curl.
Bottom line
Testing and debugging the requests snippet is where the rubber meets the road. Print, compare, raise, and log—repeat until the Python output mirrors the curl response. Once you’ve nailed that, you’ve truly converted curl command to python requests code with confidence.
Conclusion
We’ve walked through every twist and turn you might hit when you need to convert curl command to python requests code. By now you know how to break down flags, map them to requests arguments, and test the result without pulling your hair out.
So, what’s the biggest takeaway? Treat each curl flag as a tiny instruction you can translate one‑to‑one. That mindset turns a scary one‑liner into a clean, reusable function you can drop into any project.
And remember, a quick sanity check—print your url, headers, and payload before you hit requests.request. If the response matches what curl gave you, you’ve nailed the conversion.
Got a batch of endpoints? Wrap the pattern in a helper like def call_api(...) and let the same logic power dozens of calls. It saves you from copy‑pasting and keeps your codebase tidy.
Finally, if you ever feel stuck, the free AI Code Converter is there to give you a fresh start. It won’t replace the manual steps, but it can shave minutes off the grunt work.
Take the next curl line you’ve been avoiding, follow the checklist, and watch it become clean Python in seconds. Happy coding!
FAQ
Got a curl command and wondering how to turn it into clean Python? Below are the questions we hear most often, plus practical answers you can apply right now.
How do I start converting a curl command to python requests code?
First, copy the entire curl line into a text editor and spot the method flag – usually -X or the default GET. Write down the URL, then break the command into bite‑size pieces: headers, data, authentication, and any special flags. Once you have those chunks, you can map each one to the corresponding requests argument and paste them into a small template that calls requests.request(). It’s a quick, systematic way to avoid missing anything.
What’s the best way to handle headers when converting?
Every -H in curl becomes a key/value pair in a Python dict. Keep the exact case and order – some APIs are picky about header sequencing. For example, -H "Authorization: Bearer abc123" turns into "Authorization": "Bearer abc123". Drop the dict straight into requests via the headers= parameter, and you’ll see the same header block that curl sent.
How should I translate data payloads, especially JSON?
If the curl -d or --data-raw argument starts with a {, treat it as JSON. In requests you pass a Python dict to the json= argument – the library handles serialization for you. When the payload is form‑encoded, use data= instead. This subtle switch prevents the dreaded “400 Bad Request” you often see when a raw string is sent instead of proper JSON.
What about authentication flags like --user or an Authorization header?
--user user:pass maps to auth=("user", "pass") in requests. If you see an -H "Authorization: Bearer …" header, keep it in the headers dict. For safety, load bearer tokens from an environment variable (e.g., os.getenv("API_TOKEN")) so you don’t accidentally commit secrets. This keeps your code portable and secure across dev, CI, and production.
How do I map curl’s timeout and SSL options to requests?
Use --max-time N as timeout=N in the request call – it tells requests to abort if the server takes longer. The --insecure flag becomes verify=False. Add a comment next to it reminding yourself to flip the flag back before shipping, because disabling SSL verification in production is a security risk.
Can I automate the conversion for many endpoints?
Absolutely. Write a small helper that accepts the raw curl string, splits it with shlex.split(), and builds the requests arguments programmatically. Then loop over a CSV or JSON list of curl commands, generate a Python function for each, and dump them into a module. This batch approach saves you from copy‑pasting and keeps every endpoint consistent.
How can I verify that my Python snippet behaves exactly like the original curl?
Run the original curl with -v to see the full request/response dump, then print url, headers, payload, and response.request.body from your Python script. Compare status codes, headers, and response bodies side by side. If they match, you’ve nailed the conversion. For extra confidence, wrap the call in a try/except and use response.raise_for_status() to surface any hidden errors.