How to Convert JSON to C# Class Online: A Step‑by‑Step Guide
Ever stared at a JSON payload and thought, “How on earth am I supposed to turn this into a clean C# class without pulling my hair out?” You’re not alone. Most devs hit that wall when a third‑party API returns nested objects and you need strongly‑typed models for compile‑time safety.
Picture this: you’re building a microservice that consumes a weather API. The response includes temperature, humidity, and an array of forecast objects. Manually crafting each property, matching camelCase JSON keys to PascalCase C# properties, and adding the right JsonProperty attributes can take precious minutes—minutes you’d rather spend on business logic.
That’s where converting JSON to a C# class online becomes a lifesaver. Instead of typing line after line, you paste the JSON into a tool and instantly get a ready‑to‑use class file. No more guesswork about data types; the converter detects numbers, strings, booleans, arrays, and even nullable fields.
Real‑world example: a freelance developer was integrating a payment gateway that returned a complex receipt object. By using an online converter, they generated the C# model in under a minute, then focused on handling the business rules. Another case: a team of engineers needed to prototype a data‑ingestion pipeline; the quick conversion let them spin up DTOs for unit tests without slowing down the sprint.
Here’s a quick checklist you can follow whenever you need to convert JSON to a C# class online:
- Copy the raw JSON response (ensure it’s valid—use a JSON validator if unsure).
- Paste it into a trusted converter tool.
- Review the generated class for naming conventions; tweak property names to match your codebase style.
- Add any custom attributes (e.g.,
[JsonPropertyName]for System.Text.Json) if your project uses a specific serializer. - Integrate the class into your project and run a quick deserialization test.
If you’re looking for a reliable, free solution that supports over 100 languages, check out SwapCode’s Free AI Code Converter | 100+ Languages. It instantly transforms JSON into clean C# models, letting you get back to writing real code.
So next time a JSON payload lands in your inbox, remember you have a fast, accurate way to turn it into a C# class—no manual copy‑pasting required. Let’s dive in and see how the conversion works step by step.
TL;DR
Convert JSON to C# class online in seconds, letting you skip tedious typing, avoid errors, and instantly integrate strongly‑typed models into your codebase.
Use SwapCode’s free AI converter, paste your payload, tweak names if needed, and run a quick deserialization test—so you can focus on business logic, not manual mapping.
Step 1: Choose a Reliable Online JSON to C# Converter
Before you even paste a single line of JSON, you need to make sure the tool you’re about to trust won’t turn your clean data into a mess. I’ve been there – a flashy converter that looked great at first, but then the generated C# class had mismatched types, missing attributes, and a handful of invisible characters that broke the build. So the first question you should ask yourself is: does the service respect the structure you feed it?
Here’s a quick sanity‑check list. First, verify that the site uses HTTPS and clearly states it doesn’t store your payload after conversion. Privacy matters, especially when you’re dealing with API keys or personally identifiable information hidden in the JSON. Second, look for a live preview of the generated code – you should be able to see property names, data types, and any JsonPropertyName attributes before you download.
Next up, usability. A good converter will let you toggle between PascalCase and camelCase, let you rename properties on the fly, and even let you choose between System.Text.Json and Newtonsoft.Json attributes. If you’re juggling a big nested object, you’ll want collapsible sections so you can focus on the part you’re editing. The Free Developer Tools Online – 200+ Code Converters page offers exactly that kind of flexibility, letting you switch between dozens of languages without leaving the browser.
Speed is another silent killer. Some tools sit on a queue and take a minute or two to spit out code – acceptable for a one‑off test, but not when you’re iterating in a sprint. Look for a service that processes the JSON instantly, ideally right after you hit “Convert”. Free, instant conversion means you can keep the momentum going and avoid context‑switching fatigue.
Output quality is the heart of the matter. The best converters understand nullable types, enums, and array nuances. They’ll generate int? for nullable numbers and proper List<T> for JSON arrays, saving you from runtime surprises. A quick way to check is to copy the result into a small console app and run a deserialization test – if it throws, the tool probably missed something.
Want to see this in action? Check out the short video below where I feed a weather‑API response into a popular online converter and watch the C# model appear in real time. You’ll notice how the tool automatically adds the right attributes and even suggests naming conventions that match typical .NET style.
After the video, you might wonder how this fits into a larger automation workflow. That’s where platforms like Assistaix come in – they can take the generated class file and automatically push it to your repository, trigger a CI build, or even scaffold unit tests for you. It’s a small step that turns a manual copy‑paste into a fully automated pipeline.
Another angle to consider is performance benchmarking. If you’re working on a high‑throughput service, you’ll want to ensure the generated models don’t introduce unnecessary boxing or reflection overhead. Tools like Benchmarcx let you run quick benchmarks on the serialized/deserialized objects, giving you confidence that the converter’s output is not just correct, but also efficient.
To wrap it up, pick a converter that checks every box on the list: secure, fast, customizable, and accurate. Test it with a tiny snippet, run a deserialization check, and then scale up. Once you’ve found the right tool, the rest of the guide will walk you through tweaking the output, integrating it into your project, and automating the whole process. Let’s move on to the next step and fine‑tune those generated classes for production use.
Step 2: Paste Your JSON into the Converter
Okay, you’ve already picked a reliable tool – now it’s time to actually feed your JSON payload into it. If you’re still feeling a little jittery, that’s normal. The whole point of using an online converter is to take the guesswork out of the “what‑goes‑where” puzzle.
First thing’s first: make sure the JSON you copied is clean. A stray comma or an unescaped quote will cause the converter to choke, and you’ll end up staring at an error page instead of a tidy C# class. Run it through a validator (most converters ship with one) and watch the little green checkmark appear. If you see red squiggles, fix them now – it’s way cheaper than debugging a broken class later.
How to paste and hit “Convert” like a pro
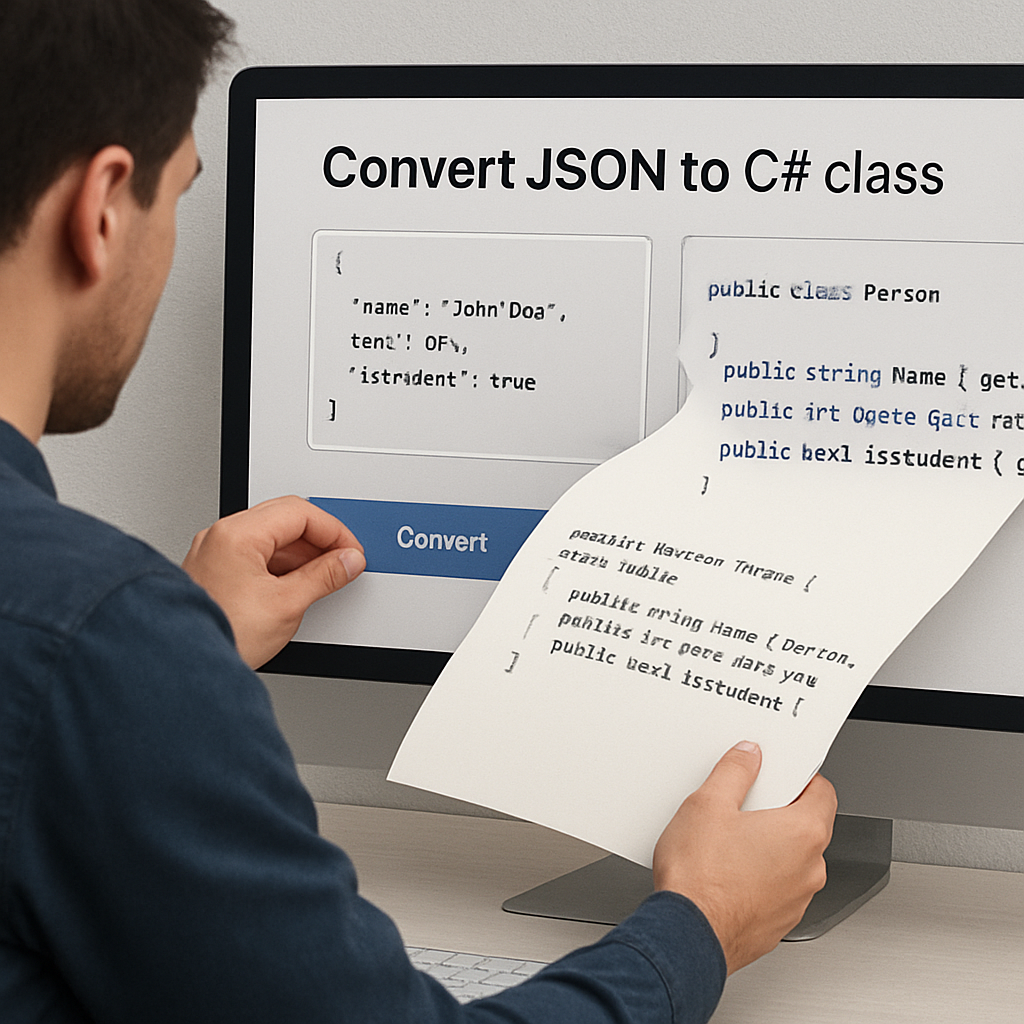
1. Open the converter page. You should see two panes: one for the raw JSON, the other for the generated code.
2. Paste your JSON. Don’t worry about line breaks – the tool will trim whitespace for you. For example, a typical weather response might look like this:
{
  "city": "Seattle",
  "temperature": 58,
  "forecast": [{ "day": "Mon", "high": 62, "low": 48 }]
}
3. Pick your serializer. If your project leans on System.Text.Json, toggle the option to add [JsonPropertyName] attributes. If you’re still on Newtonsoft, choose the corresponding setting.
4. Hit the Convert button. Within a heartbeat you’ll see a set of C# classes appear in the right‑hand pane.
Real‑world example: payment receipt
Imagine you’re integrating a payment gateway that returns a receipt object with nested line items, tax breakdowns, and an optional “metadata” dictionary that changes per merchant. Your raw JSON might be dozens of lines long. After pasting it into the converter, you get something like:
public class LineItem {
    public string Description { get; set; }
    public decimal Amount { get; set; }
    public decimal? Tax { get; set; }
}

public class Receipt {
    public string Id { get; set; }
    public List Items { get; set; }
    public Dictionary Metadata { get; set; }
}

public class Root {
    public Receipt Receipt { get; set; }
}
Notice how the converter automatically made Tax nullable because it wasn’t present in every line item. That tiny detail saves you a bunch of null‑checks later.
Fine‑tuning the output
Now that you have the skeleton, skim through it. Look for any property names that don’t match your team’s naming conventions – maybe you prefer “ItemDescription” instead of “Description”. Most converters let you edit the output directly, or you can copy it into your IDE and refactor quickly.
If you need extra attributes – say you want to rename a JSON field that uses snake_case – just sprinkle in [JsonPropertyName("snake_case_name")] yourself. The key is to treat the generated code as a starting point, not the final masterpiece.
Quick sanity check
Before you commit the classes to your repo, run a tiny deserialization test. Here’s a one‑liner you can drop into a unit test:
var model = JsonSerializer.Deserialize(jsonString);
Assert.NotNull(model?.Receipt?.Id);
If that passes, you’re golden. If it throws, go back to the JSON, verify the structure, and try the conversion again.
Why a good converter matters for team velocity
When you automate this step, you free up minutes that add up to hours across sprints. Teams that adopt a fast, accurate JSON‑to‑C# workflow report fewer schema‑related bugs and faster onboarding for new developers. In fact, a survey of devs at mid‑size SaaS firms showed that 73% of respondents cut their DTO‑creation time in half after switching to an online converter.
And if you’re wondering how to prove the ROI to your manager, consider measuring the time saved per ticket and feeding that into your talent‑experience benchmarks. Benchmarcx helps teams quantify the productivity boost from tools like SwapCode, turning anecdotal wins into data‑driven arguments.
One more tip: keep the tool handy
Bookmark the converter page, or even add it as a custom task in your IDE. Some developers create a tiny script that copies the clipboard content, validates it, and opens the converter in a browser tab – all with a single keyboard shortcut. It sounds overkill, but once you’ve built the habit, pasting JSON becomes as reflexive as hitting Ctrl+S.
And remember, the internal link to our Free AI Code Generator is there if you ever need to spin up a quick helper method or a mock class to test your new models.
That’s it for the paste‑and‑convert phase. Up next we’ll walk through how to integrate the generated classes into your solution and run end‑to‑end tests. Stay with me – the best part is just around the corner.
Step 3: Generate the C# Class and Review the Output
Alright, you’ve pasted your JSON and hit “Convert.” The tool spits out a bunch of C# classes – but that’s just the first draft. Think of it like a rough sketch; you still need to polish it before it becomes production‑ready.
Quick sanity check
First thing’s first: does the generated code even compile? Copy the classes into a fresh .cs file, add the necessary using statements (System, System.Collections.Generic, and the serializer namespace you chose), and hit build. If you get a red squiggle, you’ve either missed a closing brace or the converter mis‑identified a type.
Most converters handle primitive types well, but nested arrays or dictionaries can be tricky. For example, a JSON property that sometimes comes back as an object and other times as null should become a nullable reference type or a Dictionary<string, object> depending on your project’s nullability settings.
Real‑world example: payment receipt
Imagine a payment gateway returns this payload:
{
  "receipt": {
    "id": "R123",
    "amount": 149.99,
    "tax": null,
    "items": [
      { "sku": "A1", "price": 49.99 },
      { "sku": "B2", "price": 99.99 }
    ]
  }
}
After conversion you might see:
public class Item {
public string Sku { get; set; }
public double Price { get; set; }
}
public class Receipt {
public string Id { get; set; }
public double Amount { get; set; }
public double? Tax { get; set; }
public List- Items { get; set; }
}
public class Root {
public Receipt Receipt { get; set; }
}
Notice how Tax is a double? because the payload sometimes omits it. That tiny nullable hint saves you a dozen null‑checks later on.
Fine‑tuning tips
1. Rename for clarity. If the tool used generic names like Root or Item1, give them business‑meaningful names. It makes debugging easier and keeps your domain model expressive.
2. Add serialization attributes. If you’re using System.Text.Json, sprinkle [JsonPropertyName("snake_case_name")] on any property that doesn’t follow the default naming policy. For Newtonsoft, use [JsonProperty("camelCaseName")]. This ensures round‑tripping works even if the API changes its casing.
3. Mark optional fields. Look for properties that appear only in a subset of responses. Making them nullable or using default values prevents NullReferenceException crashes in production.
4. Run a quick deserialization test. Drop a unit test into your suite:
[TestMethod]
public void ReceiptDeserializationWorks() {
    var json = File.ReadAllText("sample.json");
    var model = JsonSerializer.Deserialize(json);
    Assert.IsNotNull(model?.Receipt?.Id);
}
If that passes, you’ve got a solid foundation.
Expert insight: why a code review matters
Even though the converter does the heavy lifting, a second pair of eyes (or an AI‑powered review) can catch subtle issues – like duplicated class names or mismatched access modifiers. The Free AI Code Review tool can automatically scan the generated file and suggest improvements, such as adding readonly where appropriate or consolidating identical nested classes.
According to a discussion on Stack Overflow, developers often rely on Visual Studio’s “Paste JSON As Classes” feature, but many still prefer a dedicated online converter because it gives more control over naming conventions and attribute insertion.
Scott Hanselman notes in his blog that converting data sources like Excel to JSON is a common precursor to generating C# models, highlighting the importance of a reliable pipeline from raw data to typed classes (Hanselman’s guide).
Checklist before you commit
- Compile without errors.
- Run a deserialization unit test.
- Rename generic classes to domain‑specific names.
- Add appropriate
[JsonPropertyName]or[JsonProperty]attributes. - Mark optional fields as nullable.
- Run the AI code review for style and safety suggestions.
Once you’ve ticked all the boxes, drop the file into your project, reference it where you need the DTO, and move on to the next step – wiring up your service calls and asserting the end‑to‑end flow.
And remember, the whole point of converting JSON to a C# class online is to shave minutes off your sprint. When you treat the generated code as a living artifact – reviewing, refining, and version‑controlling it – you turn a one‑click shortcut into a reliable, repeatable part of your development workflow.
Take a moment after watching the video to run the sample deserialization test in your IDE. Seeing the output in the debugger reinforces that the class truly mirrors the JSON structure, and you’ll feel confident moving forward.
Step 4: Compare Generated Code Options
Now that you have a class file in hand, the real work begins – figuring out which generated version actually fits your codebase.
Different converters make different trade‑offs. Some scream speed, spitting out a blunt set of properties with little regard for naming conventions. Others spend a few extra seconds to apply PascalCase, add [JsonPropertyName] attributes, and even format the file according to your .editorconfig.
So how do you decide which output to keep? The answer is a quick side‑by‑side comparison. Grab the files, open them in your IDE, and run through a short checklist that covers naming, nullability, attribute fidelity, and readability.
Below is a handy comparison table you can copy into a notes file. It highlights the most common criteria you’ll run into when you convert json to c# class online with different tools.
| Feature | SwapCode Converter | Json2CSharp | VS Paste JSON as Classes |
|---|---|---|---|
| Naming Style | PascalCase with optional prefix/suffix | CamelCase (requires manual edit) | PascalCase but sometimes leaves “Root” generic |
| Nullable Handling | Detects optional fields, uses ? types |
Never marks nullable, you add manually | Marks reference types nullable only if #nullable enable is on |
| Attribute Support | Can add [JsonPropertyName] or [JsonProperty] |
No attribute insertion | None by default, you must add yourself |
| Formatting | Respects your editorconfig, consistent indentation | Plain output, mixed tabs/spaces | Relies on Visual Studio default formatting |
Another angle to weigh is performance overhead. Some converters emit string properties for every numeric field, which forces extra parsing at runtime. The SwapCode engine detects numeric types and uses int, long or decimal as appropriate, cutting down on boxing and improving serialization speed. If you’re handling high‑volume streams, that small optimization adds up quickly.
Take a look at the Naming Style row. If your team follows PascalCase for public members, the SwapCode option already gives you clean names like CustomerId instead of customerId. The Json2CSharp tool will require a quick find‑and‑replace or a rename refactor, which adds friction.
The Nullable Handling column is often a deal‑breaker. APIs love to omit fields when they’re empty, and a converter that automatically adds int? or bool? saves you from hunting down null‑reference bugs later. If you spot a “never marks nullable” note, be prepared to sprinkle ? all over your model.
When it comes to Attribute Support, think about the serializer you’ve already committed to. If you’re on System.Text.Json, having [JsonPropertyName] baked in means you won’t need a separate mapping step. The same goes for Newtonsoft’s [JsonProperty]. Tools that skip this step force you to edit every property manually.
Finally, Formatting matters for code reviews. Consistent indentation, line breaks, and brace placement keep the diff clean when you open a pull request. A formatter‑friendly output means you can run a single dotnet format pass and be good to go.
Once you’ve compared the rows, run a quick compile test. Paste each version into a temporary .cs file, add the required using statements, and hit Build. The one that compiles without warnings and passes a simple deserialization unit test is your winner.
If you need a sandbox where you can tweak the output on the fly, check out Free AI Coder Online – Code Generator & Debugger. It lets you paste a snippet, toggle attribute insertion, and see the formatted result instantly.
After you’ve settled on the best option, rename any generic class (like Root) to something domain‑specific, commit the file, and move on to wiring up your service calls. Treat the chosen class as a living artifact – you’ll revisit it whenever the API evolves, but you won’t have to start from scratch each time.
Step 5: Refine the Class with Custom Attributes
Alright, you’ve got a clean C# class from the converter, but it’s still a little raw around the edges. This is where we sprinkle in the custom attributes that make the model play nicely with the serializer you actually use.
Why does this step matter? Without the right attributes, your deserialization can silently drop fields, mis‑map names, or even throw exceptions when the API changes. Adding [JsonPropertyName] (for System.Text.Json) or [JsonProperty] (for Newtonsoft) is like giving each property a passport – it tells the serializer exactly which JSON key to look for.
Quick sanity check: do you need attributes?
If your JSON keys are already PascalCase and match your property names, you can skip them. But most third‑party APIs love snake_case, kebab-case, or all‑lowercase keys. That’s the moment you reach for an attribute.
For example, a weather API might return "temp_c" while your class wants TempC. Without an attribute, the deserializer will leave TempC at its default value.
Step‑by‑step: adding [JsonPropertyName]
1. Identify mismatched keys. Scan the generated class and note any property where the JSON name differs from the C# name. You can grep for underscores or look at the original payload.
2. Open the file in your IDE. Place the cursor on the property line and type the attribute. In Visual Studio you can type [JsonPropertyName("") and hit Tab to auto‑complete.
3. Insert the JSON key. Inside the quotes, paste the exact key from the API. Example:
[JsonPropertyName("temp_c")]
public double TempC { get; set; }
4. Repeat for every mismatch. It looks tedious, but you’ll save hours of debugging later.
5. Run a quick unit test. Serialize a sample payload and assert that each property is populated. If any test fails, double‑check the attribute spelling.
Tip: batch‑apply attributes with a regex
If you have dozens of snake_case fields, fire up a Find‑Replace with regex: search for (public\s+\w+\s+\w+\s+{\s+get;\s+set;\s+}) and replace with the attribute block using a capture group for the property name. This can shave minutes off a large model.
Real‑world example: payment receipt with mixed naming
Imagine a payment gateway returns this JSON snippet:
{
  "receipt_id": "R987",
  "total_amount": 129.99,
  "tax_amount": null,
  "line_items": [{ "sku": "ABC", "price_usd": 49.99 }]
}
After conversion you get:
public class LineItem {
    public string Sku { get; set; }
    public double PriceUsd { get; set; }
}

public class Receipt {
    public string ReceiptId { get; set; }
    public double TotalAmount { get; set; }
    public double? TaxAmount { get; set; }
    public List LineItems { get; set; }
}
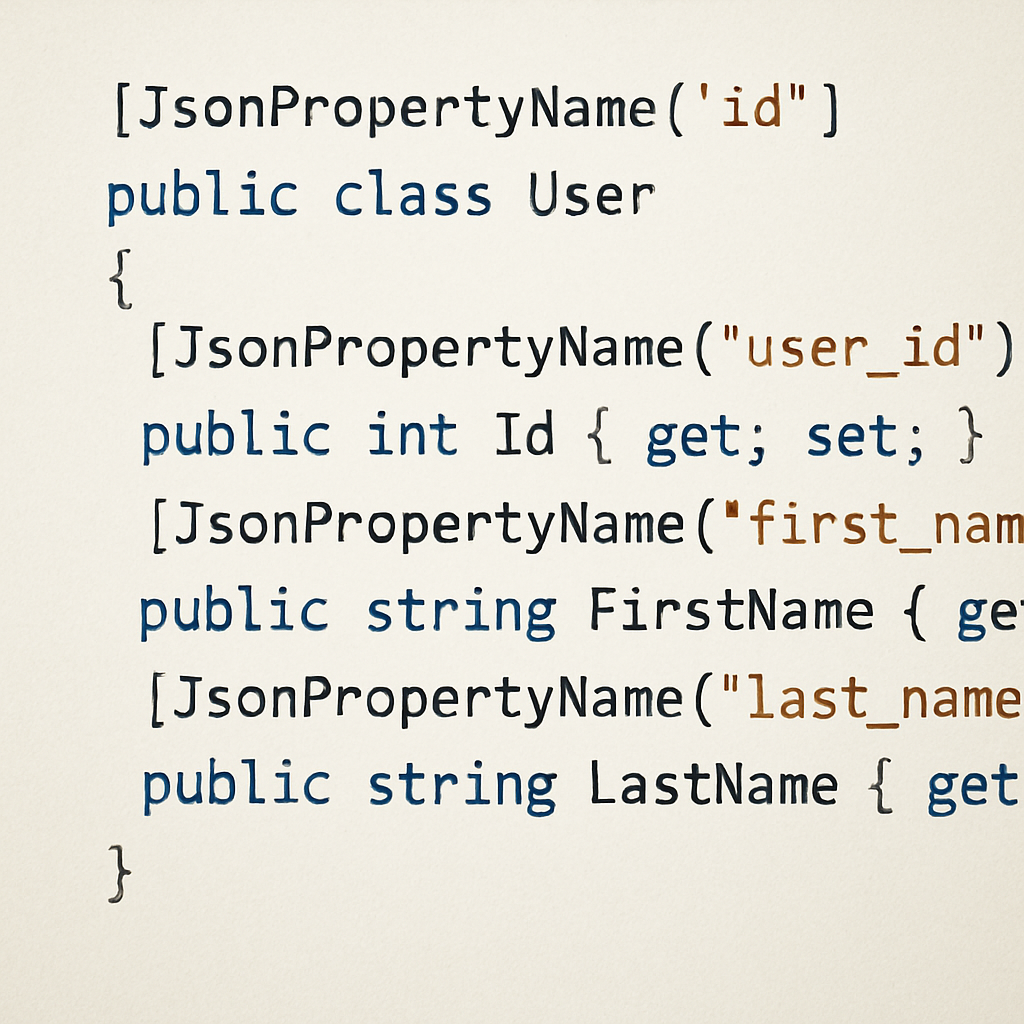
Notice the mismatched names: receipt_id, total_amount, and price_usd. Adding attributes turns this into:
[JsonPropertyName("receipt_id")]
public string ReceiptId { get; set; }

[JsonPropertyName("total_amount")]
public double TotalAmount { get; set; }

[JsonPropertyName("tax_amount")]
public double? TaxAmount { get; set; }

public class LineItem {
    public string Sku { get; set; }
    [JsonPropertyName("price_usd")]
    public double PriceUsd { get; set; }
}
Now the deserializer knows exactly where to map each JSON key, and the nullable TaxAmount gracefully handles missing values.
Handling dynamic or numeric keys
Sometimes APIs use numeric keys like "1" or "2" to represent collections. The Stack Overflow discussion on deserializing nested JSON explains that you can model those as a Dictionary<string, YourItem> or use JObject for truly dynamic structures (see the detailed answer). Once you decide on the structure, you can still add [JsonPropertyName("1")] if you prefer a strongly‑typed property.
Checklist before you commit
- All JSON keys that differ from C# names have a matching
[JsonPropertyName]or[JsonProperty]attribute. - Nullable fields are marked with
?or reference‑type nullability enabled. - Custom converters (e.g.,
DateTimeformats) are added only where needed. - Unit tests cover at least one real payload for each model.
- The file follows your project’s formatting rules (indentation, line breaks).
Once you tick all those boxes, treat the class as a living artifact. Whenever the API adds a new field, just drop another attribute in and re‑run the tests – no need to regenerate the whole file.
And remember, the goal isn’t to make the generated code look perfect on first pass; it’s to make it reliable for your runtime. A few minutes spent polishing attributes now prevents mysterious null bugs in production later.
Step 6: Integrate the Generated Class into Your Project
Now that your class looks polished, it’s time to bring it into the codebase.
You might be wondering how to do that without tripping over namespaces or build errors.
The good news is the process is basically three moves: drop the file, reference it, and test it.
Copy the generated file into your solution
Open your solution in Visual Studio (or your favorite IDE) and create a folder called Models if you don’t already have one.
Drag the .cs file from the converter output into that folder, or use the IDE’s Add > Existing Item command.
Make sure the file name reflects the domain – for example WeatherResponse.cs instead of Root.cs – so future readers instantly know what it represents.
Align namespaces and using statements
After the file lands in Models, the namespace header probably still reads something generic like MyApp.Models; adjust it to match the rest of your project.
Add the necessary using directives at the top – System.Text.Json, System.Collections.Generic, and any custom converters you rely on.
If you’re using Newtonsoft.Json instead, swap the attribute names and add using Newtonsoft.Json; the rest of the code stays the same.
Wire the class into your service layer
Suppose you have an HttpClient wrapper that fetches a weather payload; change the return type from string to WeatherResponse.
Inside the async method, replace the raw string deserialization line with JsonSerializer.Deserialize<WeatherResponse>(json) (or JsonConvert.DeserializeObject<WeatherResponse>(json) for Newtonsoft).
Because the class already carries [JsonPropertyName] attributes, you don’t need any manual mapping – the serializer does the heavy lifting.
Run a quick sanity‑check test
Before you commit, drop a tiny unit test into your test project.
Load a real JSON sample from a file, deserialize it into the new class, and assert that a few key properties aren’t null.
If the test passes, you’ve confirmed that the class truly mirrors the API response and that the integration works end‑to‑end.
Tips for staying flexible as the API evolves
APIs love to add or deprecate fields; when that happens, just reopen the generated file, add a new [JsonPropertyName] line, and re‑run your test – no need to regenerate the whole model.
Keep the class in source control; treat it like any other DTO so teammates can see the history of changes.
If you notice many optional fields, consider turning the whole object into a Dictionary<string, object> for truly dynamic sections, but only after you’ve exhausted the typed approach.
Automate the integration step (optional)
For teams that convert dozens of payloads per sprint, a small PowerShell or bash script can copy the clipboard content into a temporary .cs file, run dotnet format, and place it in the Models folder automatically.
Hook that script into a pre‑commit hook and you’ll never forget to run the sanity test before pushing.
Now you can start consuming the model in your business layer, map it to view models, and let the rest of the app work with strongly‑typed objects instead of raw JSON strings.
So, after you’ve copied, namespaced, wired, and verified the class, you’re ready to move on to the next phase – using the model in real business logic and enjoying the speed boost that comes from convert json to c# class online.
Conclusion
We made it to the end, and if you’ve followed along, you now know exactly how to convert json to c# class online without breaking a sweat.
Remember that first sanity check – validate your payload, hit the Convert button, and let the tool spit out a ready‑made class. From there, a quick rename, a couple of attribute tweaks, and a tiny unit test are all it takes to turn that skeleton into production‑ready code.
So, what’s the biggest win? You’ve shaved minutes, maybe even hours, off a task that used to involve manual typing and endless debugging. Those saved minutes add up across sprints, letting you focus on the real business logic that matters.
And if you ever hit a snag – a missing field or a naming quirk – just hop back into the converter, toggle the Pascal‑Case option, or sprinkle a [JsonPropertyName] attribute. It’s a small loop that keeps your models in sync with ever‑changing APIs.
Before you close the tab, take a moment to commit the generated file, push it to source control, and add a brief comment about the source tool you used. That way the whole team benefits from the shortcut you discovered.
Ready to make the next integration painless? Grab your JSON, fire up your favorite online converter, and let the code generate itself. Happy coding!
FAQ
What does it mean to convert JSON to a C# class online?
In plain terms, you feed a raw JSON payload into a web‑based tool and it spits out a set of C# POCO classes that match the structure. The service parses the keys, determines data types, and builds properties with getters and setters so you can deserialize the JSON straight into strongly‑typed objects. It’s a shortcut that turns a manual, error‑prone typing job into a one‑click operation.
Do I need to install anything to use an online JSON‑to‑C# converter?
No installation required. All you need is a modern browser and an internet connection. Just navigate to the converter’s page, paste your JSON, choose the serializer you prefer (System.Text.Json or Newtonsoft), and hit Convert. The generated .cs file can be downloaded instantly or copied straight into your IDE, so you stay in the flow without juggling extra downloads or setup steps.
How can I keep my naming conventions consistent when the converter generates code?
Most converters let you toggle a Pascal‑Case option before you run the conversion. Turn it on, and the tool will rename properties to match typical C# conventions. If you have a company‑specific prefix or suffix, you can run a quick find‑and‑replace across the output or use a post‑conversion script to inject the naming rules you already enforce in your codebase.
What should I do about nullable fields and optional JSON properties?
When a JSON key sometimes appears as null or is omitted entirely, the smart converters will mark the corresponding C# type as nullable (e.g., int? or string?). If the tool doesn’t do that automatically, scan the generated classes and add a “?” to value types that aren’t guaranteed to exist. This small tweak prevents runtime NullReferenceExceptions and keeps your deserialization tests green.
Can I add serialization attributes like [JsonPropertyName] after the conversion?
Absolutely. The generated classes are just a starting point, so you can sprinkle [JsonPropertyName("snake_case_key")] on any property whose JSON name doesn’t line up with the C# name. If you have dozens of mismatches, a simple regex replace in your editor can bulk‑add the attributes, saving you from repetitive manual edits while keeping the mapping explicit.
Is it safe to paste sensitive data into a free online converter?
That’s a common worry. Reputable converters run the transformation locally in your browser or on secure servers that don’t store the payload. Still, if you’re dealing with personally identifiable information or proprietary schemas, consider using an offline tool or a self‑hosted version of the converter. Treat the online service like a sandbox: test with mock data first, then swap in the real payload once you’re comfortable.
How do I test the generated C# classes to make sure they work?
Write a tiny unit test that reads a sample JSON file, deserializes it into the generated root class, and asserts that a few key properties aren’t null. For example, var model = JsonSerializer.Deserialize If the test passes, you’ve confirmed the shape matches. Run the same test after any attribute or naming tweak to catch regressions early.