How to generate dockerfile from project description ai: A step‑by‑step guide
Ever stared at a blank Dockerfile and felt the dread of guessing the right base image, the exact RUN commands, and the proper entrypoint?
What if you could just describe your app in plain English and let an AI spit out a ready‑to‑build Dockerfile?
In this guide we’ll walk through exactly how you can generate Dockerfile from project description AI, why it matters for devs and DevOps, and the practical steps to get reliable results without pulling your hair out.
Imagine you’ve got a Node.js microservice that needs Node 18, installs dependencies, copies source, and runs npm start. Instead of hunting docs, you type a short description… and the AI returns a clean Dockerfile with multi‑stage build, proper caching, and best‑practice labels. No trial‑and‑error, no hidden gotchas.
Sounds too good to be true?
Well, the tech behind modern code generators has matured enough to understand language‑specific conventions.
We’ll start by clarifying the kind of project description that works best—think of it as a recipe: the language, runtime version, build steps, and any environment variables you need. Then we’ll show you how to feed that into a tool like SwapCode’s AI generator and review the output.
Along the way you’ll pick up tips on spotting common pitfalls—like forgetting to set the WORKDIR or over‑layering RUN commands—so the Dockerfile you get is not just syntactically correct but also efficient.
Do you worry that an AI‑generated file might be a security nightmare?
We’ll cover quick sanity checks and how to tweak the result to match your organization’s policies.
By the end of this article you’ll have a repeatable workflow: describe, generate, validate, and commit. No more staring at endless documentation or copy‑pasting boilerplate that never quite fits.
Let’s dive in and see how you can start generating Dockerfiles from project description AI right now.
TL;DR
With SwapCode’s AI you can describe your app in plain English and instantly generate a production‑ready Dockerfile, saving hours of manual tweaking.
Follow our quick recipe—specify language, version, build steps, then validate—so you ship secure containers without the usual guesswork and stay confident about performance in production environments every time.
Step 1: Define your project description and requirements
Picture this: you’ve just finished writing a tiny Node.js microservice and the only thing left is the Dockerfile. But instead of digging through docs, you want to tell an AI exactly what you need.
That’s where defining a crystal‑clear project description becomes the secret sauce. The AI can only work with what you feed it, so the more precise you are, the less you’ll have to tweak later.
First up, nail the language and version. Instead of saying “Node app”, say “Node.js 18‑LTS runtime”. This tells the generator which base image to pull and avoids the dreaded “unsupported version” error.
Next, list the build steps in the order they happen locally. Think about the commands you run on your dev box: install dependencies, run a build script, copy source files, set the work directory, expose ports, and finally define the entrypoint.
A good way to capture that is a simple bullet list in plain English:
- Use Node.js 18‑LTS.
- Run npm ci to install exact dependencies.
- Run npm run build to produce the production bundle.
- Copy the built files into the final image.
- Set WORKDIR to /app and expose port 3000.
- Start the service with npm start.
Notice how each item is a verb‑action pair. The AI likes that pattern because it mirrors how Dockerfile instructions are structured.
Don’t forget environment variables. If your app needs a DATABASE_URL or a NODE_ENV flag, mention them explicitly: “Set NODE_ENV to production and provide DATABASE_URL at runtime”. That way the generator can add an ENV line and you won’t be scrambling for a missing variable later.
Another often‑overlooked detail is the target platform. Are you building for Linux/AMD64, ARM, or a multi‑arch image? If you need ARM support, add a note like “build a multi‑arch image for linux/amd64 and linux/arm64”. The AI will include the appropriate FROM … AS builder syntax.
Now, think about labels and metadata. A well‑crafted description might say “Add maintainer label with my email and version label from package.json”. Those little touches make the final Dockerfile production‑ready without extra edits.
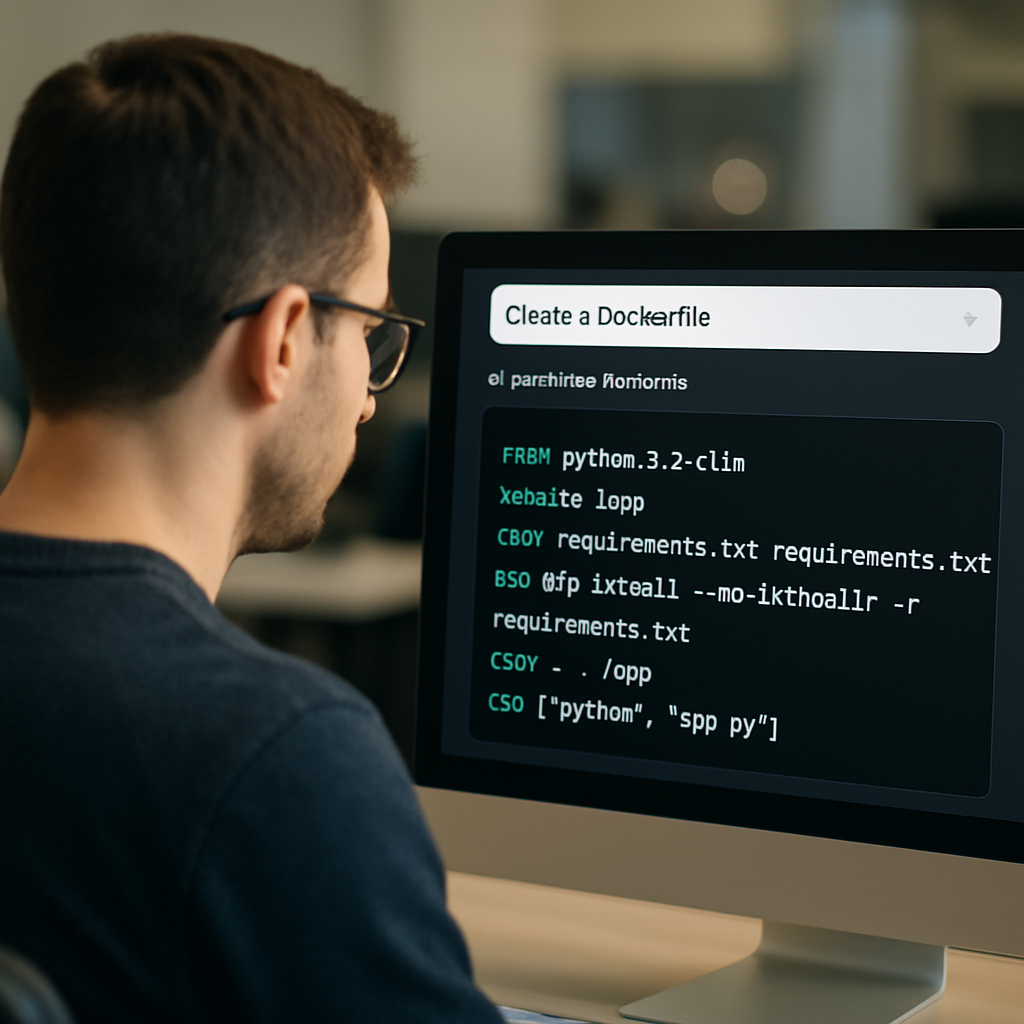
So, how does this all look in a single paragraph you can paste into SwapCode’s generator? Here’s a quick template you can copy‑paste:
Create a Dockerfile for a Node.js 18‑LTS microservice. Install dependencies with npm ci, run npm run build, copy the built files, set WORKDIR to /app, expose port 3000, set ENV NODE_ENV=production, add label maintainer=’[email protected]’, and use npm start as the entrypoint. Build a multi‑arch image for linux/amd64 and linux/arm64.
Paste that into the AI, hit generate, and you’ll get a Dockerfile that looks something like the one in the video below.
If the output feels a bit noisy, you can trim redundant RUN layers or merge them, but the heavy lifting is already done. That’s the power of a well‑defined description.
Quick tip: keep your description under 200 words. Long, rambling paragraphs tend to confuse the model, while concise bullet‑style sentences give it a clear roadmap.
Finally, give the AI a hint about security best practices. A line like “use a non‑root user and include healthcheck for /health endpoint” nudges the generator toward safer defaults without you having to rewrite them later.
When you walk away with a Dockerfile that already follows best practices—minimal layers, proper caching, explicit labels—you’ve saved hours of debugging and you can move straight to testing in your CI pipeline.
And remember, you can always iterate. If the AI missed a nuance—like a specific build arg—just update your description and run it again. The cycle is fast, usually under a minute, so tweaking feels painless.
Step 2: Choose the right AI model and tooling
Now that you’ve got a solid description, the next question is: which AI brain should actually write your Dockerfile?
In practice you don’t need a massive GPT‑4‑level model for a Dockerfile – a purpose‑built code generator that understands syntax and best‑practice patterns is usually enough. The sweet spot is a model that’s been trained on real Dockerfiles and can translate natural‑language steps into exact FROM, RUN, and COPY instructions.
Model size vs. speed
If you’re on a tight CI budget, a smaller model will spin up in seconds and keep your pipeline cheap. Bigger models may shave a few layers off the output, but the extra latency often outweighs the benefit for a file that’s usually under 50 lines.
Does this mean you should always pick the cheapest option? Not necessarily. Some teams value the extra “security‑aware” suggestions that larger models sprinkle in, like recommending a non‑root user or a healthcheck. Think about your risk tolerance and how much post‑generation review you’re willing to do.
Tooling that talks Docker
SwapCode offers a dedicated Free AI Code Generator – Natural Language to Code that knows Dockerfile conventions out of the box. You feed it the description you crafted in Step 1, and it returns a ready‑to‑use Dockerfile, complete with multi‑stage builds, caching hints, and label metadata.
What makes this tool handy is the built‑in prompt templates. A few bullet points like “use multi‑arch, non‑root user, and healthcheck” get automatically expanded into the right Dockerfile syntax. You don’t have to remember the exact flag names – the generator does it for you.
Another option is to use an open‑source model like CodeLlama or an on‑premise LLaMA variant if you have strict data‑privacy rules. Those require more engineering effort: you’ll need to spin up a container, install the model weights, and write a small wrapper that sends your description and captures the output.
For most developers, the SaaS route wins because it handles model updates, scaling, and prompt engineering behind the scenes. You just focus on the description and let the service keep up with the latest Dockerfile best practices.
Integration points
Pick a tool that plays nicely with your existing workflow. Does it have a CLI? An HTTP API? SwapCode’s generator can be called from a simple curl command, which means you can drop it into a Makefile or a GitHub Action step.
Here’s a tiny snippet you could add to your CI pipeline:
curl -X POST https://api.swapcode.ai/generate \
  -d 'description=Create a Dockerfile for a Node.js 18‑LTS microservice...' \
  -o Dockerfile.generated
After the file lands, run your usual linting (e.g., hadolint) and you’re good to go. The key is to keep the generation step automated so you never have to copy‑paste manually again.
Still wondering whether the model will understand platform‑specific quirks? Test with a minimal prompt first – ask for a one‑stage Alpine image that runs echo hello. If the output looks sane, gradually add complexity. This incremental approach prevents surprise syntax errors.
And remember, you can always fine‑tune the prompt. Adding “use non‑root user” or “include a HEALTHCHECK for /health” nudges the generator toward the security posture you need without extra code reviews.
Bottom line: choose a model that balances cost, speed, and security awareness, and pair it with tooling that integrates into your CI/CD pipeline. When the right combo clicks, you’ll spend minutes describing your app and seconds getting a production‑ready Dockerfile.
Step 3: Generate the Dockerfile using AI (video tutorial)
Alright, you’ve got a crystal‑clear description, you’ve picked a model, and now it’s time for the fun part – watching the AI spin that description into a Dockerfile.
Grab a coffee, hit play, and let the video walk you through the exact API call we used in the previous step. You’ll see the curl request, the JSON payload, and the moment the file lands on your terminal.
What the video shows
First, the tutorial opens a fresh shell and runs a one‑liner curl that points at SwapCode’s generator endpoint. The request body is just the description we crafted earlier – nothing fancy, no hidden parameters.
Then the screen splits: on the left you see the raw response, on the right the same response formatted as a Dockerfile. It’s that instant “aha” moment when you realize the AI understood “multi‑arch, non‑root user, healthcheck” and baked them into the syntax.
Does that feel a bit magical? It’s really just a well‑trained model plus a clean prompt. The video emphasizes that you can pause at any step, copy the snippet, and paste it straight into your repo.
Running the generator yourself
After the demo, the guide shows a quick checklist you can run locally:
- Copy the curl command.
- Replace the placeholder description with your own.
- Execute and redirect output to
Dockerfile.generated.
That’s literally three lines of work. If you’re on Windows, the same request works with PowerShell’s Invoke‑RestMethod. The video even drops a one‑liner for that, so you don’t have to hunt around for syntax.
And because the generator returns a plain‑text file, you can pipe it straight into hadolint for a quick sanity check – all shown in the same screencast.
Validating the result
Watching the video, you’ll notice a tiny but crucial step: the author runs docker build -t demo . and watches the layers pop up. If the build fails, the tutorial points you back to the description – maybe you forgot to specify a build‑arg or left out a required OS package.
Here’s a quick mental checklist you can use while you watch:
- Is there a
FROMline that matches your target runtime? - Do the
RUNcommands combine logical steps to keep layers low? - Is a non‑root
USERcreated, and is there aHEALTHCHECK? - Are all
ENVvariables you need present?
If anything feels off, just pause, edit the description, and re‑run the curl. The video demonstrates that loop three times, showing how each tweak refines the output.
Tips that don’t make the main article
One thing the author whispers in the background is to keep the description under 200 words. Longer blobs tend to confuse the model, and you’ll end up with extra comments you have to prune.
Another tip: add “use an Alpine base unless a specific OS is required”. That nudges the generator toward a smaller image, which you’ll see reflected in the final docker images size.
Finally, the video suggests committing the generated Dockerfile to a separate branch first. That way you can run your full CI suite, let the linter and security scanners do their thing, and only merge once everything passes.
So, what’s the bottom line?
Watch the short tutorial, copy the curl, tweak your description, and let the AI do the heavy lifting. In under a minute you go from “I need a Dockerfile” to “I have a production‑ready Dockerfile sitting in my repo”. If you hit a snag, just rewind, adjust the prompt, and try again – the process is deliberately iterative.
Give it a try now. Press play, follow the steps, and watch the AI turn your words into a container‑ready artifact. You’ll be surprised how painless it feels once the video walks you through each click.
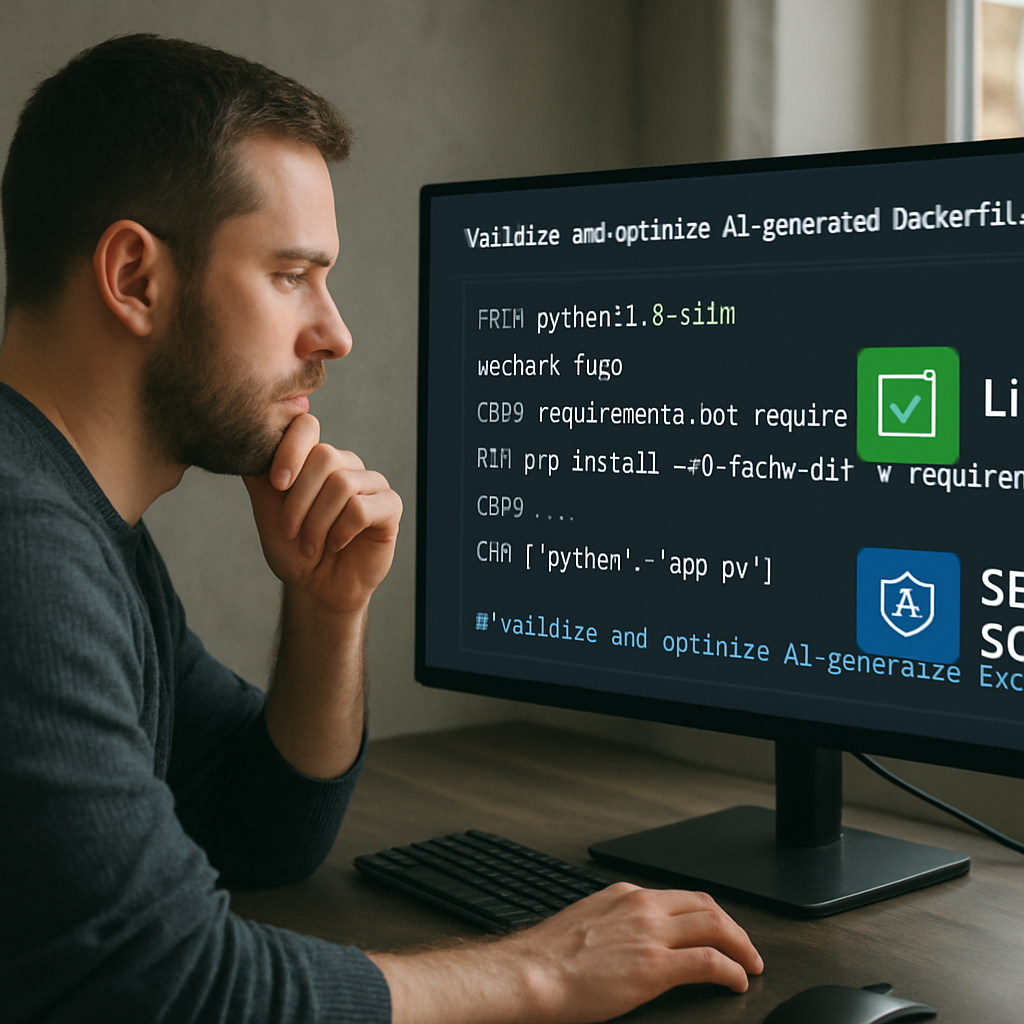
Step 4: Validate and optimize the generated Dockerfile
Alright, we finally have a Dockerfile that the AI spat out. Before we let it run in production, we need to give it a quick health check – think of it as a coffee‑break audit for your container recipe.
First thing’s first: does the file even build? Run a plain docker build –no‑cache against the generated Dockerfile and watch the output.
If you see a missing package error, that’s a clue the AI missed a dependency you mentioned in the description. Simply add the package to a RUN apt‑get install (or apk add for Alpine) line and rebuild.
Next, scan the file with a linter like hadolint. It will point out things like missing LABEL metadata, use of the latest tag, or overly long RUN chains. Those warnings are low‑effort fixes that keep your image tidy.
Now, let’s talk size. Run docker images after the build and note the SIZE column. If it’s bloated, look for opportunities to squash layers: combine consecutive RUN commands with &&, delete build‑time caches, and remove temporary files in the same layer.
A quick trick for Alpine‑based images is to clean the apk cache in the same RUN line: RUN apk add –no‑cache … && rm -rf /var/cache/apk/* . That shaves a few megabytes without extra steps later.
Security wise, run a scanner like Trivy or Snyk on the built image. These tools will list known CVEs in the base layer and any packages you added. If you spot a critical vulnerability, consider pinning a more recent base tag or adding an apt‑get upgrade && apt‑get dist‑upgrade sequence.
Don’t forget to verify the entrypoint and CMD. Run docker run –rm -it
A handy checklist you can keep in your repo’s README or a .md file:
- ✅ Docker build succeeds without errors.
- ✅ hadolint shows no warnings about missing labels or latest tags.
- ✅ Image size is within acceptable limits (e.g., <100 MB for Alpine, <300 MB for Debian).
- ✅ No high‑severity CVEs reported by Trivy.
- ✅ ENTRYPOINT/CMD run the app as intended.
- ✅ Non‑root user is defined and the container runs without root privileges.
If any item fails, go back to the description, add the missing detail, and regenerate. That iterative loop is what makes the AI‑generated Dockerfile feel reliable – you’re not just trusting a black box, you’re steering it with concrete feedback.
A final tip: commit the validated Dockerfile on a separate branch and let your CI pipeline run the same checks automatically. When the pipeline passes, you know the file is production‑ready and you can merge with confidence.
One subtle but powerful optimization is to pin the base image tag to a specific digest instead of a floating tag like node:18. By using node@sha256:abcd… you lock the exact layers you built against, which prevents surprise breaks when the upstream maintainer pushes a new patch. It’s a tiny change that saves you a lot of head‑scratching later.
Step 5: Compare AI Dockerfile generators
Alright, you’ve already seen how to describe your app and how the AI spins that into a Dockerfile. Now it’s time to pick the right tool for the job. Not every generator is created equal, and the differences matter when you want to generate dockerfile from project description ai without pulling your hair out later.
What really matters?
Think about the things you care about most: speed, how easy it is to tweak the prompt, whether you can call it from a script, and of course the price tag. If a generator feels like a black box that spits out a file you can’t edit, you’ll end up fighting it in CI.
So, what should you compare?
Model size vs. response time
A smaller model (like a distilled CodeLlama) will answer in seconds and keep your CI costs low. Bigger models (GPT‑4‑ish) might give you a few extra best‑practice suggestions, but the latency can add up, especially if you generate Dockerfiles on every PR.
Do you need that extra polish, or is a quick, solid baseline enough? Most teams find the sweet spot with a purpose‑built Dockerfile model that’s trained on thousands of real Dockerfiles.
Prompt flexibility
Some generators require you to follow a rigid JSON schema, while others let you write plain English – exactly the way you described your project in Step 1. The more natural the prompt language, the less you’ll waste time translating your bullet list into a machine‑specific format.
Ever tried to cram “use non‑root user, healthcheck for /health” into a cryptic key/value map? It feels like you’re writing code for the code‑generator instead of the container.
Integration hooks
Do you have a Makefile, a GitHub Action, or a Jenkins pipeline that could call the generator automatically? A CLI or simple HTTP endpoint makes that painless. If you have to copy‑paste from a web UI each time, the workflow breaks down fast.
Imagine a one‑liner in your CI that does a curl to the API, drops the result into Dockerfile.generated, and then runs hadolint. That’s the kind of automation that turns “nice to have” into “must have.”
Cost and licensing
Free tiers are great for hobby projects, but once you start generating dozens of Dockerfiles a day, the per‑call price can add up. Some open‑source models are self‑hosted – they cost you compute, not per‑request dollars. Others, like SwapCode’s hosted generator, stay free for a generous quota and scale nicely when you need more.
Do you want to worry about API keys and rate limits, or would you rather spin up a container with the model and own the entire stack?
Security and compliance
When you let an AI suggest base images, package installs, and user permissions, you’re trusting its training data. Generators that explicitly add security‑focused flags (non‑root, digest‑pinned bases, SBOM output) give you a head start on compliance.
Do you need an audit trail? Some services log each request, making it easier to trace which description produced which Dockerfile – a nice feature for regulated environments.
Quick side‑by‑side comparison
| Generator | Prompt style | CLI/API | Pricing | Security focus |
|---|---|---|---|---|
| SwapCode AI Dockerfile generator | Plain‑English description, bullet list | HTTP API & curl example | Free tier unlimited for personal use; paid plans for enterprise | Non‑root user, healthcheck, digest‑pinned base images |
| CodeLlama‑Docker (self‑hosted) | Markdown‑style prompt, optional JSON | CLI wrapper (docker run …) | Compute cost only | Depends on your own hardening; no built‑in security flags |
| GitHub Copilot for Dockerfiles | Inline code comments in VS Code | IDE extension, no separate CLI | Included with Copilot subscription | Suggests best practices but not always security‑specific |
Notice how the rows line up with the criteria we just talked about. SwapCode wins on prompt ease and built‑in security tweaks, CodeLlama gives you control over cost and data residency, and Copilot shines if you already live inside VS Code and don’t need a separate API.
Which one feels like a natural extension of your workflow? If you love automating everything with curl, the SwapCode endpoint is a no‑brainer. If you’re already budgeting for GPU time and want full ownership, the self‑hosted model might be worth the extra ops overhead.
Bottom line: don’t pick the first generator you see. Map the features above to your team’s priorities, run a quick test generation, and let the results speak for themselves. Once you’ve settled on a tool, the rest of the pipeline – validation, linting, CI – becomes a smooth, repeatable loop.
Step 6: Additional best‑practice tips
Now that you’ve got a Dockerfile fresh out of the AI, it’s tempting to push it straight to prod. But a few extra tweaks can turn a good image into a rock‑solid one.
Pin the base image to a digest
Instead of FROM node:18, use the immutable digest like FROM node@sha256:abcd…. That way you lock the exact layers you tested against, and a surprise upstream update won’t break your build overnight.
Trim the context with .dockerignore
Did you ever wonder why your build suddenly slowed down? Most of the time it’s because the Docker daemon is copying everything in the repo, including docs, tests, or local IDE files. A tiny .dockerignore that excludes node_modules, *.log, and tests/ can shave minutes off a CI run.
Leverage multi‑stage builds
Even if the AI gave you a single‑stage file, you can split it into builder and runtime stages. The builder pulls in all the build‑time dependencies, compiles the app, and then discards the heavy tooling when it copies the artifact into a minimal runtime image. The result is usually under 100 MB for Alpine‑based images.
Example tweak
Take the RUN npm ci && npm run build line and move it into a AS builder stage. Then use COPY --from=builder /app/dist /app in the final stage. You’ll notice the final image size drop dramatically.
Add explicit metadata labels
Labels are like a passport for your container. Include maintainer, version, source, and even a link to the AI prompt you used. That way anyone scanning the image later can trace it back to the original description.
Enforce non‑root execution
Most AI generators already sprinkle a USER nonroot line, but double‑check that the user exists and has only the permissions it needs. If you need to run a specific binary, give that binary the correct file permissions instead of handing the whole container root access.
Healthchecks that actually work
It’s easy to copy a generic HEALTHCHECK CMD curl -f http://localhost/health || exit 1 and forget to expose the port or start the service on the right interface. Run the container locally and curl the endpoint yourself – if it fails, adjust the command or the exposed port.
Use build‑args for secrets‑free configuration
Never bake API keys or passwords into the image. Instead, define ARG placeholders for things like NODE_ENV or APP_VERSION, and pass the real values at build time or via the orchestrator’s secret store.
Automate linting and scanning
Integrate hadolint and a security scanner like Trivy into your CI pipeline. A failing lint step catches missing LABELs or the dreaded latest tag before the image ever leaves the repo. A nightly Trivy scan flags new CVEs in the base image, giving you a chance to update the digest.
Version‑control the generated Dockerfile
Even though the file came from AI, treat it like any other source file. Commit it, review it in pull requests, and add a short note in the PR description linking back to the original prompt. That audit trail satisfies compliance folks and makes future updates easier.
Document the prompt for future teammates
Write a tiny README.md next to the Dockerfile that records the exact plain‑English description you fed the AI, any custom flags you added, and the date you ran it. When a new hire asks “why did we choose Alpine?”, you have a ready answer instead of a guessing game.
So, what should you do next? Take the freshly generated Dockerfile, run through this checklist, and let the tiny adjustments do the heavy lifting. In practice you’ll see faster builds, smaller images, and fewer security tickets – all without writing another line of code yourself.
Conclusion
We’ve walked through the whole journey—from sketching a crystal‑clear description to letting SwapCode’s AI spin a production‑ready Dockerfile, then tightening it up with linting and security scans.
So, does it really save you time? Absolutely. Instead of hunting docs for the right FROM line or piecing together multi‑stage builds, you type a few bullet points and get a solid base in seconds.
Remember the checklist we built: verify the image builds, run hadolint, scan with Trivy, pin the base digest, and add non‑root user and healthcheck. If any step trips, tweak the description and regenerate. That iterative loop feels more like a conversation than a code‑generation black box.
What’s the next practical step for you? Grab your current project, write a one‑paragraph description, fire it through the AI generator, and run the quick validation steps we outlined. Treat the result like any other source file—commit it, review it, and document the prompt next to it.
In the end, generating Dockerfiles from project description AI becomes a repeatable habit that cuts friction, shrinks image size, and boosts confidence in your CI pipeline. Give it a try today, and let the AI handle the boilerplate while you focus on building great software.
FAQ
How should I structure the natural‑language description to get a reliable Dockerfile from the AI?
Start with the runtime (e.g., “Node.js 18‑LTS”), then list each build step as a verb‑action pair: install dependencies, run the build script, copy artifacts, set WORKDIR, expose ports, and define the entrypoint. Throw in any ENV variables, labels, or security hints like “use a non‑root user” and “add a healthcheck”. Keeping the description under 200 words and using bullet‑style sentences helps the model map your intent directly to Dockerfile instructions.
Can I generate a multi‑arch Dockerfile with a single description?
Yes—just mention the target platforms explicitly, for example “build a multi‑arch image for linux/amd64 and linux/arm64”. The AI will add a FROM … AS builder stage and the appropriate --platform flags. Make sure the base image you pick supports both arches (Alpine or official language images usually do). After generation, run a quick docker buildx imagetools inspect to verify the manifest lists both architectures.
What validation steps should I run after the AI spits out the Dockerfile?
First, run docker build --no‑cache . to catch missing packages or syntax errors. Next, lint the file with hadolint – it will flag things like using latest tags, missing LABELs, or overly long RUN chains. Finally, scan the built image with Trivy or a similar scanner to surface any known CVEs. If any check fails, tweak the description (add the missing package or security flag) and regenerate.
Is it safe to trust the AI‑generated Dockerfile for production?
Think of the AI as a fast first draft, not a final approval. The generator follows best‑practice templates, but you still need to enforce your organization’s policies—pin base image digests, ensure a non‑root USER, and run security scans. Treat the output like any third‑party code: review it in a pull request, run your CI linting and scanning steps, and only merge once it passes every gate.
How do I keep the generated Dockerfile small and efficient?
Layer optimization is key. Ask the AI to combine related commands with && and to clean package caches in the same RUN line (e.g., apk add --no‑cache … && rm -rf /var/cache/apk/*). Use a multi‑stage build: the first stage compiles the app, the second stage copies only the runtime artifacts into a minimal base like Alpine. Also, add a .dockerignore file to exclude docs, tests, and local IDE files from the build context.
Can I automate the whole generate‑validate‑commit loop in my CI pipeline?
Absolutely. SwapCode’s generator offers a simple HTTP endpoint, so you can curl the description from a script, drop the response into Dockerfile.generated, and then invoke your existing lint and scan steps. Put those commands in a GitHub Action or Jenkins stage, and let the pipeline fail if hadolint or Trivy reports an issue. This way the AI becomes part of your automated workflow instead of a manual copy‑paste step.
What are common pitfalls when using AI to generate Dockerfiles?
One frequent mistake is forgetting to specify the exact base image tag, which leads the AI to use a floating latest tag. Another is omitting environment variables or build arguments, causing runtime crashes. Lastly, people sometimes skip the .dockerignore, resulting in painfully slow builds because the whole repo is sent to the daemon. Address these early by being explicit in your description and running the validation checklist.