
How to Generate TypeScript Interfaces from JSON Online – Step-by-Step Guide
Ever opened a JSON payload and thought, ‘I wish I had a TypeScript interface for this already?’
You’re not alone—every dev who works with APIs hits that moment when copy‑pasting objects into an editor feels like guesswork.
That’s why generating TypeScript interfaces from JSON online has become a tiny ritual in many projects: it turns vague data shapes into concrete, type‑safe contracts in seconds.
The beauty of an online generator is that you don’t need to install any npm packages or fiddle with CLI flags. Just drop your JSON, click a button, and a ready‑to‑use interface pops out, complete with optional readonly modifiers, nested objects, and arrays.
But there’s a subtle catch: output quality depends on how the tool reads ambiguous values. For example, a field that sometimes is a string and other times a number can be typed as `string | number`, or you might default to `any` for flexibility.
SwapCode’s free AI Code Converter does exactly that—take your raw JSON and return a clean interface without any sign‑up friction. Free AI Code Converter lets you tweak the result on the fly, so you can keep the workflow in a single tab.
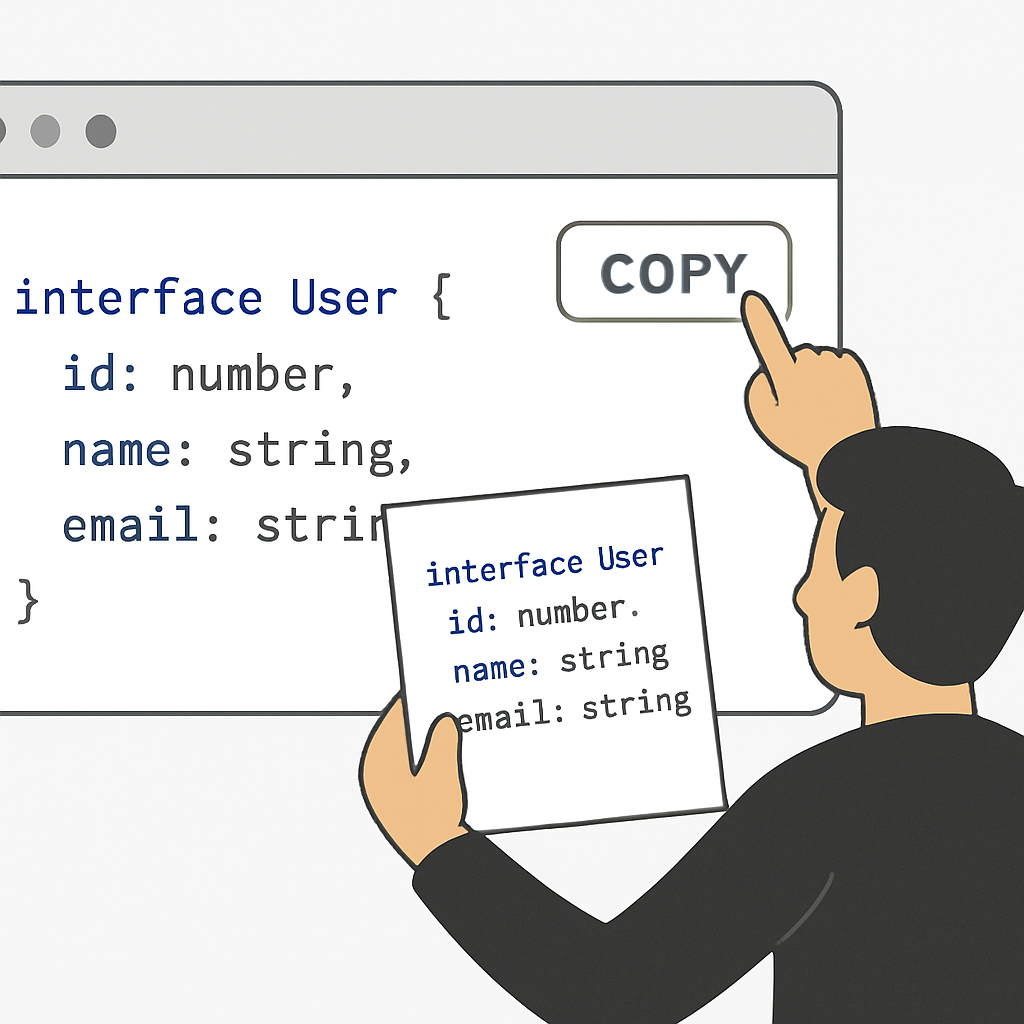
Here’s a quick mental demo: you paste `{ “id”: 42, “name”: “Alice”, “tags”: [“admin”, “user”] }` and the tool spits out `interface RootObject { id: number; name: string; tags: string[]; }`. Instantly you have autocomplete, compile‑time checks, and a clearer contract for teammates.
And because the generator runs in the browser, you can spin it up from a coffee‑break laptop, a shared screen, or a CI step that validates schemas.
So, what’s the next move? Grab that JSON snippet you’ve been juggling, fire up the converter, and let the interface appear. Once you have it, drop it into your codebase, and you’ll notice fewer runtime surprises and smoother refactors.
TL;DR
If you’re tired of manually crafting TypeScript interfaces from messy JSON, the free online converter lets you paste any payload and instantly get clean, type‑safe definitions ready for your codebase.
Just copy, click, and drop the generated interface—no installation, no sign‑up—so you can focus on building features instead of wrestling with type errors.
Step 1: Choose a Reliable Online Generator
Ever stared at a massive JSON payload and thought, “There has to be an easier way to get a TypeScript interface out of this?” You’re not alone. The first thing you need is a trustworthy online generator that won’t give you wonky types or force you to download a dozen npm packages.
So, how do you pick one that actually saves you time? Start by checking if the tool runs completely in the browser. A browser‑only solution means no install friction, no version mismatches, and you can spin it up from any device – even a coffee‑shop laptop.
Look for a clean, minimal UI
If the interface is cluttered with ads or hidden settings, you’ll waste mental bandwidth figuring out where to paste your JSON. A good generator presents a large textarea, a single “Generate” button, and a clear output pane. That’s it. Anything beyond that is optional, not mandatory.
Take a moment to test the UI with a tiny JSON snippet like { "id": 1, "name": "Bob" }. Does the tool instantly show interface RootObject { id: number; name: string; }? If you have to hunt for a “Copy” button or scroll through endless menus, you’re probably better off looking elsewhere.
Check how it handles edge cases
Real‑world APIs rarely give you perfectly uniform data. Fields can be null one moment and a string the next, arrays can be empty, and nested objects can appear conditionally. A reliable generator will either infer union types (e.g., string | null) or let you tweak the result before you copy it.
Try pasting something like:
{ "status": null, "tags": [], "profile": { "age": 30, "bio": "" } }
If the output respects the null and empty array nuances, you’ve found a tool that respects data variability.
Speed and privacy matter
Since the conversion happens locally in your browser, the JSON never leaves your machine. That’s a big win for privacy‑focused teams. If the service sends your payload to a server, look for a clear privacy statement and preferably an option to run offline.
Performance is another subtle cue. A laggy converter that spins its wheels for a few seconds on a 200‑line JSON payload is a sign of an under‑optimized backend. You want something that feels instantaneous.
One of SwapCode’s own tools hits all these marks. The SwapCode code generators page lists a browser‑only TypeScript interface generator that respects union types, runs instantly, and keeps your data private.
Actionable checklist
- Runs fully in the browser (no install required).
- Simple UI: large input box, single generate button, clear output.
- Handles
null, union types, empty arrays, and nested objects gracefully. - Processes your JSON in under a second.
- Provides a privacy guarantee that your data stays local.
Run through this checklist with any candidate tool, and you’ll quickly spot the reliable ones.
Need a visual aid? The video below walks through picking a generator, pasting JSON, and tweaking the output on the fly.
Once you’ve settled on a generator that checks all the boxes, you’re ready for the next step: fine‑tuning the interface to match your project’s naming conventions and optional readonly modifiers.
And remember, a good generator is only the foundation. The real power comes when you integrate the generated interfaces into your codebase and let TypeScript do the heavy lifting for you.

Step 2: Paste Your JSON and Preview the Output
Alright, you’ve found a generator that ticks all the boxes. Now it’s time to actually feed it your JSON and watch the magic happen.
First thing’s first: copy the raw payload from wherever it lives—maybe a Postman response, a log file, or that messy curl output you’ve been staring at.
Paste into the big textarea
Most online tools, including SwapCode’s Free AI Code Generator, give you a spacious textarea right in the center of the page. Drop the JSON there. If the UI looks cramped, resize the box or hit the “full‑screen” icon; you don’t want to miss a stray comma.
Tip: before you hit generate, glance at the JSON and make sure it’s valid. A quick online validator or even the built‑in syntax highlighting in the generator will flag missing brackets.
Hit “Generate” and breathe
Click the button and let the browser do its thing. Because everything runs locally, you’ll see the result in a flash—usually under a second for a few hundred lines.
When the interface appears, you’ll notice a few things: the top‑level interface name (often RootObject), each property with its inferred type, and any nested objects turned into their own interfaces.
Does it look right? That’s the moment you preview.
Preview the output
Read through the generated code line by line. Look for three red flags:
- Fields marked as any when you expected a more precise type.
- Missing union types where a value can be null or a string.
- Empty array declarations that default to any[] instead of the proper element type.
If you spot any of those, most generators let you tweak the JSON or adjust settings on the fly. Swap a null for an explicit string | null in the output, or add a sample element to an empty array and run generate again.
Here’s a quick real‑world example. Suppose you paste:
{
  "id": 101,
  "title": "Dashboard",
  "tags": [],
  "metadata": {
    "createdAt": "2025-01-12T08:00:00Z",
    "archived": null
  }
}
The generator should spit out something like:
interface RootObject {
  id: number;
  title: string;
  tags: any[];
  metadata: Metadata;
}
interface Metadata {
  createdAt: string;
  archived: string | null;
}
Notice the any[] for tags. If you know tags are always strings, add a dummy value [“example”] to the array and rerun. The output will now read tags: string[], which is far more useful.
Sometimes you’ll need runtime validation in addition to static typing. quicktype offers a feature that couples the generated interfaces with helper functions to validate JSON at runtime, giving you a safety net when the data shape changes.
Copy, paste, and move on
When you’re satisfied, hit the “Copy” button (or select the code manually) and paste the interfaces into your project. Most developers drop them into a .d.ts file or directly into the module where the API call lives.
Because the code is pure TypeScript, you can immediately start using autocomplete, catch type errors during compilation, and enjoy clearer contracts for teammates.
One last sanity check: run tsc on the file or let your IDE flag any mismatches. If the compiler complains, it usually means the original JSON had a hidden edge case you missed—go back, adjust, and regenerate.
And that’s it. You’ve just turned an opaque JSON blob into a strongly‑typed interface, all without leaving your browser. Ready for the next step? It’s all about polishing those names, adding readonly where appropriate, and committing the file to version control.
Step 3: Adjust Settings for Naming Conventions and Types
Now that the raw interface is on your screen, it’s time to make it speak your project’s language. The generator gave you generic names like RootObject and any everywhere – that’s fine for a quick demo, but in a real codebase you’ll want something that feels natural.
Rename the top‑level interface
Start by giving the root a name that matches the API endpoint or the domain concept. If you’re pulling a UserProfile payload, rename RootObject to UserProfile. Most generators let you edit the name in a small settings box; if not, just change it in the output pane.
Why does this matter? Your teammates will see UserProfile in autocomplete and instantly know what data they’re dealing with, instead of puzzling over a vague RootObject.
Apply your naming conventions
Do you prefer PascalCase for types and camelCase for properties? Or maybe your team uses snake_case for legacy code? Whatever the rule, scan the generated properties and adjust them accordingly.
For example, created_at becomes createdAt. A quick find‑and‑replace in the output editor usually does the trick, but some tools let you toggle a “convert keys to camelCase” switch before you hit generate.
And don’t forget about prefixes or suffixes you might add for clarity – Dto for data‑transfer objects, Response for API replies, etc.
Mark immutable fields as readonly
Look at the fields that never change after the server sends them – IDs, timestamps, or status codes. Adding readonly tells TypeScript that those properties shouldn’t be reassigned later, catching accidental mutations at compile time.
Most online generators have a checkbox like “Add readonly modifiers”. If yours doesn’t, just prepend readonly manually. It’s a tiny change that pays off when you refactor large objects.
Handle optional properties
Notice any property that sometimes isn’t present in the sample JSON? The generator often marks it as optional with a ?. If it missed a case, add the ? yourself – it signals to callers that they need to guard against undefined.
One neat trick is to run the generator on a couple of real responses, then compare the outputs. Any property that appears in one but not the other should become optional.
Fine‑tune array element types
Empty arrays are a common source of any[]. The trick we mentioned earlier – drop a dummy element of the expected type and regenerate – works here too. After you’ve got a concrete type, you can replace the placeholder with the real name.
If you prefer not to re‑run the generator, just edit the type manually: change any[] to string[], MyItem[], etc.
Export the interfaces the way you need them
Do you bundle everything into a single .d.ts file, or do you prefer one file per domain? Most tools let you toggle “export each interface” or “export default”. Pick the style that matches your project’s module system.
For projects that use ES modules, the export keyword is essential; for legacy CommonJS you might omit it and use module.exports elsewhere.
Quick checklist before you copy
- Root interface renamed to a domain‑specific name.
- Property names follow your team’s case convention.
- Immutable fields marked
readonly. - Optional fields have
?where appropriate. - Empty arrays now have concrete element types.
- Export style matches your module system.
Run tsc on the file – if the compiler is happy, you’re good to go. If you see errors, they usually point to a missed union (string | null) or a property that should be optional.
Need a visual reminder of the settings panel? The online JSON‑to‑TypeScript tool lets you toggle these options in real time – you can see the code update as you flip switches for camelCase keys, readonly modifiers, and optional properties on the conversion page.
And when you’re dealing with complex objects that need runtime validation, remember that you can pair the cleaned‑up interface with a lightweight validator or a decorator‑based solution like the one discussed on Stack Overflow. That way you keep the static safety of TypeScript while still catching malformed JSON at runtime.
Take a breath – you’ve just turned a generic blob into a polished, project‑ready contract. Next up, commit the file, add it to version control, and let your team reap the autocomplete benefits.
Step 4: Generate and Copy the Interface Code
Okay, we’ve tweaked the names, added readonly flags and sorted out optional fields – the interface is looking sharp. The last thing you need to do is actually pull that code out of the browser and drop it into your project.
Most generators give you a big textarea with the result and a single “Copy” button perched on the right. When you click it, the whole block lands on your clipboard, ready for a paste. If you’re using the SwapCode JSON‑to‑TypeScript tool, the button is labelled “Copy Interface” and works in every modern browser.
But what if the button isn’t there or you prefer a manual approach? Just click inside the code pane, press Ctrl+A (or Cmd+A on macOS) and then Ctrl+C. The same result, only a couple more keystrokes.
Now that the code is on your clipboard, open the .d.ts file or the module where the API call lives. Paste the interface at the top of the file, right after your import statements. If you’re using a feature‑rich IDE like VS Code, you’ll instantly see autocomplete suggestions for the new type.
A quick sanity check saves you from future headaches: run the TypeScript compiler on the file (npm run tsc or just tsc if you have it installed). If the compiler screams about a missing type, it usually means the original JSON had a value you didn’t account for – maybe a null that should be a union, or an empty array that needs a concrete element type. Fix the interface, run tsc again, and you’re golden.
And if you ever hit a snag while debugging the generated types, our TypeScript debugging tools can help you step through the compilation errors and pinpoint the exact line that needs adjustment.
Here’s a tiny real‑world example. Suppose the API returns a payload like: { “id”: 12, “status”: null, “tags”: [] }. After running the converter you get: interface ApiResponse { id: number; status: string | null; tags: string[]; }. Notice the tags array is now typed as string[] instead of any[]. If your project expects a different shape, edit the type right there – the change is immediate and type‑safe.
A common pitfall is forgetting to export the interface. If you plan to use it in other files, add the export keyword before the interface declaration, or enable the “export each interface” toggle in the tool’s settings. Without export, other modules will see “Cannot find name …” errors.
Finally, commit the new .d.ts file to version control. That way every teammate gets the same contract and the CI pipeline can catch accidental breaking changes. A short commit message like “Add UserProfile interface generated from API response” is enough.
To sum up, the copy‑and‑paste step is trivial, but treating it as a deliberate checkpoint – compile, verify, export, commit – turns a quick hack into a reliable piece of your codebase.
If you need a no‑install alternative, the classic json2ts page mentioned on Stack Overflow still does the job for simple schemas.
Give it a try and see how smooth the workflow becomes.
Step 5: Validate the Interface and Compare Options
Alright, you finally have a fresh TypeScript interface sitting in your clipboard. Before you toss it into the codebase, it’s worth giving it a quick sanity check. Think of it like a mini‑code review you do for yourself – a chance to catch those sneaky type mismatches before they bite you later.
Run the compiler, then breathe
First thing’s first: run tsc on the file that now contains the generated code. If the compiler stays silent, you’re already in good shape. If you see errors, they usually point to three common culprits – a property that should be string | null, an any[] that needs a concrete element type, or a missing export statement.
Don’t panic. Open the offending line, compare it with the original JSON, and tweak the type right there. Because the file is plain text, you can edit it on the fly and re‑run the compiler until it’s clean.
Validate against real API responses
Running the compiler only tells you that TypeScript is happy with the shape you wrote. It doesn’t guarantee that the shape matches every real response your backend might send. Grab a couple of live payloads – maybe one from a staging endpoint and another from production – and paste them into the generator again. Do the resulting interfaces differ? If they do, that tells you a property is optional or a union type is needed.
When you notice a discrepancy, go back to the interface and add a ? for optional fields or a union like number | string. Rerun the compiler, and you’ll have a contract that actually reflects the API’s variability.
Compare options: raw output vs. polished version
Many online tools give you a “raw” dump straight from the JSON parser and a “polished” version where you can toggle readonly flags, camelCase conversion, and export settings. It’s tempting to copy the raw output because it’s faster, but the polished version usually saves you a handful of edits later.
Here’s a quick decision matrix you can use to decide which version to adopt for a given project:
| Check | What to Look For | Why It Matters |
|---|---|---|
| Type Accuracy | Union types, correct array element types, no any |
Prevents runtime surprises and keeps autocomplete useful |
| Export Strategy | Export keyword present, correct module format | Ensures other files can import the interface without errors |
| Read‑only & Naming | Immutable fields marked readonly, keys follow project’s case convention |
Communicates intent and reduces accidental mutations |
If the raw dump fails any of those rows, switch to the polished output and enable the relevant toggles. Most generators let you preview the changes in real time, so you can see the impact before you copy.
Quick checklist before you copy
- All
anytypes replaced with specific types or unions. - Optional properties marked with
?where appropriate. - Immutable fields flagged as
readonly. - Export statements match your project’s module system.
- Naming conventions (camelCase, PascalCase) are consistent.
Run the compiler one last time. If it passes, you’ve just turned a vague JSON blob into a reliable contract.
What’s next?
Now that the interface is validated, drop it into a .d.ts file, commit it, and let your teammates enjoy the autocomplete boost. If you ever hit a wall – say, a new API version adds a field you didn’t anticipate – just repeat this validation step. It’s a tiny habit that pays off big time in long‑term maintainability.
So, does the interface feel solid enough to ship? If you’ve answered “yes” to each checklist item, you’re ready to move on to the next phase of your workflow.
Step 6: Advanced Customization and Integration Tips
Now that you’ve got a clean interface, it’s time to make it play nicely with the rest of your codebase. This is where the “advanced” part really matters – a few tweaks can turn a one‑off copy‑paste into a sustainable pattern.
Inject the interface into your API layer
Instead of scattering the generated .d.ts file in a random folder, create a dedicated types directory next to your service modules. Import the interface right where you make the HTTP call, and let the request function return Promise<YourInterface>. That way every consumer downstream sees the exact shape.
For example, if you’re using fetch you can write:
import type { UserProfile } from '@/types/user';
async function getUser(id: string): Promise {
  const res = await fetch(`/api/users/${id}`);
  return res.json() as UserProfile;
}
This tiny change gives you autocomplete inside the call site and forces TypeScript to verify the JSON you just received.
Leverage utility types for partial updates
Most APIs let you send only the fields you want to change. Rather than copy‑pasting the whole interface, wrap it with Partial or Pick to model the payload.
“`ts
type UpdateUser = Partial<UserProfile>; // all fields optional
type CreateUser = Pick<UserProfile, ‘name’ | ’email’>; // only required fields
“`
Now your service functions can declare exactly what they accept, and you avoid accidental over‑posting.
Combine runtime validation with static types
Static types are great, but they don’t protect you from a malformed response at runtime. Pair the generated interface with a lightweight validator like zod or io-ts. Define a schema that mirrors the interface, then use schema.parse(json) before you cast to the TypeScript type. If the payload fails, you get a clear error instead of a silent type mismatch.
Here’s a quick sketch using zod:
import { z } from 'zod';
const UserSchema = z.object({
  id: z.number(),
  name: z.string(),
  email: z.string().email(),
  tags: z.array(z.string()),
});
type UserProfile = z.infer;
Now your getUser function returns Promise<UserProfile> only after the schema has validated the raw JSON.
Automate regeneration in CI
APIs evolve, and you don’t want stale types lurking in your repo. Add a tiny script to your CI pipeline that pulls the latest OpenAPI spec or a sample response, runs the SwapCode generator in headless mode (the tool supports a URL‑based API), and compares the output with the committed file. If there’s a difference, fail the build and alert the team.
Because the generator runs in the browser, you can invoke it with node --eval or a simple curl request to the same endpoint – just make sure you pin the version of the generator you trust.
Integrate with your framework’s conventions
If you’re building a React app, you can turn the interface into component props automatically. For instance, a UserCard component can accept props: UserProfile and you’ll instantly get type‑checked JSX. The same works for Vue, Angular, or even plain Express middleware.
Need a quick demo? Check out how to convert TypeScript to React components with SwapCode – it shows the exact shape of props you’ll be feeding into your UI.
Tip: Keep a “type‑guard” file
Create a type-guards.ts module that exports helper functions like isUserProfile(obj: any): obj is UserProfile. Inside, verify the presence of required keys. This gives you a runtime check you can call before you trust external data, without pulling in a heavy validation library.
Use it in your fetch wrapper:
if (!isUserProfile(data)) throw new Error('Invalid payload');Final checklist for advanced integration
- Interface lives in a shared
typesfolder and is imported where needed. - Use
Partial/Pickto model request bodies. - Pair static types with a runtime validator or custom type guard.
- Automate regeneration on CI to keep up with API changes.
- Hook the type into your UI framework’s prop definitions.
- Document any manual overrides in a short README inside the
typesfolder.
By treating the generated interface as a living contract rather than a one‑off snippet, you’ll spend less time chasing type errors and more time building features. That’s the real power of being able to generate TypeScript interfaces from JSON online.
Conclusion
We’ve walked through every step of turning a raw JSON blob into a clean TypeScript contract, and by now you probably feel that the whole process is less of a mystery and more of a habit.
Remember the moment when you first pasted that payload and the generator spat out an interface in a flash? That instant win is the core value of being able to generate TypeScript interfaces from JSON online – you get instant autocomplete, catch errors early, and spend less time guessing.
So, what should you do next? Grab the next API response you’re handling, drop it into SwapCode’s free converter, rename the root type, sprinkle a few readonly flags, and commit the file. Treat the interface as a living contract; whenever the backend shifts, rerun the generator and let your CI flag the diff.
One practical tip: keep a tiny type-guards.ts next to your types folder. A simple isUserProfile check gives you runtime safety without pulling in a heavyweight library.
Finally, make this a regular part of your workflow. A few seconds of generation now saves hours of debugging later, and your team will thank you for the clearer, type‑safe codebase.
Give it a try today and watch your code confidence grow.
FAQ
How can I generate TypeScript interfaces from JSON online without installing anything?
Just open a browser, paste your raw JSON into the big textarea of a free online converter, and hit “Generate”. The tool runs entirely in-browser, so there’s no npm install or build step. Within a second you’ll see a clean interface ready to copy. It’s the same workflow you’ve already used in the earlier steps—only the UI is stripped down to a textarea, a button, and the output pane.
What if my JSON contains fields that can be null, a string, or a number—does the generator handle those?
Most modern generators detect mixed types and emit a union like string | null or number | string. If the tool you’re using misses a case, just add a representative example (e.g., include a null value) and regenerate. The resulting interface will reflect the variability, letting TypeScript warn you when you treat a nullable field as always present.
Can I rename the root interface and adjust property names after the conversion?
Absolutely. The UI usually offers an editable field for the top-level name—change RootObject to something meaningful like UserProfile. For property keys you can either toggle a “camelCase” switch before generating or manually edit the output. Consistent naming makes the contract instantly recognizable to teammates and avoids a cascade of rename refactors later.
Is my data safe? Does the JSON ever leave my computer during the conversion?
When the converter runs in the browser, the parsing and type inference happen locally. No request is sent to a remote server, so your private payload stays on your machine. If a tool advertises cloud processing, check its privacy policy, but the best-in-class options—like SwapCode’s free generator—keep everything offline, giving you peace of mind.
What are the best practices for plugging the generated interface into my project?
Drop the interface into a dedicated types folder and export it. Import the type wherever you make the API call, for example async function fetchUser(): Promise
How often should I rerun the generator when the backend evolves?
Treat the interface as a living contract. Whenever you add a new endpoint, change a response shape, or pull a fresh sample from staging, paste the updated JSON and regenerate. Automate the check in CI: fetch a sample response, run the converter in headless mode, and fail the build if the output differs from the committed file. This habit catches breaking changes before they reach production.
The generator gave me an any type for an array—what’s the cleanest way to fix it?
Empty arrays are the usual culprit for any[]. Add a dummy element of the expected type (e.g., [“example”]) and regenerate, or edit the output manually to string[] (or your specific type). After you’ve confirmed the correct element type, replace the placeholder with real data in your code. Keeping array element types explicit preserves autocomplete quality and prevents subtle bugs.