How to generate unit tests from code with AI: A Practical Step-by-Step Guide
Ever stared at a mountain of legacy code and thought, “There has to be a faster way to make sure I’m not breaking anything?” You’re not alone.
That gut‑wrenching feeling is what pushes developers to hunt for tools that can write the tests for them. Imagine typing your function once and watching a suite of unit tests appear automatically.
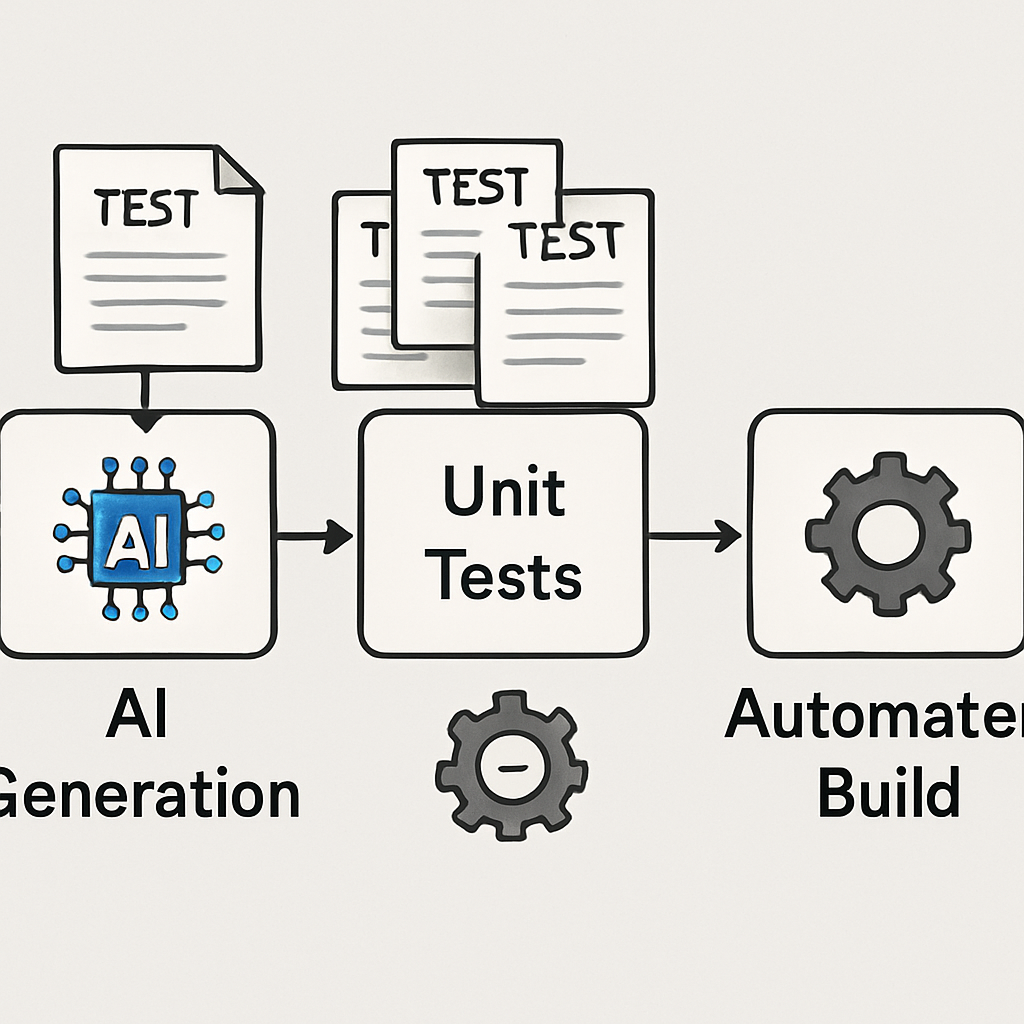
Enter the world of AI‑powered test generation. When you generate unit tests from code with ai, the model reads your source, understands edge cases, and spits out ready‑to‑run test files.
Sounds like magic, but it’s really just a clever use of large language models trained on millions of code snippets. They’ve learned patterns that humans spend weeks perfecting.
The payoff is immediate. No more manual boilerplate, no more guessing which assertion covers the corner case you just thought of. Your CI pipeline stays green, and you get back precious development time.
And if you’re worried about quality, many teams report that AI‑generated tests catch bugs they missed during code review. It’s like having an extra pair of eyes that never sleeps.
Ready to try it out? Free AI Test Code Generator offers a free AI test code generator that lets you paste a function and instantly receive Jest, PyTest, or JUnit tests, depending on your stack.
Just hit generate, copy the output into your test folder, and run it. In most cases the tests pass on the first try, giving you confidence to refactor or add new features.
But don’t stop there. Use the generated tests as a baseline, then tweak them to cover business‑specific logic. Over time you’ll build a robust suite without ever writing a line of test code from scratch.
So, what’s the next step? Give the AI a piece of your code, let it generate the tests, and watch how quickly your confidence grows. Let’s dive in and see how it works.
TL;DR
Using AI to generate unit tests from code instantly cuts boilerplate, catches hidden bugs, saves hours of manual work, and keeps your CI pipeline green. Try SwapCode’s free test generator, paste a function, and get ready‑to‑run Jest, PyTest or JUnit suites in seconds, giving you confidence to refactor fast today.
Step 1: Set Up Your Development Environment for AI‑Powered Test Generation
First thing’s first – you need a playground where the AI can actually see your code. That usually means a modern IDE with the right extensions installed. If you’re on VS Code, hit the Extensions view and search for “GitHub Copilot” or the SwapCode AI plug‑in you prefer. A quick install gives you inline suggestions right where you type.
But what if you’re more of a JetBrains fan? No worries. The same Copilot chat and test‑generation commands are available as a plugin for IntelliJ, PyCharm, and WebStorm. The key is to have the extension talk to the AI service via an API key, which you can grab from your SwapCode dashboard.
Once the extension is in place, fire up a fresh project folder. If you’re working with JavaScript/TypeScript, run npm init -y to create a package.json. For Python, set up a virtual environment with python -m venv .venv and activate it. These steps give the AI a clear dependency map to work with when it generates Jest, PyTest, or JUnit tests.
Now, configure the AI client. Head over to Free AI Code Generator and copy your personal API token. Paste it into the extension’s settings panel – usually under “AI Credentials.” This little token is what lets the model read your code and spit out test files without you having to type a single prompt.
With the environment ready, it’s time to give the AI something to work on. Open the file you want to test, highlight the function, then invoke the test‑generation command. In VS Code you can right‑click and choose “Generate Tests” or type /tests in the Copilot chat. The model will suggest a suite of unit tests covering happy paths, edge cases, and error handling.
Here’s a quick sanity check: run the generated test file with the appropriate runner – npm test for Jest, pytest for Python, or mvn test for JUnit. If everything passes, you’ve just saved yourself minutes, maybe hours, of boilerplate writing.
Feeling a bit skeptical? You’re not alone. Many developers wonder if AI‑generated tests are trustworthy. The GitHub Copilot guide notes that the AI can surface edge cases you might have missed, but it still recommends a quick review – just like you’d do with any code you pull in.
And don’t forget version control. Commit the freshly minted test file before you run it. That way, if the AI missed something, you can revert or edit without losing your original code.
Need a visual refresher? Below is a short walkthrough that shows the extension UI, the API‑key entry, and the test‑generation command in action.
Take a moment to watch the video, then come back here and try the steps on your own codebase. The process is intentionally simple – if you can copy‑paste a function into your editor, you can also copy‑paste the generated test suite.
Once you’ve got the basics down, you can start customizing. Add custom assertions, inject mock services, or tweak the test runner configuration to match your CI pipeline. The AI will respect the patterns you introduce, making future generations even more spot‑on.
Finally, keep your tooling up to date. AI models improve over time, and the extensions release new features regularly. A quick code --install-extension or plugin update check can unlock newer prompt formats that produce cleaner, more maintainable tests.
With your IDE wired, API key set, and a project scaffold ready, you’re now equipped to let the AI do the heavy lifting of unit‑test creation. The next step is to actually generate those tests and see how they tighten your code’s safety net.
Step 2: Choose an AI Model or Service for Test Generation
Now that your IDE is humming, the next decision feels a bit like picking a partner for a dance: you want someone who can keep up, anticipate the moves, and not step on your toes.
There are three big families of AI helpers you can lean on when you want to generate unit tests from code with AI: large‑language‑model (LLM) based copilots, dedicated test‑generation services, and open‑source toolkits you run locally.
LLM‑powered copilots (Copilot, Gemini, Claude)
These are the plug‑and‑play options that live inside your editor. They tap into models trained on billions of code snippets, so they can read a function and spit out a test suite in seconds. The upside? Minimal setup – just install the extension, paste your API key, and you’re ready.
But the trade‑off is that you’re tied to the vendor’s pricing and model limits. If you hit a quota mid‑sprint, you might be stuck waiting for a refill.
Real‑world tip: I tried the OpenAI Codex CLI on a Node project and saw a 3‑× productivity boost, but I ran into a hiccup where the CLI tried to run tests outside my Docker container, causing a timeout — a reminder to check sandbox settings early (Codex user discussion).
Dedicated test‑generation services
Some platforms focus exclusively on unit‑test creation. They usually let you paste a code fragment on a web UI, choose your test framework (Jest, PyTest, JUnit), and get a ready‑to‑run file back.
Because they’re purpose‑built, they often expose knobs for edge‑case coverage, mock generation, and even flaky‑test detection. The downside? You have to hop between your IDE and the web UI unless they offer an API.
One of the most popular services is SwapCode’s own Free AI Code Debugger, which doubles as a test generator and lets you invoke it from the command line, keeping the workflow inside your terminal.
Open‑source toolkits you host yourself
If you’re in a regulated environment or just love tinkering, self‑hosted options like unitcoder or testgen give you full control. You download the model, run it on a GPU or CPU, and feed it your code via a CLI.
These give you privacy (no code leaves your network) and the freedom to fine‑tune the model on your own codebase. The cost is higher upfront – you’ll need compute resources and a bit of DevOps work.
Ask yourself: Do I need the convenience of a cloud copilot, the specialization of a test‑gen service, or the control of a self‑hosted toolkit?
How to pick the right fit for you
1. Check language support. Some models excel at JavaScript but stumble on Rust. Verify the service lists the frameworks you use (Jest, PyTest, JUnit, etc.).
2. Evaluate output quality. Run a quick experiment – feed a small, well‑known function (like a factorial) and see if the generated tests cover happy path, error handling, and boundary values.
3. Look at integration points. Does the tool expose a VS Code command, a CLI, or a REST endpoint? The smoother the bridge to your existing CI pipeline, the less friction you’ll feel.
4. Mind the cost. Cloud copilots charge per token; dedicated services may have a flat monthly fee; self‑hosted requires hardware. Estimate how many tests you’ll generate per month and compare.
5. Security and compliance. If you’re dealing with proprietary code, prefer on‑prem or encrypted API calls. Check the provider’s data‑retention policy.
Quick decision checklist
- Do I need instant in‑IDE suggestions? → Go with an LLM copilot.
- Do I want a focused UI with custom coverage knobs? → Try a dedicated test‑gen service.
- Do I have strict data‑privacy rules? → Deploy an open‑source toolkit locally.
Whichever path you choose, remember that the AI is a partner, not a replacement. Review the generated tests, add project‑specific assertions, and commit them like any other code.
Now that you’ve scoped the landscape, the next step is to fire up your chosen model and let it generate those tests. Ready to see the AI in action?
Step 3: Prepare Your Codebase and Prompt Engineering
Alright, you’ve picked a model and you’ve got the IDE ready. The next hurdle is making sure the code you feed the AI is tidy enough to get useful tests back.
First thing: give your repository a quick sanity‑check. Pull the latest main branch, run a lint pass, and make sure all build artifacts are in .gitignore. A messy tree confuses the model – it can’t tell which files are the real entry points.
Does your project already have a dedicated test folder? If not, create one now (e.g., tests/ for Python or src/__tests__/ for JavaScript). Keeping generated tests separate from hand‑written ones avoids accidental overwrites later.
Next up, think about dependencies. The AI will generate import statements based on what it sees. If you have a monorepo with dozens of internal packages, add a requirements.txt or package.json that lists only the modules the target function actually uses. That way the prompt stays focused.
Now the fun part – prompt engineering. The secret sauce isn’t a fancy model, it’s a clear, concise instruction. Start with a one‑sentence description of the function’s intent, then list the edge cases you care about.
For example: “Generate Jest unit tests for calculateTax(amount, state). Include a happy‑path test, a test for a negative amount, and a test for an unsupported state.” Notice the “include” keyword – it nudges the model to cover the scenarios you explicitly care about.
Another tip: use the Arrange‑Act‑Assert pattern in your prompt. Tell the model “Arrange the input, Act by calling the function, then Assert the expected output.” That mirrors the best‑practice layout Microsoft recommends for readable tests.Microsoft’s unit testing best‑practice guide outlines why this pattern reduces brittle logic.
When you’re ready, drop the prompt into your AI tool or the SwapCode CLI. If you’re using the web UI, paste the prompt into the “Prompt” box and hit Generate. For CLI lovers, run something like swapcode generate-tests --prompt "…". The tool will spin up a temporary sandbox, feed it the cleaned‑up code, and spit out a test file.
Got the output? Open it, scan for any hard‑coded strings or magic numbers – replace them with constants if they’re likely to change. This little extra step saves you from “test‑breaks‑every‑release” headaches.
Finally, run the freshly minted test suite locally. If it passes, commit the file to a feature branch and open a pull request. If it fails, adjust the prompt: maybe you need to add “mock the database call” or “use a stub for the external API”. Iterating on prompts is normal; think of it like a conversation with a teammate who needs a little clarification.
Pro tip: keep a reusable prompt template in a .prompt file at the root of your repo. Every time you add a new function, you just copy‑paste the template, swap the function name, and you’re good to go. Over time you’ll build a library of prompt snippets that cover common patterns like “validate input”, “handle null”, or “calculate totals”.
And if you ever feel the codebase is getting too tangled for the AI to make sense of it, give it a quick refactor using SwapCode’s free AI code refactoring tool. A cleaner file structure means cleaner test output.
So, to sum it up: prune your repo, isolate the target function, craft a prompt that names the scenario, and run the model in a sandbox. With a bit of discipline, you’ll get reliable, maintainable tests that keep your CI green and your mind at ease.
Step 4: Run the AI Model and Review Generated Tests
Alright, you’ve isolated the function and crafted a solid prompt – now it’s show‑time. You fire up the model, let it churn out a test file, and then sit down to give that output a once‑over.
Kick the model into gear
In your terminal or IDE, invoke the command you set up in Step 3. For SwapCode users that usually looks like swapcode generate-tests --prompt "…". The AI spins up a sandbox, reads the cleaned‑up source, and returns a fresh .test.js, .test.py, or .java file.
Does the model ever miss the mark? Absolutely. That’s why the first thing you do is glance at the file header – does it import the right modules? Are the test names meaningful?
Run, don’t just read
Hit npm test, pytest, or mvn test straight away. If everything passes, you’ve just saved yourself minutes of boilerplate. If you see red, that’s a clue the prompt needs tweaking – maybe you forgot to mention a mock or an edge case.
Tip: keep the test run in watch mode (npm test -- --watch) so you can edit the generated file on the fly and see failures instantly.
Quick sanity checklist
| Checklist Item | Why it matters | Quick action |
|---|---|---|
| Correct imports | Missing or wrong imports cause immediate failures. | Add or adjust import statements. |
| Mocked dependencies | External calls make tests flaky. | Insert stubs or use jest.mock/unittest.mock. |
| Edge‑case coverage | AI can overlook boundary conditions. | Manually add a test for the extreme input. |
That table is your cheat sheet when you skim the output. It forces you to ask, “Did the AI remember to mock the DB?” or “Did I get a test for a negative amount?”
Iterate like a conversation
Think of the AI as a teammate who just needs a bit more context. If the first batch only covers the happy path, prepend your prompt with “Also include tests for null inputs and for values beyond the typical range.” Then run the model again. You’ll notice the new file contains the missing scenarios – just the way a human would respond after you point out the gap.
It’s normal to go through two or three rounds before the suite feels solid. The process feels a bit like polishing a rough draft; each iteration trims the noise.
Validate the logic, not the formatting
One common pitfall is getting hung up on how the AI formats assertions. Focus on what the test actually verifies. If a generated Jest test says expect(result).toBeTruthy() but you need to check an exact value, replace it with toEqual(expected). The goal is confidence that the behavior is correct, not that the code style matches your lint rules.
Remember the wisdom from a long‑standing Stack Overflow discussion: “focus on the outcome, not the exact generated code” – in other words, run the test, see it pass, and then verify the underlying behavior aligns with your requirements (Stack Overflow insight on testing code generators).
Metrics that matter
After you’ve got a green suite, take a quick look at coverage and mutation scores. A recent benchmark showed AI‑generated tests can hit around 60 % code coverage while achieving mutation scores above 80 % (Startearly AI benchmark). Those numbers tell you the tests aren’t just passing – they’re actually exercising meaningful paths.
If your coverage is low, feed the model a more detailed prompt that explicitly asks for “branch coverage for conditional X”. The AI will usually obey, giving you extra tests that hit those branches.
When to stop
Stop iterating when you have:
- A green test run across all target frameworks.
- At least one test for every public method, including edge cases.
- Coverage and mutation metrics that meet your team’s baseline.
At that point you can commit the file, open a PR, and let the rest of the team review – just like any hand‑written test.
One final pro tip: if you ever need to transform the generated test into another language or format, the Free AI Code Converter can take the file and spit out an equivalent version in your preferred stack. It’s a handy shortcut when you’re juggling both JavaScript and Python test suites.
Bottom line: run the model, watch the test runner, tweak the prompt, repeat. Within a couple of iterations you’ll have a robust, AI‑assisted test suite that keeps your CI green and your mind at ease.
Step 5: Integrate Generated Tests into CI/CD Pipeline
Okay, you’ve got a fresh batch of AI‑generated tests sitting pretty in your repo. The next question is: how do we make sure they actually protect your code every time you push? That’s where CI/CD comes in – the safety net that runs those tests automatically, night and day.
Why CI/CD matters for AI‑generated tests
Think about it: you could run the tests locally and feel good for a few minutes, but as soon as someone else merges a change, the green light can vanish. Integrating the suite into your continuous integration pipeline guarantees the same rigor you applied to the AI‑generated files is applied to every commit.
And you’re not alone – Startearly AI highlights that AI‑generated tests need scalable CI integration to keep code quality from slipping as the codebase grows.
Step‑by‑step: Plug the tests into your pipeline
Here’s a quick, down‑to‑earth walkthrough you can copy‑paste into your favorite CI config.
- Commit the test files to version control. Keep them in a dedicated folder (e.g.,
tests/ai/) so you can easily target them later. - Add a CI job that runs only the new AI suite. In GitHub Actions, that looks like a new
jobsblock that callsnpm test,pytestormvn testwith a path filter liketests/ai/**. - Fail the build on any test failure. The default behavior of most runners is to mark the step red, but double‑check the
continue-on-errorflag isn’t accidentally set tofalse. - Publish coverage reports. Tools like
jest --coverageorpytest‑covcan outputlcovfiles; then feed them to a coverage badge service so the whole team sees the impact of the AI tests at a glance. - Gate pull requests. Add a branch‑protection rule that requires the “AI‑tests” job to pass before a PR can be merged. This makes the generated suite a non‑negotiable part of code review.
Does that feel like a lot? Not really. Most CI platforms already have templates for these steps – you’re just adding a few lines that point at the AI folder.
Keeping the pipeline fast and reliable
AI‑generated tests are great, but they can sometimes be a bit heavier than hand‑written ones, especially if the model adds exhaustive edge‑case checks. To keep your builds speedy, consider these tricks:
- Run the AI suite in parallel with your existing tests, but give it a separate runner with its own cache.
- Cache dependencies inside the CI job so the test runner doesn’t reinstall packages on every run.
- Use a “smoke” stage that runs only a subset of the AI tests on every push, and a full “regression” stage that runs nightly.
That way you get immediate feedback on the most critical paths without slowing down developers during the day.
What to watch out for
Even the best AI can miss a flaky scenario. If you notice intermittent failures, add a retry wrapper or mock the unstable external call. Also, keep an eye on coverage drift – if the AI tests start to cover less code after a refactor, tweak the prompt and regenerate.
Remember, the goal isn’t to replace human insight but to amplify it. The pipeline becomes the place where you constantly validate that the AI‑generated suite still aligns with your evolving business logic.
So, what’s the next move? Push a tiny change, watch the pipeline turn green, and celebrate the fact that you just automated a safety check you’d otherwise have to run by hand.
Finally, treat the CI config as living documentation. Whenever you add a new feature, update the prompt, or switch frameworks, revisit the .yml file and make sure the AI‑generated path is still being exercised. A well‑maintained pipeline turns a one‑off test generation effort into a continuous quality guardrail.
Conclusion
We’ve walked through every step needed to let an AI write your tests, so now the big question is: what do you do with that new safety net?
First, treat the AI‑generated suite like any other code—review it, add a couple of edge‑case checks you know matter, and commit it. Once it’s in version control, the CI pipeline you set up will keep it honest on every push.
Second, remember the AI is a partner, not a replacement. It can surface surprising scenarios, but you still need that human intuition to decide what’s truly critical for your business logic.
Quick checklist before you walk away
- Run the tests locally and verify they pass.
- Push a tiny change and watch the CI turn green.
- Add a branch‑protection rule that requires the AI‑test job to succeed.
- Schedule a regular “regen” session—run the prompt again after major refactors.
By making the generate unit tests from code with ai workflow a repeatable habit, you’ll keep development speed high and bugs low, without sacrificing confidence.
So, what’s the next move? Grab a function you’ve been avoiding, hit the SwapCode test generator, and let the AI do the heavy lifting. You’ll see the green light faster than you thought possible—then you can get back to building the features that really matter.
FAQ
How do I get started generating unit tests from code with AI?
The easiest place to start is right in your IDE. Install the SwapCode test‑generation extension, drop your function into the editor, and hit the “Generate Tests” command. The AI will read the signature, infer typical inputs, and spit out a ready‑to‑run suite. From there, run the file locally, make sure it passes, and commit the result. Treat that first commit as your baseline and iterate.
Do AI‑generated tests need a manual review?
Yes – even the smartest model can slip up. After the AI drops a file, skim the imports, check that any external services are mocked, and verify the assertions actually reflect the business rule you care about. If a test only checks that a function returns truthy, replace it with a concrete expected value. A quick manual pass costs seconds, but it prevents flaky green builds down the line.
How can I keep my CI pipeline fast with AI‑generated tests?
Keep the AI‑generated suite in its own folder and give it a dedicated CI job. Run those tests in parallel with your existing suite, but limit the job’s timeout to a few minutes so a runaway test doesn’t hold up the whole pipeline. Cache your language runtimes and dependencies between runs, and consider a “smoke” stage that runs a subset on every push and a full regression run overnight. This way you get fast feedback without sacrificing coverage.
What edge cases can AI catch that I might miss?
AI models have seen thousands of patterns, so they often suggest tests for null inputs, empty collections, or boundary values that you might not think of during a quick code review. For example, if you have a function that calculates a discount, the AI may generate a test for a 100 % discount scenario, a negative price, and a locale‑specific rounding edge case. Those are exactly the hidden bugs that slip through manual testing.
Is there a limit to how often I should regenerate tests after refactoring?
You don’t need to regenerate tests after every tiny change – that would flood your repo with noise. A good rule of thumb is to run a regeneration pass when you finish a sizable refactor, add a new public API, or notice that the existing suite no longer covers a newly introduced edge case. Keep a small “prompt template” in your repo so you can fire it off quickly, but schedule the heavy lift for weekly or sprint‑end checkpoints.
Can I use the same AI tool for different languages in one project?
Absolutely – the same SwapCode engine can spin out Jest, PyTest, JUnit or even PHP‑Unit files from a single prompt. Just point the generator at the language you’re working in, and it will respect the syntax and conventions of that ecosystem. When you have a mixed‑language codebase, keep separate test folders per language and add a CI matrix that runs each suite in its appropriate environment. That way the AI becomes a universal test ally, not a single‑language gimmick.