
How to Create Docker Compose File from Requirements: A Step‑by‑Step Guide
Ever stared at a laundry list of services, ports, and environment variables and thought, “How on earth do I turn this into a working Docker‑Compose file?” You’re not alone – most devs hit that wall the first time they try to translate raw requirements into a compose.yml.
The good news is you don’t need to hand‑craft every line. By breaking the spec into logical groups—like web, database, and cache—you can map each group to a service block, let YAML handle the indentation, and let Docker do the heavy lifting.
Let’s walk through a real‑world example. Imagine you’re building a simple e‑commerce app that needs a Node.js API, a PostgreSQL database, and a Redis cache. Your requirements document might say: “Expose the API on port 3000, store data in PostgreSQL on port 5432, and use Redis for session storage on port 6379.” From that, you can sketch three services: api, db, and cache.
First, create a top‑level version key and a services map. Then, for each component, add an image, ports, and any needed environment variables. Notice how the YAML structure mirrors the hierarchy of your requirements – no extra brackets, just clean indentation.
If you’re worried about syntax errors, you can drop the draft into SwapCode’s JSON to YAML Converter – Free Online Tool and instantly see whether the file parses. The tool even highlights misplaced spaces, so you avoid the dreaded “service … not found” runtime error before you run docker‑compose up.
Once the file validates, run docker compose up -d and watch Docker spin up your stack in seconds. You’ll see three containers named api, db, and cache, each listening on the ports you specified. Need to tweak a port or add a volume? Just edit the YAML, save, and rerun – Docker handles the rest.
What if your spec changes frequently, like adding a new worker service for background jobs? Instead of rewriting the whole file, copy an existing service block, rename it, and adjust only the image and command. This modular approach scales with your project and keeps the compose file tidy.
And here’s a quick checklist you can keep on your desk: • List every component with its required port, env vars, and volumes. • Group them by function (API, DB, cache, workers). • Write a minimal service block for each. • Validate with a YAML linter. • Spin up with docker compose up and test connectivity.
So, does creating a Docker‑Compose file from plain requirements feel less intimidating now? With a clear structure, a handy YAML validator, and a few copy‑paste tricks, you can go from spec to running stack in under ten minutes. Need more AI‑powered automation? Check out Assistaix, an AI Business Automation platform that can further streamline your deployment pipelines.
TL;DR
In just minutes you can turn a plain list of services, ports, and env vars into a working docker‑compose.yml, using a simple copy‑paste pattern and a quick YAML validator to avoid syntax errors.
Follow our step‑by‑step checklist and you’ll have a reliable stack up and running without hand‑crafting every line.
Step 1: Analyze Requirements
Before you even think about typing a single line of YAML, you need to stare at the spec and ask yourself, “What does this service actually need to do?” That moment of recognition – the sigh when you realize you have a list of ports, env vars, and maybe a couple of volume paths – is where the magic starts.
Break the list into logical buckets
Grab your requirements doc and start grouping. Usually you’ll see three natural clusters: the API layer, the data layer, and any supporting services like caches or workers. Write them down in plain English, something like “API runs on Node, needs port 3000 and DB connection string; PostgreSQL runs on port 5432 and requires POSTGRES_PASSWORD; Redis runs on 6379 with no extra env vars.” This step turns a dense table into bite‑size stories you can map to Docker‑Compose services.
And if you have a quirky side‑car – say a cron job that pulls data every hour – give it its own bullet point now. The goal is to end up with a short checklist for each component: image, ports, environment, volumes. Once you have that, the rest is almost mechanical.
Validate the shape with a quick tool
One thing that trips a lot of newbies is indentation. A stray space can break the whole file. After you’ve drafted the list, pop it into our JSON to YAML Converter – Free Online Tool – just paste the key‑value pairs and watch the converter format them with proper spacing. It’s a tiny step that saves you from a night of “service not found” errors.
Does the spec mention any secrets? If so, note them now but don’t hard‑code them in the compose file. Keep them in a .env file or a secret manager; you’ll reference them later with ${VAR_NAME}. This keeps your repo clean and your containers secure.
Ask the right questions
Now that you’ve got buckets, ask yourself: Do any services depend on each other? Does the API need to wait for the DB to be ready? Those dependencies become the depends_on clause later, but recognizing them early prevents a cascade of “connection refused” when you finally run docker compose up.
Also, think about scaling. If you know the cache will be hit hard, you might plan to add deploy.replicas later. It’s easier to note that intention now than to rewrite the file from scratch.
So, what’s the output of this analysis phase? A tidy table that looks something like this:
Service | Image | Ports | Env vars | Volumes | Depends on
---|---|---|---|---|---
api | node:18-alpine | 3000:3000 | DB_URL, JWT_SECRET | ./src:/app | db, cache
db | postgres:15 | 5432:5432 | POSTGRES_PASSWORD | pgdata:/var/lib/postgresql/data |
cache | redis:7 | 6379:6379 |  |  |
That table is your blueprint. When you copy it into a docker-compose.yml, each row becomes a service block.
Feeling a little overwhelmed? Don’t worry – you’ve already done the hardest part. The next step will be turning this blueprint into actual YAML, and we’ll show you how to do it without breaking a sweat.
While the video walks you through the visual side of mapping specs to services, remember that every project is unique. If you need an extra layer of automation – say, turning your spec into a ready‑to‑run pipeline – check out Assistaix – AI Business Automation That Works. Their platform can stitch together code generation, CI/CD, and deployment steps so you spend less time wiring and more time building.
And if you’re a team lead wondering how to govern this process across multiple projects, the folks at CTO Input offer strategic guidance on container orchestration standards and best‑practice roadmaps. It’s worth a quick chat before you scale this pattern across your org.
Now that you’ve dissected the requirements, you’re ready to start writing the compose file line by line. Keep the checklist handy – it’ll be your sanity‑preserving reference as you copy, paste, and tweak each service block.

Step 2: Define Services and Dependencies
Now that you’ve turned the raw spec into a clean table, it’s time to map each row to a real Docker Compose service. Think of a service as “the thing that runs” – a container built from an image, with its own ports, env vars, volumes, and, crucially, a list of other services it depends on.
Start with the simplest block. Grab the image name (or a build context if you’re compiling your own code) and drop it under services:. Docker’s docs describe a service definition as a map whose keys are the service names and whose values contain the configuration that will be applied to every container in that service Docker Compose service reference. That’s your foundation.
Step‑by‑step recipe
1. Name it clearly. Use snake_case or kebab‑case, matching what you wrote in the spreadsheet. For example, api, db, cache. Unique names avoid the “service not found” nightmare later.
2. Choose image or build. If you have a Dockerfile, add a build: section; otherwise, reference an official image with image: node:18‑alpine. Remember you can keep the build logic in the same repo and let Compose handle it.
3. Wire ports. Use the short syntax "3000:3000" for host‑to‑container mapping, or just "3000" if you only need internal exposure. Avoid duplicate host ports – the sanity checklist from Step 1 will catch those.
4. Add environment. Pull variables from an .env file or inline with environment:. The env_file attribute can point to multiple files; later ones win if keys clash.
5. Declare volumes. Persistent data (like a Postgres data directory) belongs in a named volume declared at the bottom of the file and referenced here with volumes:. This keeps your containers stateless while preserving state across restarts.
Handling dependencies
Most stacks need one service to be ready before another can start. Docker Compose offers depends_on for ordering, and from version 2.1 onward you can pair it with healthchecks to wait until the dependency is actually healthy Stack Overflow discussion. Here’s a quick pattern:
services:
  db:
    image: postgres:15
    environment:
      POSTGRES_PASSWORD: ${DB_PASSWORD}
    healthcheck:
      test: ["CMD", "pg_isready", "-U", "postgres"]
      interval: 5s
      timeout: 2s
      retries: 5

  api:
    build: ./api
    depends_on:
      db:
        condition: service_healthy
    ports:
      - "3000:3000"
In this example the api container won’t try to connect to the database until db passes its healthcheck. That eliminates the “connection refused” race condition you’ve probably seen in early prototypes.
Sometimes you have a whole group of auxiliary services – a Redis cache, a RabbitMQ broker, a Celery worker. Group them under a shared network (Compose creates a default network for you) and let each service reference the others by name. No IPs to guess, no DNS headaches.
Real‑world scenario
Imagine you’re building a SaaS analytics platform. Your spec lists:
- frontend – React static files served by Nginx on port 80
- backend – Python FastAPI on port 8000, needs
DATABASE_URLandREDIS_URL - db – PostgreSQL on port 5432, persistent storage
- cache – Redis on port 6379
Start with frontend and backend as separate services. Add depends_on: to backend for both db and cache. Give each service a short, expressive description in a comment so future teammates understand why the dependency exists.
# backend depends on the database and cache being healthy
backend:
  build: ./backend
  depends_on:
    db:
      condition: service_healthy
    cache:
      condition: service_healthy
  env_file: .env
  ports:
    - "8000:8000"
Notice the comment – it’s the human‑readable glue that turns a YAML block into documentation.
Tips from the trenches
- Use
restart: unless-stoppedfor services that should survive a host reboot. - Leverage
profiles:to spin up only the core stack during local dev, and add extra services (like a mock email server) in adevprofile. - When a service needs a secret (API key, TLS cert), expose it via the
secrets:top‑level element and grant access per‑service – never hard‑code it.
Need a quick way to verify your YAML syntax before committing? Paste the generated file into SwapCode’s Text to JSON Converter – Convert TXT to JSON – it will flag indentation errors and let you see a JSON view of the structure.
And if you’re curious how this whole stack impacts team productivity, check out a benchmark tool that measures onboarding speed and developer satisfaction Benchmarcx. Seeing the numbers can reinforce why a disciplined compose file matters.
When every service block is defined, every dependency declared, and every volume accounted for, run docker compose config. If the output is clean YAML, you’ve successfully turned the spreadsheet into a production‑ready Docker Compose file.
Step 3: Write the docker‑compose.yml File (Video Walkthrough)
Alright, we’ve already mapped services and sorted dependencies, so now it’s time to turn that mental diagram into a real docker‑compose.yml file. If you’re staring at a blank editor wondering where to start, take a breath – the structure is simpler than it looks.
First thing’s first: open a new file called docker-compose.yml at the root of your project. Paste the version line – we usually go with "3.9" or the latest Compose Specification – and then create the services: map. Everything you drafted in the spreadsheet lives under this key.
Below is a minimal skeleton you can copy‑paste, then fill in with your own values:
version: "3.9"
services:
  # service blocks go here
Notice the comments you added earlier? Keep them right above each service block. A quick comment like # API – Node.js, listens on 3000 becomes priceless documentation for anyone reading the file later.
Now, let’s talk about the tricky bits – healthchecks and depends_on. Docker Compose lets you wait for a database to be ready before the API starts, which saves you from “connection refused” errors during the first boot. Here’s a concise example pulled from the official Compose spec:
services:
  db:
    image: postgres:15
    healthcheck:
      test: ["CMD", "pg_isready", "-U", "postgres"]
      interval: 5s
      timeout: 2s
      retries: 5
  api:
    build: ./api
    depends_on:
      db:
        condition: service_healthy
    ports:
      - "3000:3000"
If you prefer to let Docker handle ordering without healthchecks, just use the short form:
api:
  depends_on:
    - db
Once you’ve filled out all services, run docker compose config. The command renders the final YAML and will scream out any syntax problems. If the output looks tidy, you’ve successfully created the docker compose file from requirements.
So, how do you know the file is truly production‑ready? A quick sanity check: run the config command, verify that every port is unique, ensure env_file points to a .env that contains all secrets, and double‑check that volumes are declared at the bottom of the file.
Need a starter Dockerfile to go alongside your compose file? Our step‑by‑step guide shows how to generate a Dockerfile from a plain description so you can focus on the compose logic without reinventing the wheel.
After the video, commit the docker-compose.yml to your repo, tag it with a version, and consider adding a profiles: section so you can spin up only the core stack during local development. For production, you might add a restart: unless-stopped policy and push the file to your CI pipeline.
Quick checklist before you run docker compose up:
- All service names are unique and lowercase.
- No duplicate host ports.
- Secrets live in
.envor Docker secrets, never hard‑coded. - Healthchecks are defined for stateful services.
- Volumes are declared at the bottom and referenced correctly.
When everything checks out, hit docker compose up -d and watch Docker spin up the stack in seconds. If something goes sideways, the official Compose reference walks you through every attribute, and the Docker Getting Started guide offers a hands‑on tutorial you can follow for deeper troubleshooting.
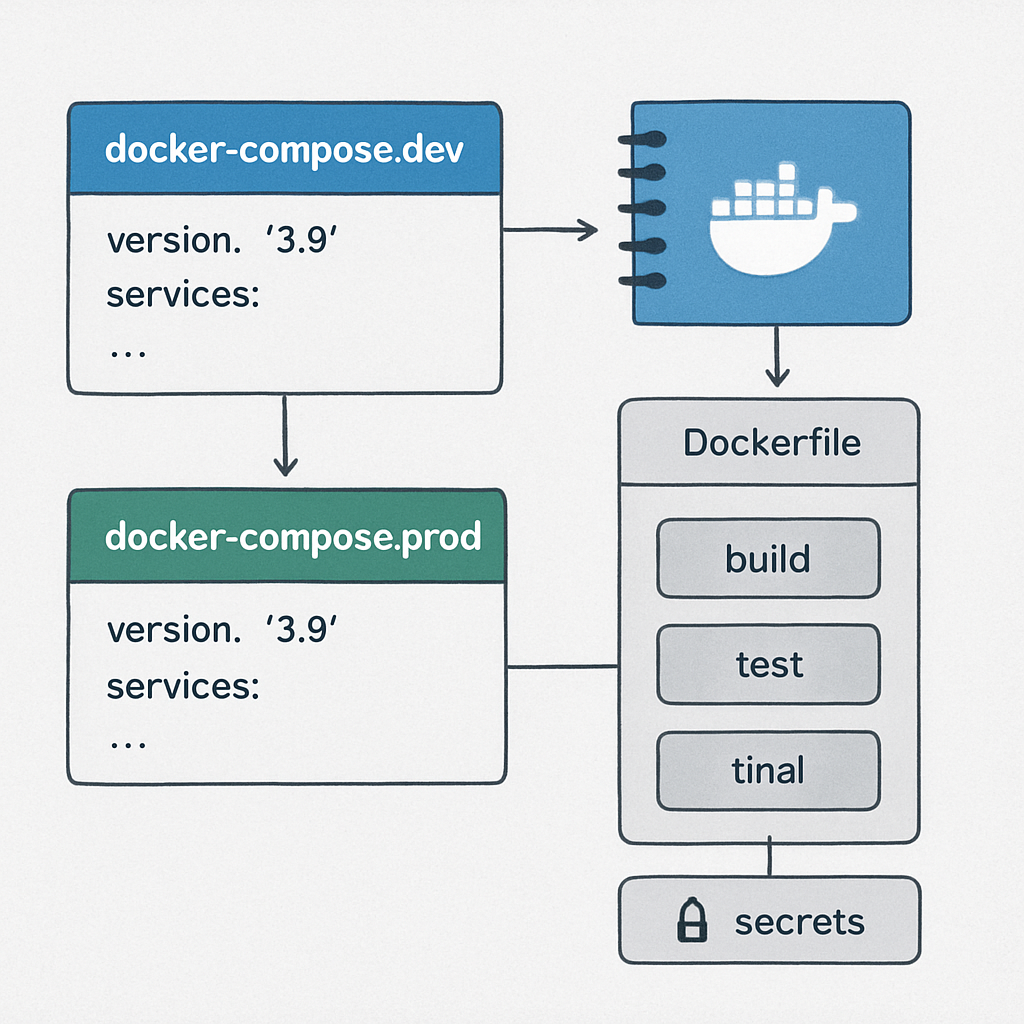
Tip: if you maintain separate compose files for dev and prod, you can use the include top‑level key to merge them at runtime. This keeps your base file lean while still allowing you to override things like replica counts or resource limits for a production deployment. And remember to keep the file under version control – a diff of a compose change is often the fastest way to spot an accidental port clash or a missing secret.
Step 4: Compare Configuration Options
Now that we’ve got the skeleton of our services, the real decision‑making starts: which configuration style fits the way you work? Do you stick with the classic docker‑compose binary, jump to the newer docker compose plugin, or even think about a Kubernetes‑style approach for future scaling? Let’s break it down together.
Option 1 – The original docker‑compose (v1)
This is the Python‑based tool most tutorials still reference. It’s battle‑tested, works on every platform, and the syntax you’ve already written will run without a hitch. The downside? It’s no longer receiving major feature updates, and you might run into subtle behavior differences when you switch to a newer Docker Desktop that prefers the V2 plugin.
Stack Overflow explains that the original python project is now deprecated in favor of the Go‑based rewrite, so keep that in mind if you plan to stay on the cutting edge.
Option 2 – The new docker compose (v2)
Docker has re‑engineered Compose as a CLI plugin written in Go. The command syntax is the same, but under the hood it follows the official Compose Specification and adds a few niceties like better support for profiles and improved networking defaults. One quirky difference: image tags are generated with a hyphen instead of an underscore (myproj‑web vs myproj_web).
Because it ships with Docker Desktop and can be installed as a plugin on Linux, you’ll often see it in CI pipelines today. If you’re writing a fresh compose file, leaning into the V2 command future‑proofs your workflow.
Option 3 – Treating Compose as a stepping stone to Kubernetes
Some teams start with Compose for local development and later migrate to Kubernetes for production. The Compose Specification even includes extensions that map to Kubernetes resources, so the transition isn’t a complete rewrite.
Another Stack Overflow thread highlights the high‑level gaps between Compose and Kubernetes, reminding us that Compose shines for single‑host setups while Kubernetes handles multi‑node orchestration.
How to pick the right option for your project
Ask yourself these quick questions:
- Is the stack staying on a single server or a single developer machine? If yes, the original
docker‑composeis still fine. - Do you need the latest Compose Specification features like
profilesor better health‑check handling? Then go withdocker compose. - Are you planning a cloud‑native rollout or expect to scale beyond one host? Consider a migration path to Kubernetes now, and keep your compose file tidy so tools like Free AI Code Converter can help you generate compatible manifests later.
Actionable checklist for comparing options
1. Run a version audit. Execute docker compose version and docker‑compose version side by side. Note the installed versions and whether the V2 plugin is available on your CI agents.
2. Test a health‑check scenario. Add a simple healthcheck to your database service and run the stack with both commands. Observe if the depends_on condition behaves identically.
3. Validate image naming. Build a service and inspect the generated image tag. If you rely on a naming convention for CI tagging, pick the command that matches your pattern.
4. Prototype a Kubernetes export. Use docker compose config > compose.yml and feed the file into a tool like Kompose later. Keeping the file minimal now saves you headaches later.
Comparison table
| Feature | docker‑compose (v1) | docker compose (v2) | When to choose |
|---|---|---|---|
| Implementation language | Python | Go (CLI plugin) | Prefer v2 for performance and future updates |
| Image tag format | project_service (underscore) | project-service (hyphen) | Pick v2 if your CI expects hyphenated tags |
| Profile support | Limited | Native profiles: key |
Use v2 when you need dev/prod isolation |
| Installation footprint | Standalone binary | Docker plugin (Docker Desktop included) | v1 if you can’t install plugins on the host |
Bottom line: there’s no one‑size‑fits‑all answer. If you’re building a quick proof‑of‑concept, the old docker‑compose will get you there in minutes. If you’re setting up a reproducible CI pipeline or thinking about scaling out, jump to the newer docker compose command and start sprinkling in profiles and health‑checks now. And keep the migration path open – a tidy compose file can later be turned into Kubernetes manifests without rewriting everything from scratch.
Step 5: Validate and Test the Compose Setup
Alright, you finally have a docker-compose.yml that mirrors the spreadsheet you built earlier. The next question is: does it actually work, or are we just staring at pretty YAML?
First thing we do is run the built‑in config renderer. docker compose config spits out a fully interpolated version of the file – all variables expanded, defaults applied, and any extends merged. If you see a clean block of YAML with no errors, you’ve passed the first sanity gate.
Spot‑check the mapping structure
Docker expects the services key to be a mapping (a dictionary of name‑to‑definition). A common typo is to forget the dash before a service block, which makes the parser think you’re feeding a list instead of a map. That triggers the “services.xxx must be a mapping” error that many newbies hit.Docker community members explain why this happens. The fix is simply to line up the service name with its child keys, using two spaces for indentation.
Run the config command again after you straighten any indentation. If the output still complains, copy the offending snippet into a plain‑text editor that shows invisible characters – sometimes a stray tab or non‑printable byte sneaks in during copy‑paste.
Validate healthchecks and depends_on conditions
Healthchecks are the safety net that lets depends_on wait for a container to be ready. Spin up the stack with docker compose up -d and then peek at the logs:
docker compose logs -f db
docker compose logs -f api
If the API keeps retrying “connection refused,” your DB healthcheck probably never passed. Adjust the interval, timeout, or retries until the DB reports healthy within a reasonable window.
Tip: you can force a quick healthcheck run with docker compose exec db pg_isready -U postgres (or whatever command matches your service). When it returns “accepting connections,” you know the condition will succeed.
Cross‑check the command flavour
Are you using the old docker‑compose binary or the newer docker compose plugin? The two accept the same YAML, but subtle differences (like how image tags are generated) can trip you up later in CI.The Docker forums break down the version nuances. Run both docker-compose version and docker compose version on your machine; if one is missing, install the plugin so you’re not stuck with an outdated parser.
Once you’ve confirmed you’re on the right side, re‑run docker compose up without the -d flag. Watching the containers start in the foreground gives you immediate feedback on ordering, environment variable substitution, and volume mounting.
Run a quick functional test
Pick one endpoint from each service and hit it with curl or your browser. For example, curl http://localhost:3000/health for the API and docker compose exec cache redis-cli ping for Redis. If every call returns the expected response, you’ve proved the stack is not just syntactically correct but also operational.
Don’t forget to verify that external ports aren’t colliding with other apps on your host. A netstat -tuln sweep before you launch can save you an “address already in use” headache.
Checklist before you call it done
- Run
docker compose config– no errors, all variables resolved. - Indentation clean –
servicesis a mapping, not a list. - Healthchecks defined for stateful services;
depends_onusescondition: service_healthy. - Using the same Compose flavour locally and in CI.
- All ports unique, volumes declared, and secret values pulled from
.envor Docker secrets.
When that list is all green, you’ve truly created docker compose file from requirements that survives a real‑world spin‑up. Keep the file under version control, tag the commit, and you’re ready to hand the stack off to teammates or your CI pipeline.
Step 6: Optimize for Production
All right, you’ve got a compose file that runs locally. Now the real question is: how do we turn that into a rock‑solid production stack without pulling our hair out?
First, let’s pause and think about why production feels different. It’s not just “run it forever.” It’s about security, performance, and keeping the lights on when traffic spikes.
Separate dev and prod configs
Never mix development tweaks with production settings. The cleanest way is to keep two files – compose.dev.yaml and compose.prod.yaml. The dev file can have hot‑reload, extra debugging tools, and relaxed resource limits. The prod file focuses on minimal layers, read‑only filesystems, and strict healthchecks.
Here’s a quick snippet that shows the idea:
services:
  api:
    build:
      context: ./api
      target: prod   # <-- only the production stage
    environment:
      - APP_ENV=production
    restart: unless-stopped
    deploy:
      resources:
        limits:
          cpus: "1"
          memory: 512M
Notice the target: prod line? It tells Docker to use the production stage from a multi‑stage Dockerfile – exactly what the official Docker production setup guide for Laravel recommends.
Trim the image down
Multi‑stage builds are your best friend. In the first stage you install everything you need to compile assets, run tests, or run migrations. The second stage copies only the runtime bits. That means your final image is tiny, starts faster, and has a smaller attack surface.
Typical Laravel example (you can adapt it to Node, Python, whatever):
# Build stage
FROM php:8.2-fpm as builder
WORKDIR /app
RUN apt-get update && apt-get install -y git unzip
COPY . .
RUN composer install --no-dev --optimize-autoloader

# Production stage
FROM php:8.2-fpm-alpine as prod
WORKDIR /app
COPY --from=builder /app /app
EXPOSE 9000
All the dev‑only extensions stay in the builder, leaving the prod image lean.
Secure secrets and env vars
Never bake passwords or API keys into the compose file. Use Docker secrets for anything that needs to stay out of version control, and reference them with secrets: under each service. For simple .env files, keep them outside the repo and mount them at runtime with env_file:.
Example:
services:
  db:
    image: postgres:15
    secrets:
      - db_password
    environment:
      POSTGRES_PASSWORD_FILE: /run/secrets/db_password
secrets:
  db_password:
    file: ./secrets/db_password.txt
This way the password never appears in plain text anywhere Docker logs.
Healthchecks and graceful shutdowns
Production containers should know when they’re healthy and when it’s time to exit. Add a healthcheck that actually probes your app – a simple curl to a /health endpoint works for most services.
Also, give each container a stop_grace_period so Docker can wait for ongoing requests to finish before killing the process.
healthcheck:
  test: ["CMD", "curl", "-f", "http://localhost:3000/health"]
  interval: 10s
  timeout: 3s
  retries: 3
stop_grace_period: 30s
Resource limits and scaling
Even if you’re running on a single VM, it’s worth telling Docker how much CPU and memory each service can chew. That prevents a runaway Node process from starving the database.
Use the deploy.resources.limits block (Docker Swarm) or the newer resources section if you’re on Docker Compose V2.
deploy:
  resources:
    limits:
      cpus: "0.5"
      memory: 256M
When you need to scale horizontally, just add replicas: 3 under deploy and let the orchestrator handle the rest.
Logging and monitoring hooks
Production isn’t “set it and forget it.” Hook your services into a centralized log driver (like json-file with rotation, or a remote syslog) so you can trace errors after the fact.
For quick visibility, add a sidecar like fluentd or ship logs to a cloud provider. The key is to avoid “log bloat” – rotate files and keep only the last few days.
Final checklist before you push
- Two compose files: dev vs. prod, with clear
targetstages. - Multi‑stage Dockerfile that strips dev tools.
- All secrets handled via Docker secrets or external .env files.
- Healthchecks on every stateful service.
- Resource limits defined for CPU and memory.
- Graceful shutdown period set.
- Log driver configured and rotation in place.
Run docker compose -f compose.prod.yaml config one last time. If the output is clean, you’ve turned that messy requirements list into a production‑ready compose stack.
And remember, production is a marathon, not a sprint. Keep the file under version control, tag each change, and treat every tweak as a small, testable improvement.
FAQ
How do I begin to create docker compose file from requirements?
First, grab the raw spec—maybe a spreadsheet, a Google Doc, or a plain‑text list. Paste every service, port, and env var into a single table. Give each row a quick description of what the component actually does; that mental model is the bridge between “just data” and a working service block. Once the table is clean, copy the rows into the services map of a new docker-compose.yml and you’re already halfway there.
What’s the safest way to validate the YAML before I run it?
Run docker compose config locally. The command renders a fully interpolated version of the file, expands variables, and will immediately scream out any syntax or indentation errors. If the output looks like tidy YAML, you’ve passed the first sanity gate. As a second check, feed the file into a free online JSON‑to‑YAML converter to see the same structure in a different format—any mismatch usually points to a stray tab or missing space.
How can I make sure my services start in the right order?
Use depends_on together with healthchecks. Define a lightweight healthcheck for each stateful service (for example, pg_isready for Postgres). Then add depends_on: db: condition: service_healthy to any service that needs the database. Docker will wait until the healthcheck reports “healthy” before launching the dependent container, which eliminates the classic “connection refused” race condition you’ve probably seen in early prototypes.
When should I split the compose file into dev and prod versions?
Whenever you start adding things like hot‑reload, extra debugging tools, or relaxed resource limits, it’s time for a separate compose.dev.yaml. Keep the production‑only file lean: enable restart: unless‑stopped, set strict resources.limits, and point to the production stage of a multi‑stage Dockerfile with target: prod. At deployment time you simply run docker compose -f compose.prod.yaml up -d, and you’re sure no dev‑only baggage is leaking into production.
How do I keep secrets out of the compose file?
Never hard‑code passwords or API keys. Store them in a .env file that lives outside version control, or better yet use Docker secrets: define the secret at the top level and reference it with secrets: under each service. In the service block, map the secret to an environment variable file like POSTGRES_PASSWORD_FILE: /run/secrets/db_password. This way the plain text never appears in the compose file or Docker logs.
What resource limits should I apply to avoid one container starving the others?
Start with modest caps—maybe cpus: "0.5" and memory: 256M for a small API, and scale up as you monitor real usage. Add the limits under deploy.resources.limits (or the newer resources block for Compose V2). The limits act like a safety net: if a Node process tries to eat all RAM, Docker will throttle it, keeping the database and cache responsive.
How can I troubleshoot a stack that won’t start after I’ve written the file?
First, run the stack without -d so you can see the live logs. Look for “waiting for service_healthy” messages—that usually means a healthcheck is failing. Next, exec into the offending container (docker compose exec db bash) and run the healthcheck command manually; you’ll see the exact error. Finally, double‑check that host ports aren’t already in use with netstat -tuln and that all volumes are declared at the bottom of the file.
Conclusion
So, you’ve walked through turning a raw spec into a clean docker‑compose.yml, added secrets, healthchecks, and resource limits.
If any step felt fuzzy, remember the simple mantra: define, map, test, repeat.
Does it all still sound overwhelming?
The good news is that each piece lives in a predictable place – services under the top‑level map, secrets at the root, and limits inside the deploy block.
When you run docker compose config and see a tidy YAML dump, you’ve already passed the hardest gate.
What’s the next move?
Commit the file, tag the commit, and spin up the stack in your CI pipeline – the same commands that got you here will now automate deployments.
Keep the dev and prod variants separate, lock down secrets with Docker secrets, and let healthchecks guard your services; that’s the recipe for a reliable production launch.
Ready to put this into practice on your next project?
Grab your spreadsheet, feed it into SwapCode’s free AI generator if you need a quick starter, then let the steps above turn it into a production‑ready compose file.
And remember – a well‑crafted docker compose file is a living document; revisit it whenever services evolve, and your team will thank you for the clarity.