How to Use a Mock Data Generator from JSON Schema Online for Faster Development
Ever found yourself staring at a JSON schema and wondering how to get realistic mock data without spending hours writing it by hand? You’re not alone—most devs hit that wall when a new API lands on their desk and the test suite complains about missing payloads.
Imagine you’re building a checkout flow and the spec says each order must include a customer object, an array of line items, and a nested payment method. Manually crafting that JSON for every test case quickly becomes a slog, and the risk of typos skyrockets. That’s where a mock data generator from JSON schema online becomes a lifesaver.
One real‑world example: a fintech startup needed to simulate hundreds of transaction records to stress‑test their fraud detection engine. By uploading their OpenAPI schema to an online generator, they instantly received varied, schema‑compliant payloads—saving days of manual data entry.
Another scenario: you’re a freelance dev polishing a demo app for a client. Instead of hard‑coding user profiles, you feed the user schema into a generator and instantly get diverse usernames, emails, and profile pictures that look like real data, making the demo feel polished.
Here’s a quick three‑step recipe you can try right now:
1️⃣ Paste your JSON schema into the generator’s input box.
2️⃣ Choose the number of mock records you need and any custom value ranges (e.g., dates within the past year).
3️⃣ Hit “Generate” and download the JSON array or copy it straight into your test fixtures.
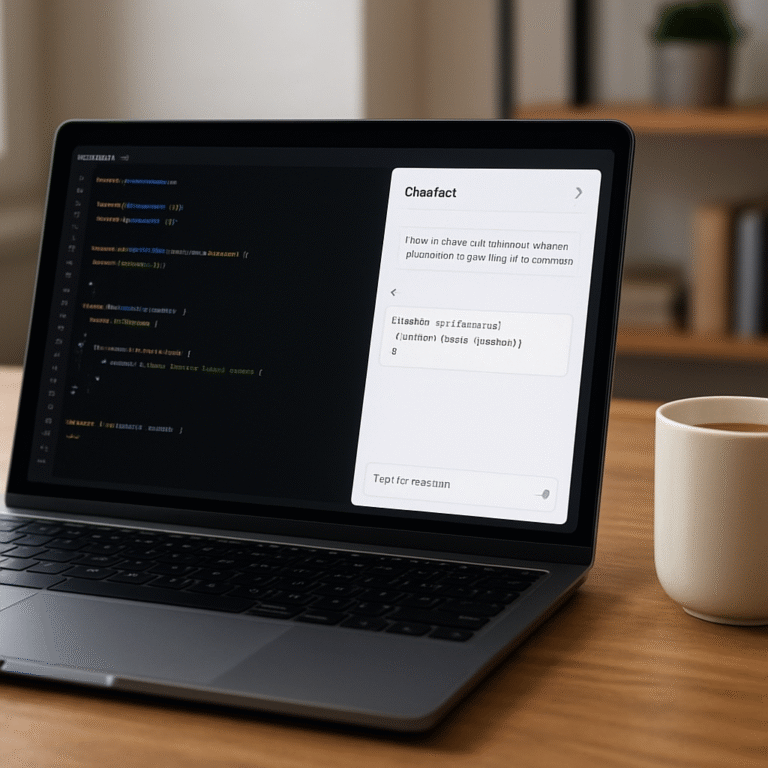
Tip: Pair the generated mock data with Free AI Test Code Generator – Generate Unit Tests Online … to spin up unit tests in seconds. The test generator can consume those mock objects and scaffold assertions, turning raw data into a full testing suite.
If you want to share your findings or write a tutorial about this workflow, the automated content engine at Rebelgrowth can help you spin up SEO‑optimized posts that reach the right developer audience.
So, does a mock data generator sound like the missing piece in your dev toolbox? Give it a try, and you’ll see how much smoother your testing pipeline becomes.
TL;DR
A mock data generator from JSON schema online instantly creates realistic test records, letting you skip manual payload crafting and speed up development any project.
Just paste your schema, choose quantity, hit generate, in seconds, and copy the JSON into your fixtures—your tests become reliable, and your demos look polished.
Step 1: Understand JSON Schema Basics
Ever opened a swagger spec and felt a little panic because the JSON schema looked like a foreign language? You’re not the only one. That moment of “what does this even mean?” is the perfect place to pause, take a breath, and break the spec down to its simplest parts.
At its core, a JSON schema is just a contract. It tells your code – and anyone reading the file – what shape a JSON payload should have. Think of it like a blueprint for a tiny house: you define the rooms (properties), the materials (data types), and which doors must stay locked (required fields).
Key building blocks
The most common keywords you’ll bump into are type, properties, required, and format. type can be string, number, object, array, etc. properties is a map where each key is a field name and the value is its own mini‑schema. required is an array of property names that must appear, and format gives hints like email or date-time for validation libraries.
Here’s a tiny example that you might have seen in a checkout API:
{
  "type": "object",
  "properties": {
    "orderId": { "type": "string" },
    "total": { "type": "number" },
    "customer": {
      "type": "object",
      "properties": {
        "email": { "type": "string", "format": "email" },
        "name": { "type": "string" }
      },
      "required": ["email"]
    }
  },
  "required": ["orderId", "total", "customer"]
}
Notice how each level repeats the same pattern – type, properties, required. Once you get comfortable with that recursion, the rest feels much less intimidating.
Why the basics matter for mock data
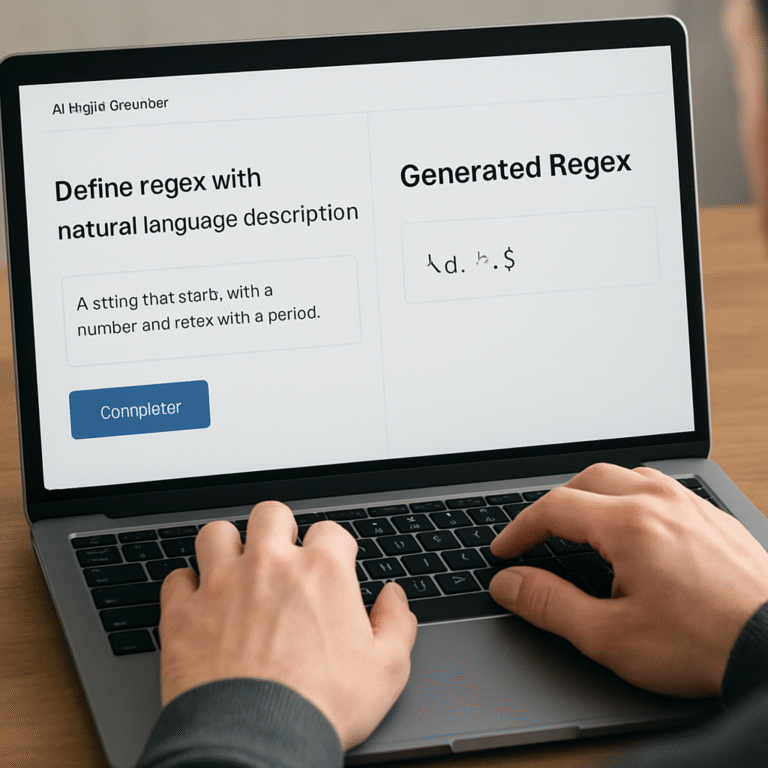
If you try to generate mock data without respecting these rules, you’ll end up with payloads that instantly fail validation. That’s a waste of time, especially when you’re trying to speed up test suites. A solid grasp of the schema lets you tell a mock data generator from JSON schema online exactly what to fill in – and what to leave out.
When you paste your schema into the generator, it reads those type and format clues and spits out realistic values: email strings that actually look like emails, numbers within sensible ranges, and nested objects that obey the required list. It’s the difference between feeding your tests a hand‑typed stub and getting a fully‑fledged, schema‑compliant JSON payload in seconds.
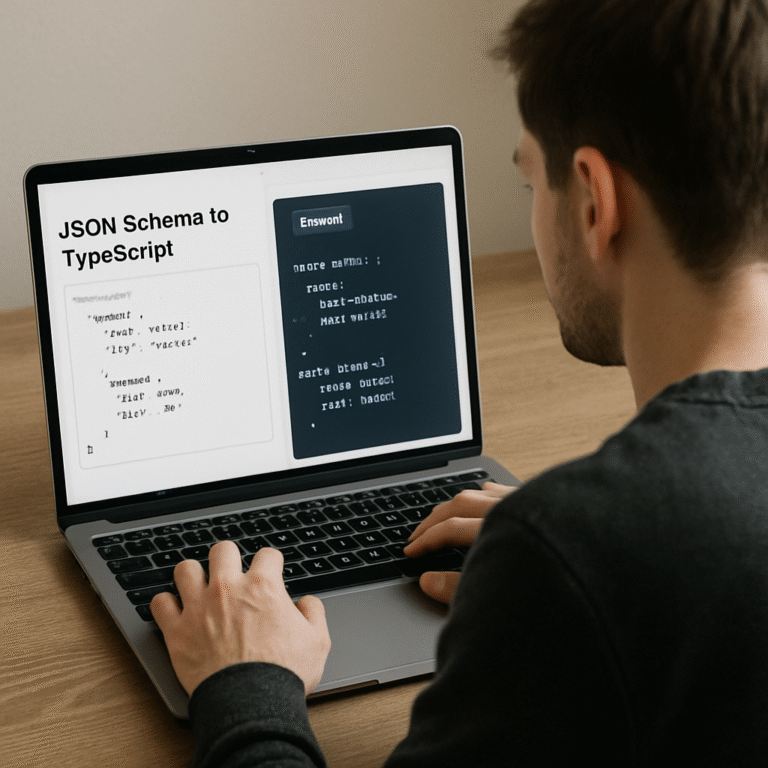
Want to see how the schema drives the mock output? Try the JSON‑to‑TypeScript types guide on SwapCode – it walks you through the same schema parsing logic, just with a focus on type generation instead of mock data.
Quick tip: always start with the top‑level type and work your way down. If you see an array, ask yourself what each item should look like and define an items schema accordingly. That way the generator knows whether to produce a list of strings, objects, or mixed types.
Here’s a short checklist you can keep on a sticky note while you’re reviewing a schema:
- Is the top‑level
typeset toobject? - Are all required fields listed under
required? - Do you have
formathints for strings that need a specific shape (email, date‑time, uri)? - For arrays, is there an
itemsdefinition?
Once you’ve ticked those boxes, you’re ready to feed the schema into the mock generator and let it do the heavy lifting.
And if you ever need a visual refresher, this short video walks through the schema‑to‑mock process step by step.
After the video, give the generator a spin with a real schema from your project. You’ll be amazed at how quickly you get a JSON array that matches every required field, respects format, and even includes realistic sample data.

Finally, remember that good mock data isn’t just about passing validation – it’s about mimicking real‑world diversity. Pair the generated payloads with tools like the automated content engine from Rebelgrowth to quickly spin up documentation or blog posts that showcase your API. And when you need to test a WordPress plugin that consumes that JSON, you can rely on WordPress maintenance services from WPLeaf to keep your test environment stable and up‑to‑date.
Take a moment now: open the schema you’re struggling with, run it through the mock generator, and watch the JSON appear. You’ll see instantly how understanding the basics turns a confusing spec into a powerful testing ally.
Step 2: Choose an Online Mock Data Generator
Now that you’ve got a solid schema, the next decision feels a bit like picking a coffee shop for your morning brew – you want something fast, reliable, and that doesn’t leave a bitter aftertaste. A good mock data generator from JSON schema online should let you paste the schema, tweak a few options, and walk away with realistic payloads in seconds.
What to look for in the UI
First, open the tool and scan the interface. If the input box is huge and the button says “Generate” in plain text, you’re already on the right track. Look for clear sections where you can set the number of records, choose output format (JSON, CSV, or even SQL), and add custom rules like date ranges or enum overrides.
Second, check whether the generator respects constraints you defined – minimum, maximum, patterns, and required fields. A quick sanity test is to generate a single record and verify that a quantity field never drops below 1, or that an email field follows the proper @ pattern. If the tool skips those rules, you’ll waste time fixing validation errors later.
Real‑world examples
Imagine you’re building a fintech dashboard that shows recent transactions. Your schema says each transaction has amount (number), currency (enum of USD, EUR, GBP), and timestamp (date‑time). You fire up an online generator, ask for 50 rows, and set the date range to the past 30 days. The result is a mix of amounts like 124.57, 9.99, and timestamps that look exactly like the ones your API would return. You can drop that JSON straight into your integration test suite.
Another scenario: a marketing team needs a CSV of fake user profiles to demo a new personalization engine. They paste the user schema, select CSV output, and tick the “include header” box. Within a click they have a file with columns for firstName, lastName, email, and even a random avatarUrl. No more manual copy‑pasting, and the data feels authentic enough that stakeholders think it’s real.
Step‑by‑step checklist
- Visit a reputable mock data generator (look for reviews or community recommendations).
- Paste your JSON schema into the main input area.
- Set the record count – start small (5‑10) to verify compliance, then scale up.
- Adjust optional settings: date windows, enum weighting, string length, or custom regex.
- Choose the output format that matches your workflow – JSON for API tests, CSV for spreadsheets, SQL for direct DB seeding.
- Click “Generate” and preview the first few records.
- Run a quick schema validation (most generators include a “Validate” button) to catch mismatches early.
- If you need to share the data with non‑technical teammates, consider converting the JSON into a PDF report using the JSON to PDF Converter. It creates a clean, printable document that’s perfect for design reviews.
Does this feel doable? Absolutely. Most tools let you repeat the process with a single click, so you can generate fresh data every time your schema evolves.
Tips from the community
Developers often recommend a generator that supports custom scripts – you can write a tiny JavaScript snippet to force a field like status to be “approved” 70% of the time and “pending” 30% of the time. That extra realism helps load‑testing tools simulate real traffic patterns.
If you’re juggling multiple environments (dev, staging, prod), give each its own generator profile. That way you can lock down production‑like data ranges while keeping dev data more random.
Automation hook
When you start generating data at scale, consider wiring the generator into your CI pipeline. A simple curl command can pull new mock rows before each test run, ensuring your suite always works against fresh, schema‑compliant data.
And if you want to go a step further, check out Assistaix’s AI business automation platform – it can orchestrate the whole mock‑data‑to‑test‑run workflow, so you spend less time clicking and more time shipping code.
Step 3: Generate Mock Data Using Your JSON Schema
Kick off with a sanity‑check run
Before you fire the generator at scale, grab a single record. That quick peek tells you whether the tool respects minimum, enum, and pattern rules you defined earlier. If the orderId looks like a random string instead of the “ORD‑” prefix you expect, you know you need to tweak the schema or add a custom rule.
Most online generators let you drop a tiny JavaScript snippet right in the UI. You could, for example, force the status field to be “approved” 70 % of the time and “pending” the rest. It’s a neat trick that makes load‑testing feel a lot more realistic.
Step‑by‑step: From schema to a ready‑to‑use JSON file
- Open your chosen mock data generator and paste the full JSON schema into the large input box.
- Set the record count. Start with 5‑10 rows – enough to eyeball compliance without drowning in noise.
- Adjust optional settings:
- Date window (e.g., past 30 days for
createdAt). - String length limits for IDs.
- Custom regex for fields like
phoneNumberorzipCode.
- Date window (e.g., past 30 days for
- If you need a little extra randomness, pull in a Random String Generator to seed unique identifiers that match your business pattern.
- Choose the output format – JSON for API tests, CSV for spreadsheets, or even SQL inserts if you plan to seed a dev database directly.
- Hit “Generate” and download the file.
- Run a quick validation pass. Many generators include a “Validate against schema” button; otherwise, paste the result into a JSON validator (like jsonschema.net) to catch any stray mismatches.
Real‑world scenario: E‑commerce checkout stress test
Imagine you’re about to launch a Black Friday sale. Your checkout API expects an order payload with nested customer, lineItems, and paymentMethod objects. You need 10 000 diverse orders to simulate traffic spikes.
Using the steps above, you generate 10 000 rows, set the timestamp range to the last two weeks, and weight the paymentMethod enum so that credit cards appear 60 % of the time, PayPal 30 %, and “applePay” 10 %. The result is a massive JSON array that you can feed straight into your load‑testing tool (e.g., k6 or JMeter) without writing a single line of mock data code.
Automation tip: Hook it into CI/CD
When your schema evolves – maybe you add a new discountCode field – you don’t want to manually rerun the generator. A simple curl command can pull fresh mock rows right before your test suite runs:
curl -X POST -H "Content-Type: application/json" \
     -d @mySchema.json https://mockapi.example.com/generate?count=20 > mock-data.json
Store mock-data.json as a test fixture and let your CI pipeline fetch it each build. This guarantees your tests always validate against the latest schema.
Expert insight: Blend mock data with unit‑test scaffolding
Once you have clean JSON payloads, you can hand them to SwapCode’s Free AI Test Code Generator (already introduced earlier) to auto‑generate Jest or PyTest stubs. The generator reads the same schema, so your mock data and test code stay perfectly in sync.
That combination cuts the time from “write a test” to “run a test” down to minutes, which is why many teams report dramatically faster feedback loops.
Beyond JSON: When you need PDFs or spreadsheets
If a product manager wants to review the sample data without opening a code editor, export the JSON to CSV or PDF. Most generators have a one‑click export, or you can pipe the output into a simple script that uses pandoc or xlsxwriter.
Putting it all together
So, what’s the final checklist?
- Validate the schema first – you don’t want hidden errors.
- Generate a small test batch, inspect manually.
- Fine‑tune custom rules (enum weighting, regex, date windows).
- Export in the format your downstream tool needs.
- Automate the fetch step in your CI pipeline.
- Optionally, feed the data into an AI test generator for instant test scaffolding.
Doing this once gives you a reusable “mock data factory” that you can call on any project, any environment. And if you want to push the automation even further – like orchestrating mock‑data creation, test execution, and reporting in one flow – check out Assistaix. Their AI‑driven platform can stitch together the generator, your CI runner, and a dashboard so you spend less time clicking and more time shipping code.
Step 4: Customize and Export Mock Data
Okay, you’ve got a batch of raw JSON records, but they’re still a little too generic for real‑world testing. This is where the magic of customization kicks in – you tell the generator exactly how you want each field to behave, then pull the data out in the format your team actually consumes.
Fine‑tune individual fields
Most online mock data generators let you attach a tiny snippet of JavaScript or a simple rule to any property. Need order IDs to start with ORD‑ and be ten characters long? Add a rule that prefixes "ORD-" and pads the rest with random digits. Want email addresses from a specific domain for staging environments? Set the email pattern to /.+@staging\.example\.com/. These tweaks keep the data realistic without you having to edit each record by hand.
Think about it this way: you’re not just generating data, you’re shaping a miniature version of your production universe. When the mock payload looks like the real thing, your integration tests stop throwing false positives.
Apply conditional logic
Sometimes a field’s value depends on another field. For example, a paymentMethod of "creditCard" might require a cardNumber, whereas "paypal" would omit it. Many generators support if/else style hooks – you can write a small function that checks paymentMethod and either injects a dummy card number or leaves the field empty.
In a recent Stack Overflow thread, developers pointed out tools like JSON Schema Faker that let you embed such conditional scripts directly in the schema‑driven workflow. That means you can keep the logic right where the schema lives, and the generator will honor it automatically.
Batch size and performance considerations
Start small – generate 5‑10 records and manually verify that your custom rules work. Once you’re happy, ramp up to the volume you need for load testing or bulk seeding. If you’re hitting memory limits in the browser, try the “stream” mode some tools offer, which writes each record to a temporary file instead of keeping everything in RAM.
Does this feel overwhelming? Not really. It’s just a series of tiny, repeatable steps, and you can save them as a profile for future runs.
Now that you’ve sculpted the data, let’s talk about getting it out of the generator and into your pipeline.

Export formats you’ll actually use
JSON is great for API tests, but your stakeholders often need CSV for spreadsheets, or even SQL INSERT statements for quick DB seeding. Most generators ship with a one‑click export toggle – just pick the format, hit “Export,” and you’ve got a file ready to drop into your CI job.
If you need a PDF report for product managers who don’t touch code, you can pipe the JSON through a simple conversion script or use the built‑in PDF export feature that some tools provide.
Comparison of common export options
| Export Format | Best Use Case | Quick Tip |
|---|---|---|
| JSON | API unit/integration tests | Validate against schema after export |
| CSV | Data analyst reviews, spreadsheets | Include header row for column names |
| SQL | Seeding dev databases quickly | Wrap output in a transaction block |
Quick checklist before you close the generator:
- Confirm custom prefixes, regex, and conditional rules are applied.
- Run a schema validation pass on the exported file.
- Choose the export format that matches the next step in your workflow.
- Save the generator profile so you can repeat the exact setup later.
- Commit the export script to your repo for reproducible CI runs.
When you automate these steps, generating fresh, realistic mock data becomes as easy as running a single command in your pipeline. That’s the final piece of the “mock data factory” puzzle – you’ve customized, you’ve exported, and now you’re ready to ship code with confidence.
Step 5: Integrate Mock Data into Your Development Workflow
Alright, you’ve got a nice batch of JSON that matches your schema, but the magic only happens when that data lives inside the same pipeline you use to build, test, and ship code.
Why integration matters
If mock data sits on your desktop, it’s easy to lose track of versions, and your teammates will quickly start pulling stale files. By weaving the generator into your repo, every branch automatically gets the right shape of data, and you avoid the “it works on my machine” trap.
Step‑by‑step: bring mock data into your repo
1. Save the generator profile. Most online tools let you export a JSON configuration that includes field rules, enum weights, and date windows. Drop that file (e.g., mock‑config.json) into a tools/ folder and commit it.
2. Add a tiny NPM script. In package.json create a script called generate:mock that calls the tool’s CLI or a curl request. Example:
{
  "scripts": {
    "generate:mock": "curl -X POST -H \"Content-Type: application/json\" -d @tools/mock-config.json https://mockapi.example.com/generate?count=20 > src/__mocks__/sample.json"
  }
}
3. Decide where the output lives. For unit tests you might keep the file under src/__mocks__/. For database seeding, write a .sql file in db/seeds/. The key is that the path is part of the source tree, not a stray download folder.
4. Run the script locally. Before you push, execute npm run generate:mock and glance at the result. If something looks off, tweak mock-config.json and repeat – the loop is fast enough to become part of your daily routine.
Hook mock data generation into CI/CD
Now that you have a reproducible command, add it to your CI pipeline. Most CI providers let you run arbitrary shell steps, so insert a “generate mock data” stage right before the test job.
steps:
  - checkout: self
  - script: npm install
  - script: npm run generate:mock   # ← fresh data every build
  - script: npm test
Because the script pulls the latest schema from your repo, every build validates against the exact contract you just committed. If the schema changes, the CI run will instantly fail – a built‑in safety net.
Real‑world example: feature‑flag testing
Imagine your product team rolls out a new “premium” flag that toggles extra fields in the user payload. You add a premium boolean to the schema and update the mock config to weight it at 15 % true. Each CI run now produces a handful of premium users, letting your integration tests verify both code paths without any manual test data creation.
When the flag is later retired, simply remove the property from the schema and the generator stops emitting it. No test files need to be edited – the change propagates automatically.
Troubleshooting schema references
If your generator complains about “unable to load reference” errors, it’s often a proxy or certificate issue in the editor. A quick fix is to adjust VS Code’s proxy settings, as suggested on Stack Overflow. Once the editor can resolve external schemas, your CI step will also be able to fetch them without a hitch.
Quick checklist
- Commit
mock-config.jsonalongside the JSON schema. - Add an NPM script (or Make target) that regenerates the data.
- Store generated files in version‑controlled folders (
__mocks__,seeds). - Insert the script as a pre‑test step in your CI pipeline.
- Validate the output against the schema each run.
- Document any custom weighting or conditional logic for teammates.
Once you’ve wired everything up, generating fresh, schema‑compliant mock data becomes as routine as running npm test. That consistency not only speeds up development, it also builds confidence that every environment – local, CI, or staging – is speaking the same data language.
Give it a try today: push a tiny change to your schema, watch the CI pipeline spin up new mock rows, and see your tests pass without a single manual edit. That’s the sweet spot where automation meets reliability.
Step 6: Advanced Tips & Best Practices
Now that you’ve wired the generator into your repo, it’s time to squeeze every ounce of reliability out of it.
Advanced tip #1: lock down data security from the get‑go. If you’re feeding sensitive fields into a cloud‑based mock generator, double‑check where the data lives. The Liquid Technologies online converter warns that data is stored on its servers unless you tick the “process locally” box, so for anything confidential you’ll want to run the tool on your own machine or enable the local‑processing mode according to the tool’s documentation.
But what if you still need the convenience of a web UI for quick sanity checks?
You can keep a lightweight profile in your repo and spin up the generator in a Docker container that points at the same schema. That gives you the UI feel without ever sending data off‑site.
Advanced tip #2: use the built‑in advanced options to control payload size. Most generators let you cap array lengths or string lengths. Set a reasonable max—say 20 items for a line‑items array—so your CI runs stay fast and you don’t accidentally explode memory.
Ever watched a test suite grind to a halt because a mock payload grew to megabytes?
Trim it down with a custom rule in the config file, e.g., “maxItems: 10” for any nested array. You still get realistic variety without the slowdown.
Advanced tip #3: version‑control your mock‑config.json side by side with the schema. Treat it like any other source file: commit changes, review them in pull requests, and tag releases. When the schema bumps a version, the config can evolve in lockstep, guaranteeing that generated data always matches the contract.
Does that sound like extra overhead?
Not really—once it’s in version control the generator becomes a deterministic step in your pipeline, and you avoid the “my local mock data is different” surprise.
Advanced tip #4: sprinkle conditional logic directly into the schema using if/then/else keywords. That lets you model mutually exclusive fields without writing external scripts. For instance, if paymentMethod is “paypal” you can omit cardNumber, and the generator will respect that rule automatically.
Give it a quick test: generate a single record, look at the output, and verify the conditional branch fired. If it didn’t, tweak the schema and re‑run until it behaves exactly as your business rules expect.
Advanced tip #5: automate validation as a gate before you publish mocks. Add a step that runs a JSON Schema validator against the freshly generated file. If the validator flags any mismatch, fail the build. This catches schema drift early.
What’s the point of generating data if it can’t pass the same checks your real API does?
You can use any CLI validator, or even the online validator from Liquid Technologies, which supports unlimited data sizes when you run it locally.
Advanced tip #6: seed deterministic randomness for reproducible test runs. Most generators accept a seed value; set it in your config so every CI run produces the same set of records. That makes snapshot testing a breeze because you know exactly what the mock payload will look like.
If you need variation, bump the seed number in a separate nightly job. You get fresh data for load testing while still having stable data for unit tests.
Advanced tip #7: clean up after generation. Add a script that removes temporary mock files from the workspace after the test step finishes. Keeping the repo tidy prevents accidental commits of large generated blobs.
Ever pulled a 10 MB mock file into your repo by mistake?
A simple git‑ignore entry for the output folder solves that, and you still have the source config checked in.
Putting it all together, here’s a quick checklist you can paste into your README:
- Store mock‑config.json next to the JSON schema and commit both.
- Enable local processing mode for any sensitive data.
- Cap array and string lengths via advanced options.
- Use if/then/else in the schema for conditional fields.
- Run a schema validator on every generated file.
- Set a deterministic seed for reproducible mocks.
- Ignore generated output folders in git.
FAQ
What exactly is a mock data generator from JSON schema online?
In plain English, it’s a web‑based tool that reads the rules you defined in a JSON schema and spits out realistic JSON records that obey those rules. Think of it as a “data factory” that knows your field types, required flags, enum choices, and even pattern constraints, so you never have to hand‑craft a single payload again.
How do I feed my JSON schema into the generator without exposing sensitive data?
If you’re worried about leaking secrets, most generators offer a “local processing” mode that runs entirely in your browser. You just drop the schema file into the UI, hit generate, and the work never leaves your machine. For added safety, strip out any example or default values that contain real credentials before you paste the schema.
Can I control the randomness so my tests stay deterministic?
Absolutely. Look for a seed field in the advanced options – set it to a fixed number (e.g., 42) and every run will produce the exact same set of records. That makes snapshot tests reliable and lets you compare results across builds. When you need fresh data, just bump the seed in a nightly job or switch to a random seed for load‑testing scenarios.
What export formats are available, and which should I use for API testing?
Most services let you download JSON, CSV, or even SQL INSERT statements with a single click. For unit or integration tests, stick with JSON because it matches the shape your code expects and you can run a quick schema validation step. CSV is handy when a product manager wants to skim the data in a spreadsheet, and SQL is useful if you’re seeding a local database directly.
How can I integrate mock data generation into my CI/CD pipeline?
Turn the generator into a CLI call or a curl request that pulls fresh data right before your test stage. Add a script in your package.json (or Makefile) that runs the request, writes the output to src/__mocks__/sample.json, and then kicks off your test suite. Because the script reads the schema from source control, every build validates against the exact contract you just committed.
Example snippet
curl -X POST -H "Content-Type: application/json" -d @schema.json https://mockapi.example.com/generate?count=20 > src/__mocks__/sample.json
Are there performance considerations when generating large volumes of mock data?
Yes. Generating tens of thousands of records in the browser can eat RAM, so switch to a “stream” mode if the tool offers it – it writes each record to a temporary file instead of keeping everything in memory. Also cap array lengths and string sizes in the schema’s advanced options; a 20‑item line‑items array is usually enough for stress tests without blowing up your CI job.
What common pitfalls should I avoid?
First, don’t forget to run a schema validation pass on the generated file – it’s easy to miss a tiny typo that breaks a downstream test. Second, always add the output folder to .gitignore so you don’t accidentally commit megabytes of mock blobs. Third, remember to version‑control your generator config (the JSON profile) alongside the schema; that way any change to the data shape is reviewed just like code.
Conclusion
If you’ve made it this far, you probably feel the relief of finally having a reliable mock data generator from json schema online in your toolbox.
Remember that moment when you stared at a blank schema and wondered how to get realistic payloads without writing every line by hand? We turned that frustration into a simple, repeatable workflow.
Key takeaways: validate your schema first, start with a tiny batch, tweak custom rules, export in the format your team needs, and lock the whole process into your CI pipeline. Those steps keep your tests fast, your data fresh, and your whole team on the same page.
So, what’s the next move? Grab your schema, fire up the generator, and let it spin out a few records. Then run a quick validation check and commit the config next to the schema. You’ll see instantly how much smoother development becomes.
And if you ever need a hand turning those JSON blobs into unit tests, the Free AI Test Code Generator can do the heavy lifting for you—no extra setup required.
Give it a try today, and watch your mock‑data workflow go from clunky to seamless. Happy coding! You’ll wonder how you ever tested without it.