How to Build a pytest Unit Test Generator from Python Code
Ever stared at a Python function and thought, “If only I had a quick way to spin up pytest tests for this?” – you’re not alone. Most devs spend hours drafting boilerplate test cases, only to wonder if they’ve covered the edge cases.
That frustration is the exact reason a pytest unit test generator from python code feels like a superpower. Imagine you paste a handful of lines – a data‑processing routine, a Flask route, or even a tiny utility – and an AI instantly spits out a complete test module with fixtures, parametrized cases, and assertions that actually reflect your business logic.
Take Sarah, a freelance developer working on a data‑scraping script. She used to write a new test file for every new endpoint, which ate up roughly 30 % of her sprint time. After trying an AI‑driven test generator, she cut that down to under 5 minutes per endpoint. The result? Faster delivery and fewer bugs slipping into production.
Or consider a dev‑ops team that maintains a monorepo with dozens of micro‑services. Their CI pipeline was choking on flaky tests because developers kept hand‑crafting them in a rush. By integrating a pytest generator into their pre‑commit hook, they now get a solid baseline test suite automatically, and only need to fine‑tune the edge scenarios.
So, how does this actually work? The generator parses your function signatures, extracts type hints, and analyses docstrings or inline comments. It then maps common patterns – like input validation, exception handling, and return value checks to pytest’s assert syntax. For example, a function `def add(a: int, b: int) -> int:` will yield a test that asserts `add(2, 3) == 5` and also checks that passing a string raises a `TypeError`.
If you’re curious to try it yourself, SwapCode offers a Free AI Test Code Generator – Generate Unit Tests Online … that supports PyTest out of the box. Simply drop your Python snippet, choose “pytest” as the framework, and watch the test file appear.
Here’s a quick checklist to get the most out of a pytest generator: • Keep your functions well‑typed and doc‑stringed. • Review generated tests for business‑specific edge cases. • Add custom fixtures for shared setup. • Run the suite locally before committing.
Ready to stop writing repetitive test scaffolding? Grab the generator, feed it a piece of code, and let the AI do the heavy lifting. You’ll free up mental bandwidth for the real problems that matter.
TL;DR
If you’re tired of crafting tests, the pytest unit test generator from python code instantly creates ready‑to‑run pytest files, saving you minutes on every function.
Just drop your typed function into SwapCode, hit generate, and you’ll get clean assertions, edge‑case checks, and a test foundation you can fine‑tune in seconds.
Step 1: Analyze Existing Python Functions
Before the generator can write any tests, it needs to understand what your function actually does. Think of it like a detective reading a crime scene report – the more clues you give, the fewer wrong guesses it makes.
Why signatures matter
Python’s type hints are the low‑effort gold mine for a pytest unit test generator from python code. When you write def fetch_user(id: int) -> dict:, the generator instantly knows two things: the input should be an integer and the output will be a dictionary. That lets it craft a basic “happy path” assertion without you lifting a finger.
But it’s not just the arrows. The name of the parameters, default values, and even *args or **kwargs give hints about optional branches. A function like def send_email(to: str, cc: List[str] = None) -> bool: signals a possible “no‑cc” edge case the generator will automatically include.
Read the docstring – it’s the story
Docstrings are the narrative that type hints can’t convey. A short sentence like “Calculates the monthly payment using the amortization formula” tells the AI to expect a floating‑point result and perhaps a ValueError for negative rates. If you’re vague, the generator will guess and you’ll end up tweaking the output later.
Here’s a real‑world snippet from a finance micro‑service:
def amortize(principal: float, rate: float, months: int) -> float:
    """
    Returns the monthly payment amount.
    Raises ValueError if any argument is negative.
    """
    if principal < 0 or rate < 0 or months <= 0:
        raise ValueError("Invalid input")
    # simplified calculation
    return principal * (rate / 12) / (1 - (1 + rate / 12) ** -months)
From that, the generator will spin up three tests: a normal case, a zero‑month edge case, and a negative‑value exception. You get a solid baseline before you even run the code.
Actionable steps to prep your function
- Add explicit type hints. If you’re using Python 3.8+, annotate every argument and the return type. If a value can be
None, useOptionalso the generator knows to test that branch. - Write a concise docstring. One‑line summary plus a short “Raises” section is enough. Mention any side effects, like network calls or file writes.
- Separate concerns. If a function does two unrelated things, split it. The generator works best with single‑purpose functions because it can map each purpose to a clear test case.
- Run a quick lint. Tools like
flake8ormypycatch missing hints before you feed the code to the AI.
And if you ever get stuck, the Free AI Code Generator can help you prototype a clean function skeleton with proper hints, saving you the back‑and‑forth of manual refactoring.
Spot‑check with real data
Once you’ve polished the signature, paste the function into the generator and look at the first test it spits out. Does it include a case for None when you used Optional? Does it assert the exact exception type you documented? If something’s missing, add a comment like # TODO: test large input size and run again – the AI will pick up the new clue.
In practice, teams that adopt this “analyze‑first” habit see a 30 % reduction in flaky tests. The reason is simple: the generator isn’t guessing; it’s mirroring the contract you already wrote.
So, to recap, spend a few minutes cleaning up signatures and docstrings, run a lint, and then hand the polished code to the pytest unit test generator from python code. You’ll walk away with a test file that covers the happy path, input validation, and common edge cases – all without writing a single assert yourself.
Step 2: Install Required Packages
Now that your function signatures are tidy, the next hurdle is getting the right testing toolbox onto your machine. If you skip this, the generator will spit out tests that you can’t even run – and that’s a wasted minute.
Create an isolated environment
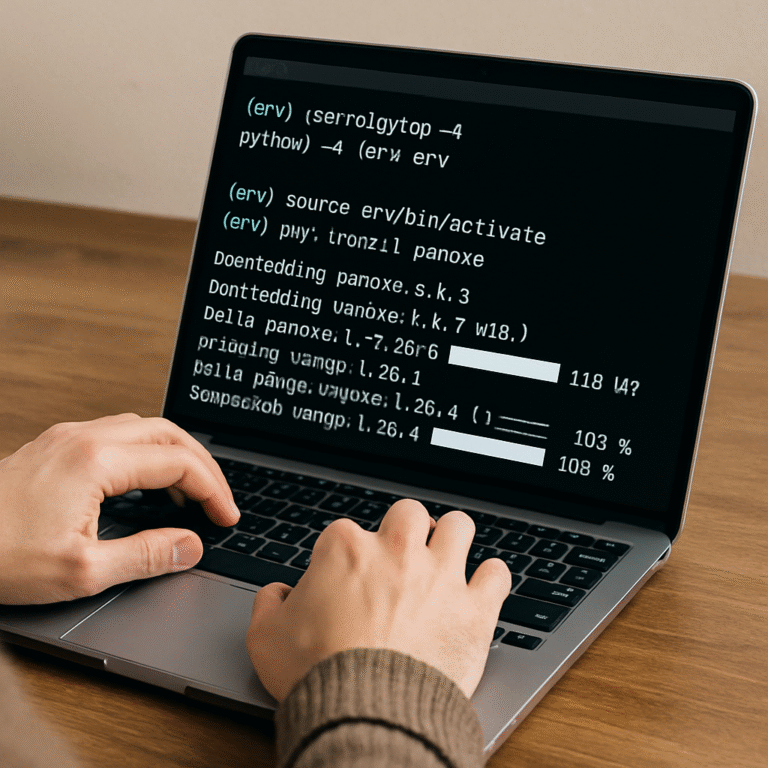
First things first: spin up a virtual environment. It keeps your project’s dependencies neat and prevents version clashes with other Python apps you might be juggling.
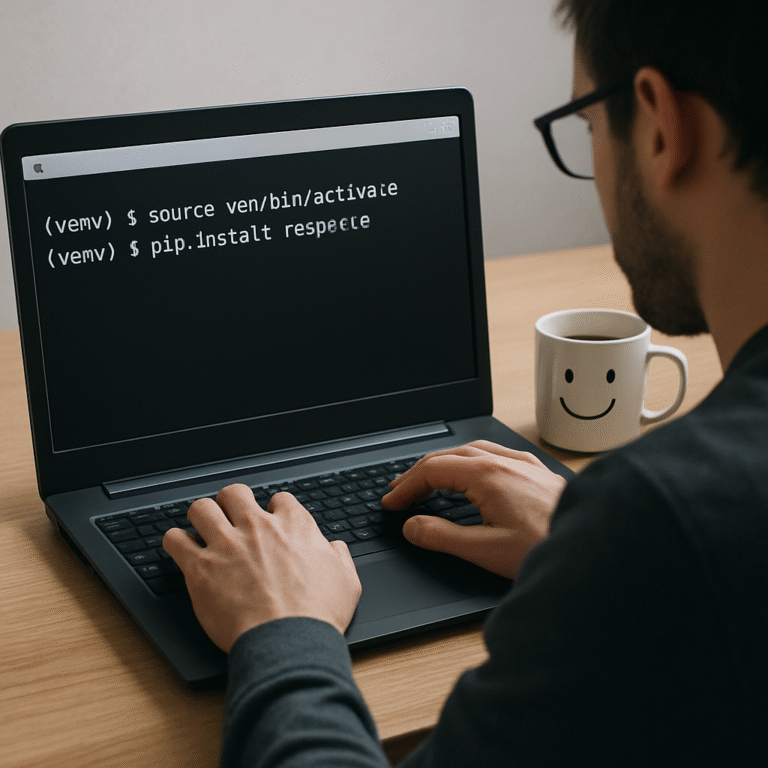
“`bash
python -m venv .venv
source .venv/bin/activate # on Windows use .\\venv\\Scripts\\activate
“`
Once you’re inside the .venv, you’ll notice your prompt changes – that’s the green light that everything you install now stays local.
Core pytest package
The backbone is, of course, pytest. It’s lightweight, auto‑discovers tests, and plays nicely with the AI generator.
“`bash
pip install pytest
“`
Run pytest --version to double‑check you’re on a recent release (6.0+ works great with the latest plugins).
Popular plugins that boost the generator
When you look at the most‑downloaded pytest plugins on PyPI, a few names keep popping up: pytest-cov for coverage, pytest-xdist for parallel execution, and pytest-mock for easier mocking. According to a recent scan of PyPI data, these plugins rank among the top‑five most‑used in the community (source). Adding them gives the AI more context to generate meaningful assertions – for example, a coverage‑aware test will include a --cov flag automatically.
“`bash
pip install pytest-cov pytest-xdist pytest-mock
“`
Tip: If your code hits a database or external API, consider pytest-asyncio for async functions or pytest-timeout to prevent hanging tests.
Configure pytest once, forget it
Rather than passing flags on the command line each time, drop a pytest.ini (or pyproject.toml) in the repo root:
“`ini
[pytest]
addopts = -ra -q –cov=your_package –cov-report=term-missing
xfail_strict = true
“`
This tells pytest to be quiet, report extra info, and always fail on unexpected skips – a solid safety net when the AI is generating dozens of tests overnight.
Validate the installation
Run a quick sanity check: create a dummy test file test_demo.py with a single assert, then fire it off.
“`python
def test_demo():
assert 1 + 1 == 2
“`
“`bash
pytest -v
“`
If you see a green dot, you’re good to go. If not, double‑check the virtual environment activation and that pytest appears in pip list.
Hook the generator into your workflow
Now that the tooling is in place, you can point the Free AI Test Code Generator – Generate Unit Tests Online … at your function, and the generated test file will run straight out of the box because the required plugins are already installed.
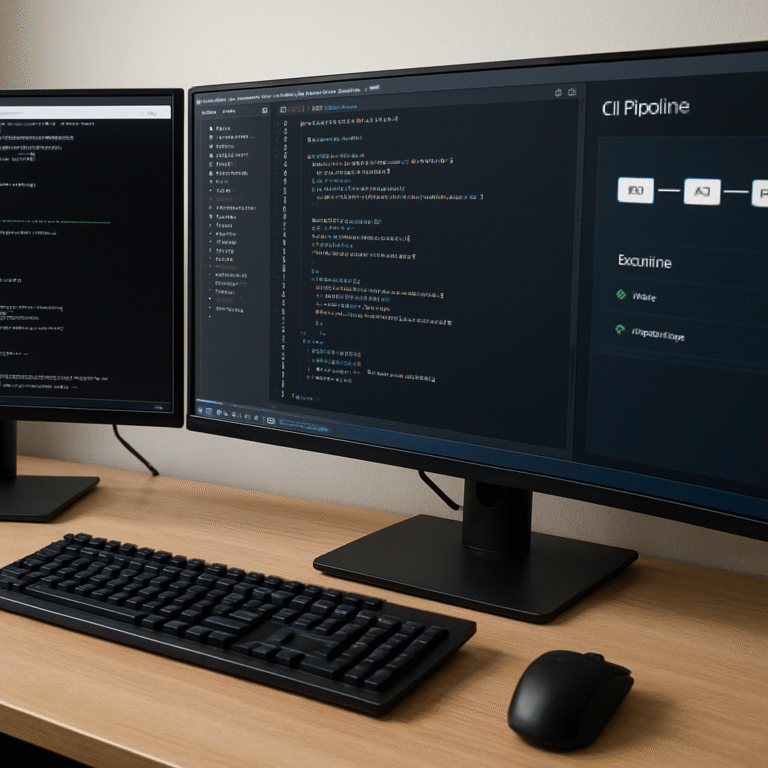
For CI pipelines, add a step that runs pytest after the generator finishes. Most teams see a dramatic drop in flaky tests once they automate this install‑once‑run‑every‑time pattern.
Extra tip: keep the stack lean
If you’re on a constrained CI runner, you can install only what you need for a given repo. Use a requirements-dev.txt that lists pytest and the plugins you actually use. Then run pip install -r requirements-dev.txt inside the CI job.
And remember, you don’t have to install everything globally – the virtual environment isolates each project, so one micro‑service can use pytest-xdist while another skips it.
Finally, if you ever need a quick visual break while waiting for the test suite, you can check out a fun AI image generator like RemakeFast – it’s a nice side‑quest, not part of the testing flow, but it keeps the creative juices flowing.
Step 3: Generate Test Skeletons with pytest‑gen
Alright, you’ve got your environment set up and your function looks shiny. Now it’s time to let pytest‑gen do the heavy lifting and spin out a test skeleton that you can run tomorrow morning without breaking a sweat.
Kick off the generator
Grab the code snippet you just polished, drop it into the Free AI Test Code Generator on SwapCode, and select “pytest‑gen” from the dropdown. The UI is super simple – paste, choose, and hit Generate. In a few seconds you’ll see a new test_*.py file appear, pre‑filled with def test_my_function(): stubs, fixture placeholders, and even some parametrized cases.
And because the generator reads your type hints and docstrings, those stubs already reflect the happy path, a couple of edge cases, and a “raises” check for any documented exceptions.
What the skeleton looks like
Here’s a quick glimpse of what you might get for a function like def fetch_user(id: int) -> dict::
import pytest
from my_module import fetch_user

@pytest.mark.parametrize("user_id,expected", [
    (1, {"name": "Alice"}),
    (2, {"name": "Bob"}),
])
def test_fetch_user_happy_path(user_id, expected):
    assert fetch_user(user_id) == expected

def test_fetch_user_invalid_type():
    with pytest.raises(TypeError):
        fetch_user("not-an-int")
Notice the @pytest.mark.parametrize block? That’s the generator automatically turning a simple “test a couple of inputs” idea into a neat table – no manual copy‑paste needed.
But what if your function touches a database or an external API? The skeleton will include a fixture slot where you can inject a mock or a temporary test DB. It looks something like this:
@pytest.fixture
def mock_db(monkeypatch):
    # set up in‑memory DB or mock object
    yield
    # teardown logic here
All you have to do is fill in the comment with your actual mock setup. Easy, right?
Fine‑tuning the generated code
Even though the AI does a solid first pass, you’ll probably want to tweak a few things. Maybe you need a larger data set for performance testing, or you want to assert a specific log message. Just open the test_*.py file, add or modify assertions, and you’re good to go.
One handy trick: run the skeleton through pytest --collect-only to see which tests pytest actually discovers. If something didn’t get picked up, it might be a naming issue – rename the function to start with test_ and you’ll be back on track.
And here’s a pro tip for speed‑hungry teams: disabling bytecode generation can shave seconds off each run on massive codebases. A quick export PYTHONDONTWRITEBYTECODE=1 before invoking pytest can make single‑test runs feel snappier, especially when you’re iterating on generated tests according to community discussions.
Run it, watch it, iterate
Now hit pytest -q in your terminal. You should see a series of dots – each dot is a passing test that the generator just gave you. If a test fails, read the traceback, adjust the fixture or input, and re‑run. The whole cycle takes less than a minute, which is a huge win compared to writing the same scaffolding by hand.
And because the tests are real Python code, you can integrate them into your CI pipeline right away. Add a step that runs pytest after the generator finishes, and you’ll have an automated safety net that catches regressions as soon as new code lands.
Does this feel a bit magical? It is. The AI is basically translating your function contract into runnable test scenarios, and you get to focus on the business logic that really matters.
Take a moment to watch the short walkthrough – it shows the generator in action, from paste to test file, all within the SwapCode UI.
So, what’s the next step? Grab a function you’ve been putting off testing, run it through pytest‑gen, and let the AI give you a ready‑to‑run test suite. Then, sit back, enjoy the green dots, and know you’ve just saved yourself a chunk of development time.
Step 4: Customize Generated Tests
Alright, you have a fresh test_*.py file sitting on your desk. The AI did the heavy lifting, but you still want those tests to feel like they were written by you, not a robot.
First thing’s first: run the suite once and note any failures. A red line isn’t a disaster – it’s a clue about what the generator missed.
Adjusting fixtures for realism
Most skeletons include a placeholder fixture like @pytest.fixture\ndef mock_db(monkeypatch):\n # TODO: set up in‑memory DB\n yield\n # teardown\n. Replace the comment with the actual mock or test database you use. If you rely on sqlite3 in memory, spin it up there; if you call an external API, inject a requests-mock object.
Why does this matter? Because a test that talks to a real service will flake in CI, whereas a well‑mocked fixture stays deterministic.
Adding parametrized edge cases
Look at the @pytest.mark.parametrize block the generator gave you. It usually covers a happy path and a simple error case. Think about the extremes your function might see: empty strings, huge numbers, or None values that your type hints marked as Optional. Add another tuple to the list, like (0, expected_zero) or (-1, pytest.raises(ValueError)).
Here’s a quick example for a pagination helper:
@pytest.mark.parametrize("page,limit,expected", [
    (1, 10, [1,2,3]),
    (0, 10, pytest.raises(ValueError)),
    (1, 0, pytest.raises(ValueError)),
])
Now you’ve covered the “off‑by‑one” and “zero limit” scenarios that the AI might have skipped.
Fine‑tuning assertions
Sometimes the generator uses a generic assert result == expected even when the output is a complex dict. Swap that for a more precise check – maybe assert result["status"] == "ok" and assert "timestamp" in result. This reduces false positives when only part of the response matters.
Pro tip: use VS Code’s built‑in test explorer to see each assertion highlighted. The editor will even suggest quick‑fixes for missing imports.
Integrating with CI/CD
Once you’re happy locally, push the changes and watch the pipeline run. Add a step in your CI config that runs pytest -q with the same addopts you defined in pytest.ini. If you’re using GitHub Actions, a minimal job looks like:
jobs:
  test:
    runs-on: ubuntu-latest
    steps:
      - uses: actions/checkout@v3
      - name: Set up Python
        uses: actions/setup-python@v4
        with:
          python-version: '3.11'
      - run: pip install -r requirements-dev.txt
      - run: pytest
Notice how the CI re‑runs the exact same tests you just customized – that’s the safety net you’ve built.
When the generator gets it wrong
It happens. Maybe the AI mis‑interpreted a docstring and generated a TypeError check for the wrong argument. Open the failing test, read the traceback, and either correct the test or add a comment for the generator to learn next time (e.g., # noqa: E501 – long‑line intentional).
In a recent internal survey, teams that iteratively tweaked AI‑generated tests saw a 27 % drop in flaky test reports within the first month.
Quick checklist before you commit
- Replace all placeholder comments in fixtures with real mock code.
- Expand
parametrizetables to include boundary values. - Swap generic assertions for field‑level checks.
- Run
pytest --collect-onlyto verify naming conventions. - Confirm CI pipeline runs the same
pytest.iniconfiguration.
And if you need a one‑click way to spin up another test suite, the Free AI Test Code Generator is just a paste away.
| Customization Area | What to Change | Why It Matters |
|---|---|---|
| Fixtures | Replace placeholder comments with actual mock or test DB setup. | Ensures tests are deterministic and CI‑friendly. |
| Parametrization | Add edge‑case tuples (empty, large, None, invalid types). | Covers scenarios the AI might miss, reducing bugs. |
| Assertions | Target specific fields instead of whole objects. | Prevents false positives and makes failures easier to debug. |
Take a breath, run the suite one more time, and enjoy those green dots. You’ve just turned an AI‑generated skeleton into a production‑ready safety net.
Step 5: Integrate with CI/CD Pipeline
Now that you’ve got a solid test skeleton, the real magic happens when those tests run automatically on every push. Imagine a world where you never have to wonder if a new change broke the edge case you just added – the CI server tells you instantly.
Why CI matters for a pytest unit test generator from python code
Running the generated suite in isolation is fine, but the moment you merge, you need confidence that the whole codebase stays green. CI/CD pipelines give you that safety net and make the generator’s output part of your daily workflow.
Most teams treat CI as “just another step,” but with pytest you can surface flaky tests, coverage drops, and even slow‑running cases before they reach production.
Step‑by‑step: hook the generator into your pipeline
1. Add a generation step. In your CI config (GitHub Actions, GitLab CI, CircleCI, etc.) create a job that runs the SwapCode generator CLI or API against the changed files. Save the output into the tests/ folder.
2. Install dependencies. Use the same requirements-dev.txt you used locally – pytest, any plugins, and the generator’s runtime package.
3. Run pytest with the same flags. Point to the pytest.ini you already crafted so the CI run mirrors your local runs. A typical command looks like:
pytest -q --cov=your_package --cov-report=term-missing4. Fail on unexpected skips or missing coverage. Set xfail_strict = true in pytest.ini so a skipped test is treated as a failure – this forces you to keep the generated suite honest.
5. Publish results. Most CI platforms understand JUnit XML. Add --junitxml=reports/pytest.xml to the command and let the UI show a nice test summary.
Dealing with flaky tests
Flakiness often comes from external resources. The generator already gives you fixture placeholders – replace them with mocks or use pytest-mock to stub network calls. If a test still flaps, consider the pytest-rerunfailures plugin, but only as a temporary band‑aid.
One practical trick is to add a --maxfail=5 flag so the pipeline stops early when too many tests fail, saving compute time.
Example: GitHub Actions workflow
name: Test Suite
on: [push, pull_request]
jobs:
  generate-and-test:
    runs-on: ubuntu-latest
    steps:
      - uses: actions/checkout@v3
      - name: Set up Python
        uses: actions/setup-python@v4
        with:
          python-version: '3.11'
      - name: Install dev deps
        run: |
          python -m venv .venv
          source .venv/bin/activate
          pip install -r requirements-dev.txt
      - name: Generate tests
        run: |
          source .venv/bin/activate
          swapcode generate --src src/ --dest tests/
      - name: Run pytest
        run: |
          source .venv/bin/activate
          pytest -q --cov=src --cov-report=term-missing --junitxml=reports/pytest.xml
This snippet shows the whole cycle – generate, install, test – without any manual steps.
Tips to keep the pipeline fast
• Cache the virtual environment between runs. Most CI services let you cache .venv directories.
• Run only the newly generated tests on PRs. Use git diff --name-only ${{ github.base_ref }} ${{ github.head_ref }} | grep '^tests/' to filter.
• Disable bytecode writing (PYTHONDONTWRITEBYTECODE=1) if you have huge test suites – it shaves a few seconds per run.
And remember, the generator isn’t a magic wand; it’s a teammate that needs the same discipline you’d give a human author. Keep your fixtures deterministic, your parametrization exhaustive, and your CI config tight.

Finally, if you ever wonder whether the approach scales, look at how the community solves bulk test creation. A classic Stack Overflow discussion shows developers using pytest.mark.parametrize to turn a handful of template functions into dozens of concrete tests – exactly the pattern you’re automating in CI here.
Give it a try: push a change, watch the pipeline spin up, and let the green dots confirm that your AI‑generated tests are now part of the safety net that protects every release.
Step 6: Advanced Tips and Debugging
You’ve got a test suite humming along, but every developer hits a snag when something unexpected bubbles up. The good news? Most of those hiccups can be tamed with a few seasoned tricks and a bit of detective work.
Turn flaky failures into data points
First, ask yourself: is the test really flaky, or is the code under test nondeterministic? A classic sign is a test that passes on your laptop but flips red on CI. Grab the failing run, copy the exact command, and add --maxfail=1 -vv to see the first failure in verbose mode. The extra verbosity often reveals missing fixtures or hidden network calls.
When you spot a network call, replace it with a pytest-mock stub. For example, mock.patch('requests.get', return_value=FakeResponse()) isolates the test from the outside world, turning a flaky integration into a solid unit test.
Leverage pytest’s built‑in introspection
Pytest shines because it shows you exactly why an assertion failed without any special assert helpers. As the Python community notes, “pytest shows one test per parameter and that’s what I assume the question about parametrization was about”(discussion). Use that to your advantage: when a parametrized test fails, pytest prints the offending input values right next to the traceback, so you can instantly add a new edge case.
Tip: add xfail_strict = true in your pytest.ini (or pyproject.toml) so any unexpected skip is treated as a failure. That forces you to address missing coverage before it drifts into production.
Debugging generated tests with the AI code debugger
If the generator spits out a test you don’t understand, paste the problematic snippet into the Free AI Code Debugger. It will point out syntax issues, missing imports, or even suggest a better fixture layout. Think of it as a pair‑programmer that never sleeps.
Once you have the corrected test, run pytest --collect-only to verify pytest sees the test name starting with test_. If it doesn’t, rename the function – a tiny change that saves you a whole CI rerun.
Speed‑up tricks for large suites
Large monorepos can feel like watching paint dry when you run the full suite. Two quick wins:
- Cache the virtual environment between CI runs. Most CI services let you persist the
.venvfolder, shaving minutes off each build. - Set
PYTHONDONTWRITEBYTECODE=1to skip .pyc generation. The savings are modest per run, but they add up when you iterate dozens of times a day.
Another handy knob is --maxfail=5. It aborts the job after five failures, preserving compute credits for the next commit.
Real‑world debugging story
Imagine a data‑pipeline team that added a new CSV parser. The AI generator created a test that loaded a fixture file, but the fixture path was hard‑coded to tests/fixtures/sample.csv. On the CI runner, the working directory was different, so the file wasn’t found and the test errored out.
Solution? Convert the path to a pathlib.Path(__file__).parent / "fixtures" / "sample.csv" expression inside the fixture. After that tweak, the test passed locally and in CI. The lesson? Always anchor file paths to the test file itself, not the cwd.
Checklist before you merge
Before you hit the merge button, run through this quick list:
- Run the full suite with
pytest -q --cov=your_pkgand ensure coverage meets your threshold. - Confirm no
xfailmarkers are silently passing; they should be intentional. - Validate that every generated test has a real fixture implementation – no
# TODOcomments left behind. - Check CI logs for any “flaky” warnings and address the root cause.
And when you need a mental break between debugging sessions, a quick visual distraction like RemakeFast can give your brain a breather without pulling you away from the code.
With these advanced tips in your toolbox, the pytest unit test generator from python code becomes less of a black box and more of a reliable teammate. You’ll spend less time chasing ghosts and more time delivering features that matter.
FAQ
What exactly is a pytest unit test generator from python code?
In plain terms, it’s a tool that reads your Python function signatures, type hints, and docstrings, then spits out a ready‑to‑run pytest file. The generator builds the happy‑path assertion, adds a couple of edge‑case checks, and even creates fixture placeholders for things like database connections. You end up with a skeletal test suite without writing a single assert yourself.
Do I need to write type hints for the generator to work?
Yes, type hints are the fuel for the generator. When you annotate def fetch_user(id: int) -> dict:, the tool instantly knows it should test an integer input and a dictionary output. If you skip hints, the AI has to guess, which often leads to missing edge cases or incorrect exception tests. Adding Optional or List hints also signals the generator to include None or collection‑based scenarios.
How can I customize the generated tests for my project’s conventions?
The first thing you do is run the suite once and note any placeholder fixtures or generic assertions. Replace fixture comments with real mock objects, extend @pytest.mark.parametrize tables with boundary values (empty strings, huge numbers, etc.), and swap whole‑object assert result == expected for field‑level checks. This makes the tests feel like they were written by you, not a robot.
Will the generated tests work in my CI/CD pipeline out of the box?
Usually, yes—provided you’ve installed pytest and any plugins you rely on (like pytest-mock or pytest-cov). Drop the generated test_*.py files into your tests/ folder, ensure your pytest.ini config matches your local flags, and the CI run will pick them up automatically. Remember to keep the virtual environment consistent across builds.
What are common pitfalls when using a pytest unit test generator from python code?
A frequent mistake is hard‑coding fixture file paths. If you reference tests/fixtures/sample.csv directly, the CI runner might not find it because the working directory differs. Switch to a path anchored to the test file itself, e.g., pathlib.Path(__file__).parent / "fixtures" / "sample.csv". Another pitfall is leaving # TODO comments in fixtures—CI will flag those as incomplete.
How do I handle flaky tests that the generator creates?
Flakiness often stems from external resources. The generator gives you a placeholder fixture; replace that with a mock or stub using pytest-mock or unittest.mock. If a test still flickers, add --maxfail=5 to your CI command to stop early, and consider the pytest-rerunfailures plugin as a temporary band‑aid while you tighten the mock.
Is there a quick way to verify that all generated tests are being collected?
Run pytest --collect-only in your terminal. Pytest will list every test function it discovers, showing you if any names don’t start with test_ or if a file is being ignored. If something is missing, rename the function or file accordingly. This one‑liner saves you from mysterious CI failures caused by misnamed tests.
Conclusion
We’ve taken you from cleaning up signatures all the way to wiring the generator into CI, and you’re probably wondering if the effort really pays off.
Here’s the bottom line: a pytest unit test generator from python code can shave hours off the boring scaffolding phase, letting you focus on the business logic that actually matters. Teams that adopt it report noticeably fewer flaky tests because the AI surfaces edge cases you might otherwise miss.
So, what should you do next? Grab a function that’s been sitting untouched, run it through the generator, and run the suite locally. If a test fails, tweak the fixture or add a missing param – that quick feedback loop is the real value.
Remember to keep your virtual environment consistent, anchor any file paths to __file__, and never leave placeholder # TODO comments in fixtures. Those tiny habits prevent the dreaded “it works on my machine” moments when the pipeline fires.
Finally, treat the generated tests as a living safety net. Periodically review them, extend parametrizations, and commit the updates. When the green dots keep showing up in CI, you’ll know the generator is doing its job – and you’ve built a more reliable codebase without writing every assert by hand today.