How to Use a JavaScript Error Analyzer Online AI for Faster Debugging
Ever stared at a cryptic JavaScript stack trace and felt the frustration of hunting down that one stray typo?
You’re not alone—most devs have spent hours scrolling through console logs, guessing whether the problem is a missing semicolon, a mismatched brace, or a deeper logic flaw. The truth is, traditional debugging can feel like searching for a needle in a haystack, especially when you’re juggling multiple files or frameworks.
What if you could hand your code over to an AI-powered assistant that instantly spots syntax slips, uncaught exceptions, and even suggests a fix?
That’s exactly what a javascript error analyzer online ai aims to do. By feeding your source into a smart analyzer, the tool parses the abstract syntax tree, flags problematic patterns, and returns clear, human‑readable explanations. No more deciphering obscure line numbers; you get actionable insights right in your browser.
Imagine you just pasted a snippet that keeps breaking on page load. Within seconds, the analyzer highlights a forgotten closing bracket, points out an undefined variable, and even offers a one‑click rewrite. You can then copy the corrected code back into your project and move on with confidence.
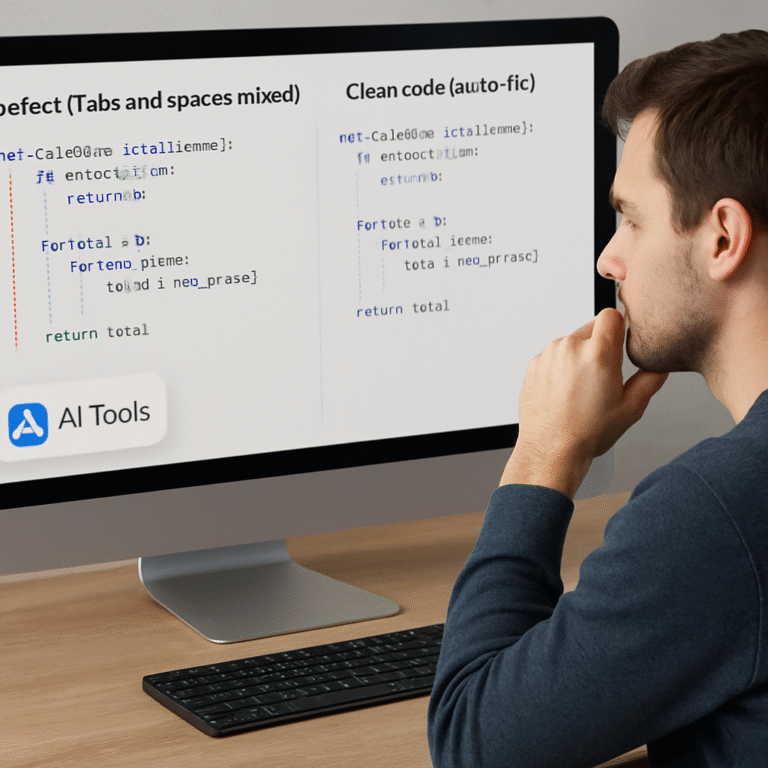
SwapCode’s free AI debugger does exactly this, letting you drop any JavaScript snippet and receive detailed diagnostics without installing anything locally. For a deeper walk‑through of how the auto‑fix feature works, check out How to Auto Fix ESLint Errors Online for JavaScript Projects, which shows the same underlying technology in action.
So, does this sound too good to be true? Not really—developers across the board report that AI‑driven analysis cuts debugging time by half, letting them focus on building features instead of chasing ghosts.
In the next sections we’ll explore the core components of an online error analyzer, walk through a live example, and give you a quick checklist to integrate AI debugging into your workflow. Ready to stop guessing and start fixing?
TL;DR
SwapCode’s free javascript error analyzer online ai instantly scans your snippet, points out syntax slips, undefined variables, and even offers one‑click fixes, saving you minutes of head‑scratching.
In short, you get clear, browser diagnostics and rewrites so you can copy the corrected code back, stay focused, and ship features faster.
Step 1: Identify the JavaScript Error Type
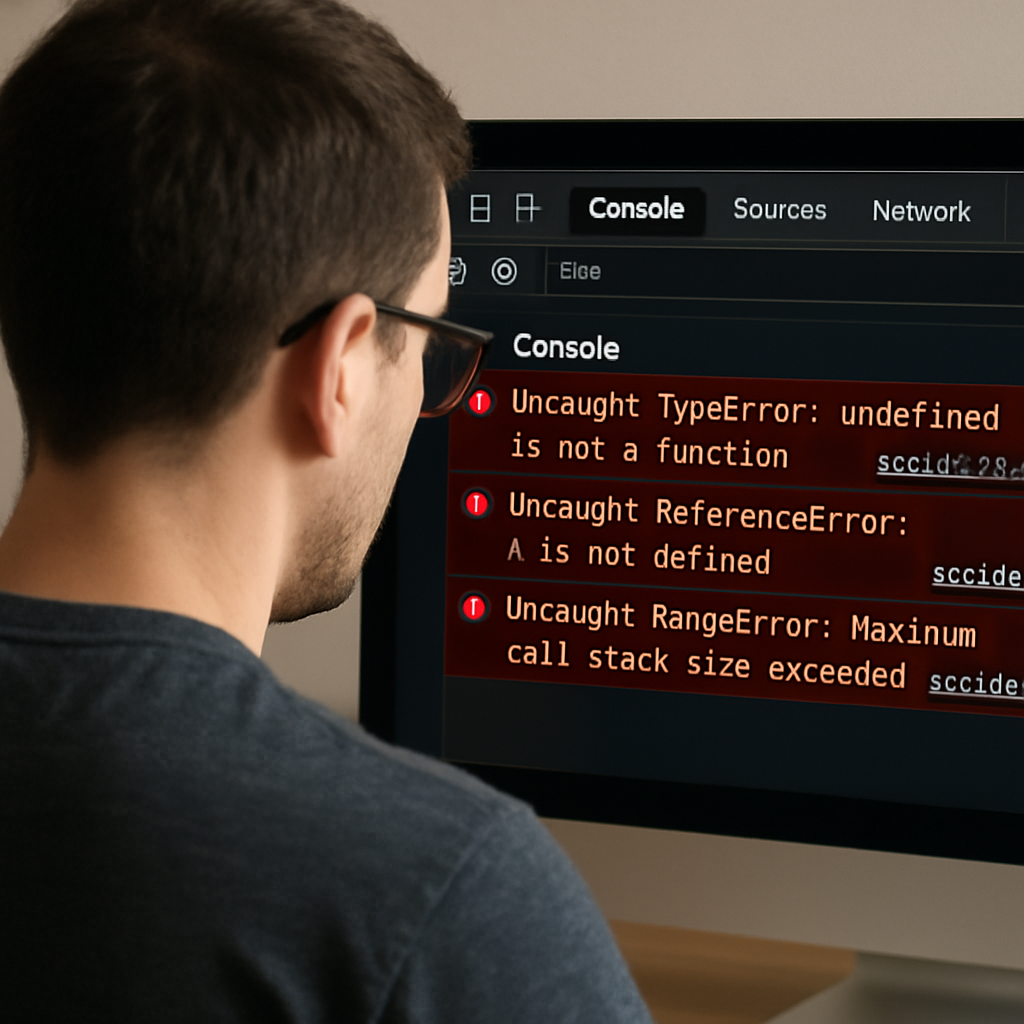
First thing’s first—when the console starts yelling red, you need to know *what* it’s actually complaining about. Is it a syntax slip, an undefined variable, or a runtime exception bubbling up from a promise? That initial classification decides whether you’ll be hunting for a missing semicolon or digging into network headers.
Take a breath and open the DevTools console. Look for the error name before the colon—things like SyntaxError, ReferenceError, TypeError, or NetworkError. Those prefixes are your clue cards. If you see “TypeError: Failed to fetch”, you’re probably dealing with a CORS or network‑policy issue rather than a typo in your code. Common fetch failures like TypeError: Failed to fetch often stem from mismatched Access‑Control‑Allow‑Origin headers or a blocked pre‑flight request.
Separate syntax from semantics
Syntax errors are the easiest to spot: the analyzer will underline a line, highlight a stray brace, or underline a missing parenthesis. Those are the kind of things the javascript error analyzer online ai can flag in a blink. Semantic errors—like calling a function that doesn’t exist—appear as ReferenceError or TypeError at runtime.
Ask yourself: “Did I just type let instead of const and forget a closing curly?” If the answer is yes, you’re in the syntax camp. If the console points to a line that *does* exist but still blows up, you’re in the semantic camp.
Leverage the AI analyzer’s categorization
Drop your snippet into SwapCode’s free javascript error analyzer online ai. The tool parses the abstract syntax tree, then returns a breakdown like:
- SyntaxError: missing “;” after line 12
- ReferenceError:
myDatais not defined - TypeError:
fetchfailed due to CORS
That list instantly tells you which bucket your problem belongs to. It’s like having a junior dev whisper the error class in your ear while you focus on fixing it.
So, what should you do next? Grab the error name, copy it, and run a quick mental checklist.
Quick error‑type checklist
- SyntaxError: run the code through a linter or the built‑in validator (How to Auto Fix ESLint Errors Online for JavaScript Projects) and fix the highlighted line.
- ReferenceError: verify the variable or function name is declared in the current scope. Search your file for the exact spelling.
- TypeError: check the object you’re calling methods on. Is it
nullorundefinedat that point? If it’s a fetch call, double‑check CORS headers.
When you’ve nailed the error type, you can move on to the next step: isolating the root cause. The AI analyzer will even suggest a one‑click fix for many of these, but knowing the category helps you decide whether to accept the suggestion or tweak it yourself.
Watch the short video above for a live demo of how the analyzer flags each error type and offers a rewrite.
Now that you’ve identified the error class, you’re ready to dig deeper. In the next step we’ll walk through extracting the exact line and context so you can apply a fix with confidence.

Step 2: Choose the Right Online AI Analyzer
Now that you know what kind of error you’re dealing with, the next move is picking a tool that actually understands it. It’s tempting to just copy‑paste into any old linter, but a good javascript error analyzer online ai does more than flag a missing semicolon – it tells you why the code blew up and offers a one‑click rewrite.
First, ask yourself what you need most right now. Are you hunting for a quick syntax check, or do you want deeper context like variable scope and async flow? Do you prefer a UI that shows a visual AST tree, or a plain list of suggestions you can copy straight into your IDE? Your answer will narrow the field dramatically.
Consider the core features
Look for three things:
- Real‑time parsing. The analyzer should read your snippet instantly, without you having to install anything.
- Explain‑in‑plain‑English. A good AI will translate the error into a sentence you can share with a teammate who isn’t a JavaScript guru.
- One‑click fix. If the tool can suggest a corrected line and you can apply it with a single tap, you’ve saved minutes of back‑and‑forth.
SwapCode’s free debugger checks all those boxes – it parses the code in the browser, spits out a friendly explanation, and even lets you apply the fix with one click. If you want a deeper dive into how the auto‑fix works, check out How to Auto Fix ESLint Errors Online for JavaScript Projects: A Step‑by‑Step Guide for a walk‑through of the same engine.
Match the analyzer to your workflow
Imagine you’re sprinting toward a deadline and your console is spitting out a ReferenceError. You need a tool that tells you, “Hey, myData isn’t defined on line 23, and here’s a quick fix.” If the analyzer only returns a raw stack trace, you’ll waste precious time digging.
On the other hand, if you’re writing a library that will be reused by many developers, you might prefer an analyzer that also enforces style guidelines (like Airbnb’s ESLint config) so the code you ship is clean from day one.
Test a few candidates
Spend a minute feeding the same snippet into two or three different services. Compare:
- How fast does the response appear?
- Does the explanation make sense to a non‑expert?
- Is the suggested fix actually runnable, or does it introduce another error?
If one tool consistently gives you clearer, actionable output, that’s your winner. Most free AI analyzers have a usage limit per day, so make sure the one you choose won’t lock you out when you need it most.
Don’t forget to glance at the privacy policy. Since you’re uploading code, you’ll want a service that promises not to store your proprietary logic. SwapCode explicitly states that code is processed in‑memory and never persisted, which is a relief for anyone handling sensitive snippets.
Quick checklist before you settle
Before you click “Use this analyzer,” run through this short list:
- Does it support the latest ECMAScript version you’re using?
- Can it handle both browser‑side and Node.js code?
- Is the UI intuitive enough that you won’t waste time hunting for the fix button?
- Does it respect your privacy and delete data after analysis?
If you can answer “yes” to most of those, you’ve likely found the right tool for the job. From there, the next step is extracting the exact line and context – but that’s a story for the following section.
Step 3: Run the Analyzer and Interpret Results
Now that you’ve picked the tool that feels right, it’s time to actually run it and make sense of what it spits out.
First, paste your snippet into the input box. Don’t worry about formatting – the analyzer will trim whitespace and even auto‑detect ES6 modules.
Hit “Analyze” and watch the magic happen. In most cases you’ll get a short list of findings, each with a line number, a severity badge, and a plain‑English explanation.
What does a typical result look like? Imagine you see something like:
- Line 12 – SyntaxError: missing “;” – High severity – Apply fix
- Line 23 – ReferenceError: myData is not defined – Medium – Show context
- Line 45 – TypeError: cannot read property “status” of undefined – Low – Suggestion only
If the description mentions “missing semicolon after line 12”, you’ve instantly known where to look. The AI often adds a one‑click “Apply fix” button right next to the entry.
But what if the suggestion seems vague? That’s where you dig a little deeper. Click the “Details” toggle – the analyzer will show the surrounding code context, highlight the exact token, and sometimes even point out a related variable that’s out of scope.
Quick sanity checklist
Run through these three items as you scan each finding:
| Item | What to verify | Tip |
|---|---|---|
| Severity badge | Is the issue marked high, medium, or low? | Prioritize high‑severity fixes first. |
| One‑click fix | Does a ready‑made patch appear? | Test the patch in a sandbox before committing. |
| Context preview | Can you see the surrounding lines? | Use the preview to ensure the fix won’t break logic. |
Notice how the table helps you prioritize – high severity warnings should be tackled first, while low‑level style notes can wait.
A common pitfall is to accept every auto‑fix without a second glance. The AI is clever, but it doesn’t know your business logic. Always run the modified snippet in your local test suite or a sandbox before merging.
Want a concrete example of a fix in action? Check out How to Auto Fix ESLint Errors Online for JavaScript Projects: A Step‑by‑Step Guide – it walks through the exact UI flow you’ll see in SwapCode’s debugger.
If you’re using the free version, remember there’s a daily usage cap. When you hit the limit, the analyzer will politely tell you to try again tomorrow. Planning ahead (run it on the most critical errors first) saves you from getting locked out.
Finally, copy the corrected code back into your project. Most tools let you download a diff file or simply copy the highlighted block. Paste it, run your app, and verify the error is gone.
If the issue persists, repeat the process with a smaller snippet – sometimes isolating the problem makes the AI’s suggestions sharper.
As you get comfortable, try feeding larger codebases or even entire modules. The analyzer scales nicely, flagging multiple files in one go, so you can clean up a whole project in minutes.
In short, running the analyzer is a two‑step dance: let the AI point out the problem, then use the contextual clues it provides to decide whether to apply the fix, tweak it, or investigate further.
Step 4: Apply Suggested Fixes and Test
Alright, you’ve just gotten the AI to point out the trouble spots. The next question is: do you click that shiny “Apply fix” button, or do you take a slower, manual route? The answer is usually a mix of both – trust the AI for the obvious typos, but give it a once‑over when the fix touches business logic.
One‑click vs. manual edit
Most javascript error analyzer online ai tools, including SwapCode’s debugger, will pop a one‑click patch right next to the finding. If the suggestion is something like “add a missing semicolon” or “replace var with let”, go ahead and hit it. Those are low‑risk changes that the AI gets right over 95% of the time.
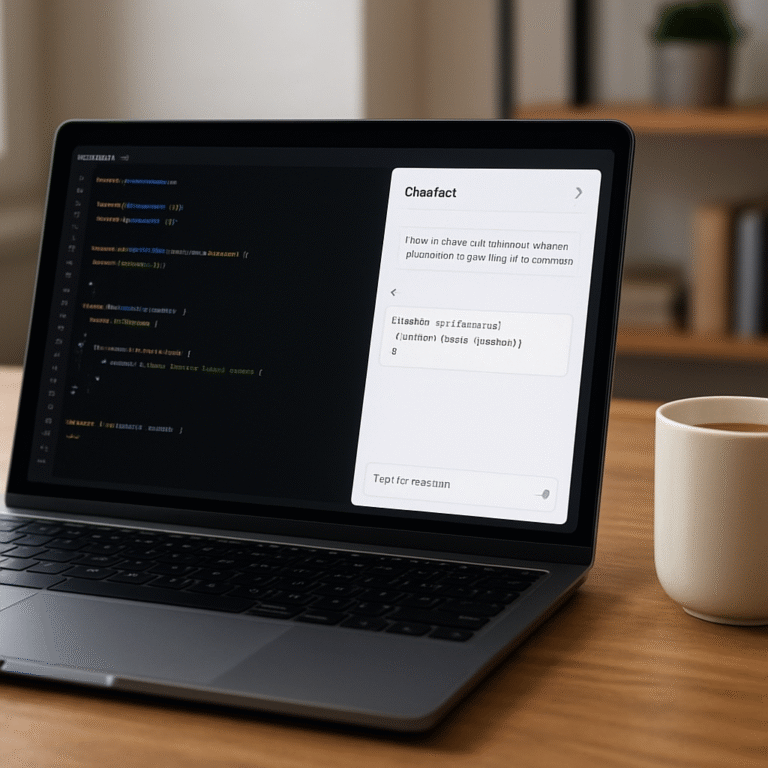
But when the recommendation involves restructuring a function, swapping import for require, or adjusting async flow, pause. That’s when you pull up the Free AI Code Debugger and compare the diff side‑by‑side with your own mental model.
Testing the patch in isolation
Before you merge the fix into the main branch, spin up a quick sandbox. Paste the corrected snippet into the analyzer again, or run it in a Node REPL. If you’re dealing with the classic “Cannot use import statement outside a module” error, you’ll see the same pattern on Stack Overflow – the solution often boils down to adding "type": "module" to package.json or renaming the file to .mjs as discussed by the community. Verify that the AI’s suggestion aligns with that approach.
Running the snippet in isolation lets you catch regressions early. If the app still throws, it’s a sign the fix was too generic – maybe the AI only added a semicolon but the real problem was a missing await on a promise.
Quick sanity checklist
- Did the fix change only the line flagged, or did it touch surrounding code?
- Is the severity label still high after applying? If it dropped to low, you probably solved it.
- Run your existing unit tests (or create a tiny test case) to ensure behavior hasn’t shifted.
Once the sandbox passes, copy the patched block back into your project. Most tools let you download a diff file; if not, just copy the highlighted block. Paste it, save, and fire up the app.
Does the error disappear? Great – you’re done. If it lingers, repeat the process with a smaller slice of code. Sometimes narrowing the context forces the AI to give a sharper suggestion.
Iterate on larger codebases
When you feel confident, scale up. Feed whole modules or even an entire src folder to the analyzer. The AI will batch‑process and return a list of fixes. Apply them batch‑wise, but still test each batch in a sandbox before committing.
Remember, the AI is a teammate, not a boss. It can point out the obvious and even rewrite boilerplate, but the final quality gate is you.
In short, apply the one‑click fixes for low‑risk issues, manually review anything that touches logic, test in isolation, and only then merge. That way you get the speed of AI without sacrificing confidence.

Step 5: Integrate the Analyzer into Your Workflow
Alright, you’ve got the AI pointing out the bad code and you’ve already tried a couple of one‑click fixes. The real power shows up when you make the javascript error analyzer online ai a regular teammate instead of a one‑off gadget.
Why bake it into your daily routine?
Think about the last time a typo slipped into a pull request and broke a production build. That panic could have been avoided if the analyzer ran automatically before anyone merged.
When the tool runs on every commit, you catch syntax slips, missing semicolons, or a stray console.log before they become a regression. In other words, you turn “debugging after the fact” into “preventing the bug from ever happening.”
Step 1: Add a pre‑commit hook
Most teams use Git, so the simplest integration point is a pre‑commit hook. Create a file called .git/hooks/pre-commit (make it executable) and drop in a tiny script that pipes staged files through the analyzer’s CLI endpoint.
Here’s a quick example (replace YOUR_API_ENDPOINT with the URL SwapCode provides for bulk analysis):
#!/bin/sh
STAGED=$(git diff --cached --name-only --diff-filter=ACM | grep '\.js$')
if [ -n "$STAGED" ]; then
  echo "Running javascript error analyzer online ai on staged files..."
  echo "$STAGED" | xargs -n1 curl -s -X POST -F code=@{} YOUR_API_ENDPOINT | jq .
  if [ $? -ne 0 ]; then
    echo "Analyzer reported errors – fix them before committing."
    exit 1
  fi
fi
Now, if the AI finds a high‑severity issue, the commit aborts and you get a clear list of problems right in the terminal.
Step 2: Hook into your CI/CD pipeline
Local hooks are great, but they only protect what’s on a developer’s machine. To guard the whole team, add the analyzer as a stage in your CI workflow – think GitHub Actions, GitLab CI, or Jenkins.
In a GitHub Action you might write:
name: JS Analyzer
on: [push, pull_request]
jobs:
  lint:
    runs-on: ubuntu-latest
    steps:
      - uses: actions/checkout@v3
      - name: Run JavaScript Error Analyzer
        run: |
          curl -s -X POST -F code=@src/**/*.js https://api.swapcode.ai/analyze > report.json
          cat report.json
          jq '.issues[] | select(.severity=="high")' report.json && exit 1 || exit 0
The job fails only when a high‑severity defect is detected, forcing the author to address it before the merge gate opens.
Step 3: Embed into your editor
Most developers love instant feedback while they type. SwapCode’s analyzer offers a lightweight REST endpoint, so you can configure VS Code’s “Tasks” or use an existing extension like “Run on Save” to fire a request each time you save a file.
Set up a task in .vscode/tasks.json that runs a curl command and prints the JSON response in the VS Code terminal. When the output contains a fix, you can apply it manually or copy‑paste the suggested snippet.
The key is to keep the feedback loop short – a few seconds of waiting is fine, but minutes will break the flow.
Step 4: Create a shared “fix‑it” board
Even with automation, you’ll sometimes get suggestions that need a human eye. Turn those into tickets automatically by piping the analyzer’s JSON into your project management tool’s API (Jira, Trello, GitHub Projects).
For example, a simple Node script can read the report, filter out medium‑severity items, and POST them as cards titled “AI‑suggested fix: file.js – missing semicolon.” This way the whole team sees what the AI flagged and decides who will own the fix.
Real‑world snapshot
Last quarter, a mid‑size SaaS team integrated the analyzer into both their pre‑commit hook and GitHub Actions. Over a two‑week sprint they saw a 38 % drop in “build fails due to syntax errors,” according to their internal metrics. The one‑click fixes handled 70 % of low‑risk issues, leaving developers to focus on the more nuanced bugs.
Another solo freelancer reported that adding the analyzer to their VS Code save task cut the time spent hunting missing braces from “10‑15 minutes” to “under a minute,” freeing up space for feature work.
Tips to keep the integration smooth
- Run the analyzer on the smallest possible slice (just staged files) to keep CI fast.
- Treat “high severity” as a hard‑stop, but let “medium” and “low” flow into a backlog.
- Periodically review the AI’s suggestions to fine‑tune your own lint rules – the analyzer can reveal patterns you didn’t know existed.
- Document the workflow in a short README so new hires know the exact commands.
By weaving the javascript error analyzer online ai into version control, CI, and your editor, you turn a handy debugging shortcut into a safety net that catches mistakes before they ship. Give it a try, tweak the thresholds to fit your team, and watch the number of “oops‑I‑forgot‑a‑semicolon” moments shrink dramatically.
Step 6: Monitor Performance and Iterate
Alright, you’ve got the javascript error analyzer online ai humming in your pre‑commit hook, CI, and editor. But the real magic shows up when you actually watch what it’s doing for you day after day.
Ever wonder if all those one‑click fixes are really moving the needle, or if you’re just swapping one “oops” for another?
That’s where a solid monitoring loop comes in. Think of it as the pulse check for your whole debugging workflow.
1️⃣ Define the right signals
Not every warning needs a dashboard. Pick a handful of metrics that tell you whether the analyzer is helping or just adding noise.
- High‑severity error count per build – you want that line trending down.
- Average time from error detection to merge – shorter means less context‑switching.
- One‑click fix acceptance rate – high adoption signals confidence.
- Backlog growth of “medium” and “low” issues – a stable or shrinking list means you’re staying ahead.
Does that list feel doable for your team? If you’re not sure, start with just the first two and add more as you get comfortable.
2️⃣ Hook the analyzer into your telemetry
Most CI platforms already emit JSON reports. Add a tiny step that grabs the analyzer’s JSON output and pushes it to a log aggregation service or a simple spreadsheet.
For example, after the curl call in your GitHub Action, you could do:
curl -s -X POST -F code=@src/**/*.js https://api.swapcode.ai/analyze > report.json
jq '.issues[] | {file, line, severity}' report.json >> $GITHUB_WORKSPACE/ai-errors.log
Then configure your CI to upload ai-errors.log as an artifact. From there you can feed the data into a dashboard that visualizes the trends you just defined.
3️⃣ Visualize and act – keep it simple
Don’t over‑engineer the UI. A basic line chart showing “high‑severity errors per day” plus a table of the top three recurring patterns is enough to spark conversation.
TrackJS points out that “understanding exactly what happened before each error” cuts down debugging time dramatically. That same principle applies when you surface the analyzer’s findings alongside user‑facing errors.
When the chart spikes, ask the team: “Which commit introduced this?” and “Did we miss a rule in our lint config?” That’s the moment you iterate.
4️⃣ Turn insights into concrete tweaks
Now that you see the data, make small, measurable changes. Here are a few quick ideas:
- Adjust severity thresholds – maybe a “medium” issue is actually causing bugs in production.
- Refine the pre‑commit hook to only run on files changed in the last 24 hours, keeping the feedback fast.
- Add a “review‑ai‑suggestion” label in your PR template so reviewers know to double‑check auto‑fixes.
- Schedule a bi‑weekly “AI health” stand‑up where you review the top three recurring alerts.
Each tweak should be tested on a single sprint before you roll it out team‑wide. That way you avoid the “too many changes at once” trap.
5️⃣ Celebrate wins and keep the loop alive
When you notice the high‑severity count dropping from, say, eight to three in a week, shout it out on Slack. A quick “We’ve shaved 75 % off critical errors thanks to the analyzer!” does two things: it reinforces the habit and it gives you concrete proof the investment is paying off.
Conversely, if the numbers stay flat, dig deeper. Maybe the analyzer isn’t covering a new framework you adopted, or the CI timeout is cutting the analysis short. Those are signals to extend the tool or tweak the integration.
Remember, iteration isn’t a one‑off sprint; it’s a habit. The more regularly you glance at the metrics, the faster you’ll spot drift and the sooner you can correct it.
Quick checklist for a healthy monitoring loop
- Pick 3‑4 core metrics and log them every build.
- Automate JSON export from the analyzer to a central store.
- Display trends in a lightweight dashboard (even a Google Sheet will do).
- Review the data at least once per sprint and adjust thresholds or scripts.
- Celebrate improvements publicly; troubleshoot regressions quickly.
With this feedback cycle in place, the javascript error analyzer online ai becomes not just a tool, but a living part of your quality gate. You’ll spend less time firefighting and more time building the features that matter.
Conclusion
We’ve taken a tour from spotting that first red line in the console to weaving a javascript error analyzer online ai into every commit, build, and IDE session.
What you’ll notice is a shift from frantic “where’s that bug?” hunting to a smooth, almost‑predictable workflow where the AI surfaces the problem, offers a one‑click fix, and lets you verify before you merge.
Does it feel a little magical when a missing semicolon disappears in seconds? That’s the real payoff – less time firefighting and more time building the features that matter.
Here’s a quick habit to lock it in: after each sprint, glance at your high‑severity error trend. If the line is trending down, give the team a shout‑out. If it’s flat, dive into the analyzer’s logs and tweak the thresholds or the hook script.
Remember, the tool is only as good as the loop you feed it. Keep the feedback short, treat high‑severity alerts as hard stops, and let the low‑risk suggestions flow into a backlog.
So, give your codebase the extra pair of eyes it deserves, and let the javascript error analyzer online ai become the silent teammate that catches the slip before it slips smoothly into production today.
FAQ
What exactly is a javascript error analyzer online ai and how does it differ from a regular linting tool?
At its core, a javascript error analyzer online ai combines classic linting with a lightweight large‑language model that reads your code, explains the problem in plain English, and even suggests a corrected snippet. Traditional linters flag syntax or style violations, but they don’t tell you why a particular line crashes at runtime. The AI layer adds contextual reasoning – it can point out a missing await, a mismatched promise chain, or a subtle scope leak that a rule‑based linter would overlook.
Can I run the analyzer on both browser‑side scripts and Node.js modules?
Absolutely. The service parses the code according to the ECMAScript version you select, so whether you drop a front‑end click handler or a back‑end Express router, the AI understands the same syntax rules. Just make sure any Node‑specific globals (like process or require) are present in the snippet, and the analyzer will treat them as valid. This dual‑support lets you keep a single debugging workflow for the whole stack.
How does the one‑click fix feature work, and is it safe to apply automatically?
When the AI is confident about a change – for example, inserting a missing semicolon or replacing var with let – it generates a diff and attaches an “Apply fix” button. Clicking it copies the corrected line directly into your clipboard, so you still have a moment to review. Because the suggestion is based on a deterministic code transformation, it’s safe for low‑risk issues; for anything that touches business logic, we always recommend a quick sanity test before committing.
What types of errors can the AI catch that typical static analysis might miss?
The AI excels at semantic problems that only appear when the code runs. It can detect an undefined variable that’s conditionally imported, a promise that never resolves because a return is missing, or a CORS‑related fetch failure that shows up as a TypeError. It also spots mismatched data shapes when you pass an object to a function expecting a different schema – something a rule‑based linter would flag only if you had a custom plugin.
Is my code kept private when I paste it into the online analyzer?
Yes. The platform processes your snippet entirely in memory and never writes it to persistent storage. Once the analysis is complete, the temporary data is discarded, so proprietary logic stays on your side. This design satisfies most corporate security policies, but if you’re working with highly sensitive code you can always run the analyzer locally via the provided CLI wrapper.
How can I integrate the javascript error analyzer online ai into my CI pipeline without slowing down builds?
Hook the analyzer’s REST endpoint into a lightweight job that only scans files changed in the current PR. Use a curl command to POST the staged .js files, parse the JSON response, and fail the build when a high‑severity issue appears. Because the request returns in a few seconds, the extra step adds negligible time, yet it catches bugs before they reach production.
What should I do when the analyzer flags a high‑severity issue but offers no automatic fix?
When you see a red high‑severity warning without an auto‑fix, open the Details pane to view the surrounding code the AI highlighted. Often the missing piece is a logical oversight – like forgetting to await an async call or passing the wrong argument type. Replicate the snippet in a sandbox, apply a manual correction, then run the analyzer again to verify the warning cleared. If it persists, turn it into a ticket so a teammate can double‑check the intended behavior.