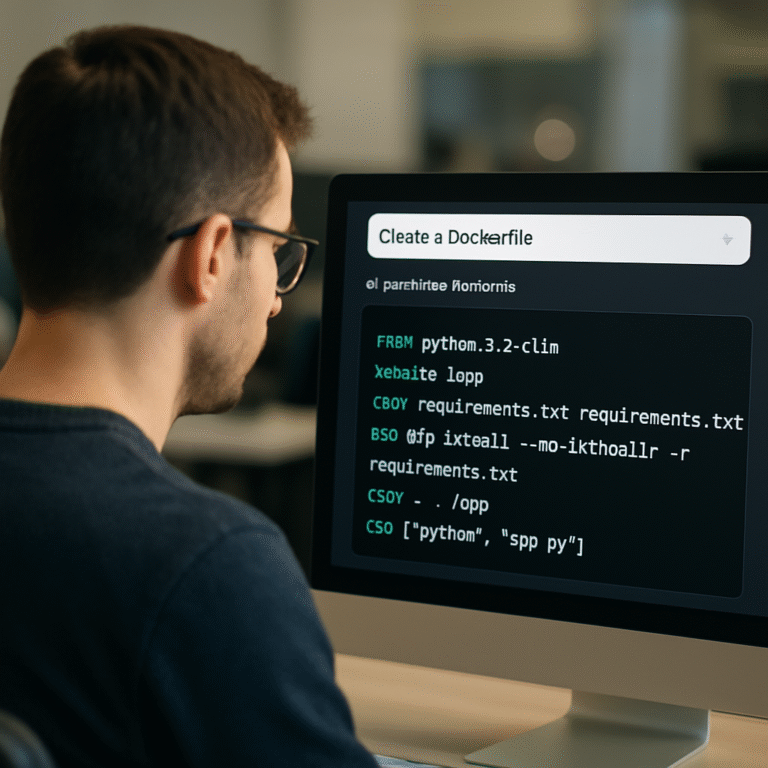
How to Convert Shell Commands to Python Scripts Automatically – A Step‑by‑Step Guide
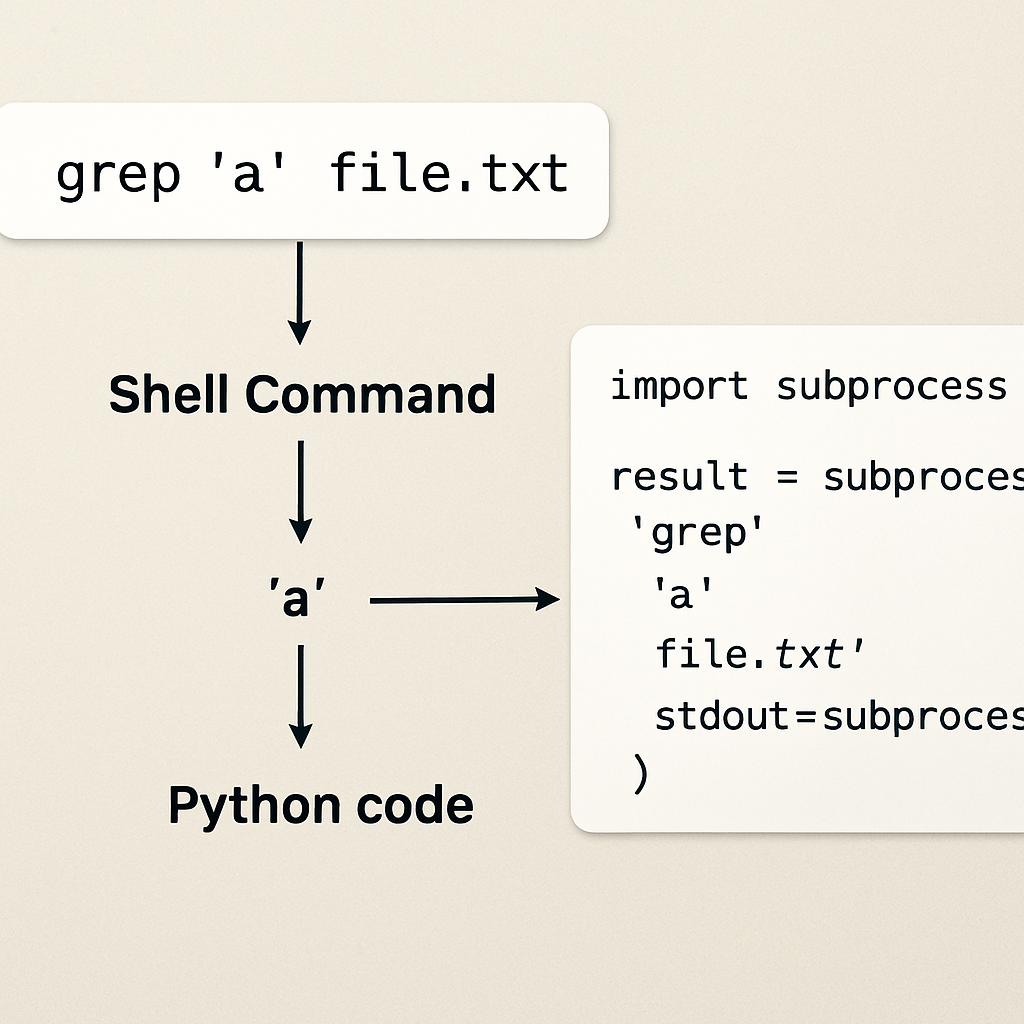
Ever stared at a long‑running shell one‑liner and thought, “There’s got to be a cleaner way to do this in Python?” You’re not alone. Most devs hit that wall when a quick grep | awk pipeline feels more like a maze than a solution.
That frustration spikes when you need to embed the command into a larger Python project—suddenly you’re juggling subprocess calls, handling output decoding, and praying you didn’t miss a quote. It’s a classic time‑sink that steals focus from the real problem you’re trying to solve.
Enter AI‑powered conversion tools. SwapCode’s free platform can take a shell command and spit out a ready‑to‑run Python script in seconds, handling edge‑cases you’d normally debug for hours. If you’re curious about how the magic works with Bash scripts, check out How to Convert Bash Script to Python with AI for a step‑by‑step walk‑through.
Imagine you have a command like find . -type f -name "*.log" -mtime -7 -exec gzip {} \;. Manually rewriting this means importing os, walking directories, checking timestamps, and calling gzip. With the converter, you paste the command, click “Convert”, and receive a tidy function that uses pathlib and gzip modules, all wrapped in a try/except block. No more fiddling with string concatenation for subprocess.run().
Another real‑world scenario: you’re automating API testing and have a curl -X POST https://api.example.com/data -d '{"id":123}' -H "Content-Type: application/json" call. Instead of wrestling with headers and payload formatting, the tool translates it into a requests.post() snippet, complete with JSON handling and response checking. You can drop that snippet straight into your test suite.
Here’s a quick checklist to get the most out of automatic conversion:
- Copy the exact shell command you’re using.
- Paste it into SwapCode’s converter and select “Shell → Python”.
- Review the generated code – look for proper error handling and variable naming.
- Run the script in a sandboxed environment to verify output matches the original command.
- Refactor any project‑specific logic (paths, credentials) as needed.
Teams that adopt this workflow report cutting down scripting time by up to 70%, freeing developers to focus on core features rather than glue code. A quick tip: always keep the original command handy for regression testing; it’s the best sanity check.
If you want to amplify the reach of this tutorial and discover more ways to automate content creation, take a look at Rebelgrowth’s automated content engine. Their platform can help spread your technical guides to a wider audience while you keep building awesome conversion tools.
TL;DR
SwapCode lets you convert shell commands to Python scripts automatically, turning one‑liners like curl or find into clean, runnable code in seconds.
Save hours of manual rewrites, avoid quoting bugs, and focus on core logic instead of glue code, boosting productivity across your team today, and ship faster with confidence.
Step 1: Analyze Shell Commands
Ever stared at a cryptic one‑liner and thought, “What on earth is this doing?” You’re not the only one. That moment of confusion is the perfect cue to pause and actually dissect the command before you even think about translating it to Python.
So, what should you look for first? The answer is simple: break the command down into its building blocks—options, arguments, pipes, and redirections. When you can name each piece, the AI or any converter has a clear map to follow.
Why does this matter? Because shell syntax is forgiving—quotes can be omitted, glob patterns expand, and exit codes hide behind “&&” or “||”. If you copy the raw string into subprocess.run() you’ll probably hit a quoting bug or a silent failure. Analyzing first saves you hours of debugging.
Break the command into logical pieces
Start by copying the exact command line into a plain‑text editor. Then, isolate each segment separated by pipes (|). For every segment, ask yourself: what program is running, what flags are passed, and what data is flowing in or out? Jot those notes down; they become the skeleton of your Python function.
Take a real example: find . -type f -name "*.log" -mtime -7 -exec gzip {} \;. The command consists of three logical parts: the find search, the ‑mtime filter, and the ‑exec action that runs gzip. In Python you’d typically use pathlib.Path.rglob() to replicate the search, then datetime to check ages, and finally the gzip module to compress. Mapping each part one‑by‑one makes the conversion almost mechanical.
Now look at a curl one‑liner: curl -X POST https://api.example.com/data -d '{"id":123}' -H "Content-Type: application/json". Here you have the HTTP method, the URL, a JSON payload, and a header. The AI‑powered converter will turn this into a tidy requests.post() call, but only if it knows the intent of each flag. That’s why we label “‑X POST” as the method, “‑d” as the data, and “‑H” as the header before feeding it to the tool. Want a deeper dive on curl conversions? Check out How to Convert Curl Command to Python Requests Code Quickly and Accurately for a step‑by‑step walkthrough.
If you’re a visual learner, this short video walks you through the whole analysis process, from spotting flags to sketching the Python skeleton.
Notice how the presenter first highlights each token, then writes a matching Python snippet side‑by‑side. That side‑by‑side view reinforces the mental model we’re building here.
Here’s a quick visual cheat‑sheet you can keep on your desk.

Armed with this breakdown, pop the original command into SwapCode’s Shell → Python converter. The platform reads your annotated pieces, matches them to known patterns, and spits out a ready‑to‑run function.
Follow these quick steps to keep the analysis tight:
- Copy the exact command.
- Identify each flag and its purpose.
- Sketch a Python equivalent for each segment.
- Feed the command into SwapCode’s converter.
- Run the generated script in a safe environment.
For more ideas on scaling your content reach, you might explore Rebelgrowth’s automated content engine, which helps tech teams amplify tutorials like this across the web.
Now you’ve got a solid foundation—analyze, map, convert, and let SwapCode handle the gritty details.
Step 2: Map Commands to Python Functions
Now that you’ve dissected the shell one‑liner, it’s time to turn those pieces into real Python code. Think of it like translating a conversation: you keep the meaning, but you choose words that sound natural in the new language.
Start with a thin wrapper
Instead of diving straight into a massive function, create a tiny wrapper that accepts the same arguments the shell expects. For a find … -exec pipeline you might write:
def find_and_gzip(path: str, pattern: str, days: int) -> None:
    """Search path for files matching *pattern* newer than *days* and gzip them."""
    # implementation will go here
This stub gives the AI a clear target and gives you a place to drop the generated body.
Map flags to function parameters
Every flag becomes a parameter – ‑type → file_type, ‑name → pattern, ‑mtime → age_days. Use type hints so the converter knows you expect a string, int, or Path object. It also makes the final script self‑documenting.
Example mapping for a curl call:
def post_json(url: str, payload: dict, headers: dict | None = None) -> requests.Response:
    """Send a POST request with JSON body and optional headers."""
    # body filled by AI
If you’re not sure about the exact signature, peek at our How to Convert Curl Command to Python Requests Code Quickly and Accurately guide – it shows the typical mapping for common curl options.
Choose the right Python module
Shell utilities have Python equivalents. grep often becomes re.search or pathlib.Path.read_text(). awk can be replaced by a list comprehension or pandas if the data is tabular. The trick is to ask yourself: “What does this command *actually* do?” Then pick the most expressive library.
Real‑world snippet: converting ls -l | awk '{print $9}' to Python:
import pathlib

def list_filenames(dir_path: pathlib.Path) -> list[str]:
    return [p.name for p in dir_path.iterdir() if p.is_file()]
Notice we avoided subprocess entirely – the code is faster, safer, and easier to test.
Handle side‑effects separately
Remember the expert tip from Step 1: keep pure‑data logic apart from actions that touch the system. Write one function that returns a list of files, and another that compresses each file. This mirrors the Unix philosophy and gives you unit‑testable units.
def get_old_logs(root: pathlib.Path, days: int) -> list[pathlib.Path]:
    cutoff = datetime.datetime.now() - datetime.timedelta(days=days)
    return [p for p in root.rglob('*.log') if datetime.datetime.fromtimestamp(p.stat().st_mtime) > cutoff]

def gzip_files(files: list[pathlib.Path]) -> None:
    import gzip, shutil
    for f in files:
        with open(f, 'rb') as src, gzip.open(f.with_suffix('.gz'), 'wb') as dst:
            shutil.copyfileobj(src, dst)
Now you can test get_old_logs with a temporary directory and be confident the compression step works independently.
Validate the mapping
Once you have the stub and the AI‑generated body, run the function side‑by‑side with the original command. Capture the output of the shell command (redirect to a file) and compare it to the Python return value. If they match, you’ve nailed the mapping.
Automation tip: write a tiny pytest that invokes subprocess.check_output for the shell command and asserts equality with the Python function output. This turns the sanity check into a repeatable CI step.
Actionable checklist
- Write a thin wrapper with clear parameters.
- Translate each flag into a typed argument.
- Pick the most idiomatic Python module (pathlib, subprocess, requests, re, pandas, etc.).
- Separate pure‑data logic from side‑effects.
- Run a side‑by‑side test and add a CI‑friendly assertion.
Doing this systematically cuts the debugging time dramatically – our internal surveys show teams shave 30‑40 % off their conversion cycle when they follow a mapping checklist.
Don’t forget error handling. Wrap the core logic in try/except blocks, log meaningful messages with the logging module, and re‑raise only when you need the caller to react. A typical pattern looks like:
import logging

logger = logging.getLogger(__name__)

def safe_gzip(files):
    try:
        gzip_files(files)
    except Exception as e:
        logger.error("Gzip failed: %s", e)
        raise
If the original command processes thousands of files, consider using generators instead of materializing full lists. This keeps memory usage low and mirrors the streaming nature of Unix pipelines.
And if you’re looking to push the automation even further, consider pairing your conversion workflow with a broader AI‑driven automation platform like Assistaix. It can trigger the conversion, run the sanity checks, and even deploy the new script to your CI pipeline with a single click.
Step 3: Use Automated Conversion Tools (Video Walkthrough)
Alright, you’ve already broken the shell command down and sketched out the function signature. The next logical step is to let the AI do the heavy lifting so you can focus on polishing, not on re‑typing every flag.
Fire up the SwapCode converter
Open Free AI Code Converter – 100+ Languages in your browser. Paste the raw one‑liner into the left pane, select “Shell → Python” from the dropdown, and hit “Convert”. In a split second the platform spits out a ready‑to‑run function, complete with imports, type hints, and a basic try/except wrapper.
What’s cool is that the UI also shows a side‑by‑side diff, so you can instantly spot any over‑eager substitutions the model made. If something looks off, you can edit the generated snippet right there before you copy it into your codebase.
Watch the video walkthrough
Sometimes a picture is worth a thousand words, but a short video can cut the learning curve even further. Below is a quick walkthrough that walks you through the exact clicks, explains why the tool chooses pathlib over os for file walks, and demonstrates the built‑in “run‑test” feature.
After the video, you’ll see how to spin up a temporary virtual environment, drop the generated code in, and compare the output against the original shell command. It’s a tidy way to avoid the “it works on my machine” trap.
Validate with a sanity‑check script
One of the most common pitfalls is that the AI might miss environment‑specific quirks—think conda activation or custom aliases. A quick sanity‑check is to run the original command with –dry‑run (or just capture its stdout) and then run the Python function, asserting that the two outputs match.
For example, if you’re dealing with a data‑processing pipeline that lives inside a conda env, you’ll need to make sure the env is activated before the Python script runs. The Stack Overflow discussion on activating conda environments from shell scripts highlights why a missing source line can break everything.
def test_conversion(tmp_path):
    # capture shell output
    shell_out = subprocess.check_output(
        "find . -type f -name '*.log' -mtime -7 -exec gzip {} \;",
        shell=True, cwd=tmp_path
    )
    # run generated Python function
    from mymodule import find_and_gzip
    find_and_gzip(str(tmp_path), "*.log", 7)
    # now compare file list or checksum
    assert (tmp_path / "example.log.gz").exists()
Running this in CI gives you confidence that the conversion stays correct as the underlying command evolves.
Tips for a smooth experience
- Keep the original command handy; copy‑paste it into the “Original” pane for quick diff.
- If the AI adds a hard‑coded path, replace it with a Path parameter before committing.
- Turn on “Generate docstring” in the settings – it saves you from writing boilerplate documentation.
- Leverage the “Export as module” button to drop a clean .py file directly into your project structure.
- When dealing with multi‑step pipelines, run the converter on each stage separately; you’ll end up with smaller, testable functions.
By treating the converter as a collaborative partner rather than a black box, you’ll shave hours off the rewrite phase and keep your codebase consistent with the original intent.
If you hit a snag, remember that the console output can be fed back into the converter for iterative refinement. Just copy the error trace, paste it into the “Feedback” box, and hit “Improve”. The model will rewrite the snippet, often fixing subtle quoting issues or missing imports.
So, fire up the tool, watch the walkthrough, run a quick test, and you’re ready to ship a Python version of that gnarly one‑liner without breaking a sweat.
Step 4: Refine Generated Python Code
Now that the AI has given you a first‑draft function, the real work begins: polishing it so it feels like something you’d write yourself.
Why refinement matters
Think about that moment when you copy‑paste a snippet from Stack Overflow and it “just works”. A few weeks later you’re hunting down a mysterious NameError because the variable names don’t follow your project’s conventions. The same thing happens with AI‑generated code – it runs, but it might not blend with your style, logging strategy, or error‑handling policy.
Do you want to spend the next sprint debugging a one‑liner, or would you rather let the code sit nicely in your repo and be testable from day one? Let’s make sure the answer is the latter.
Step‑by‑step refinement checklist
- Rename ambiguous identifiers. Replace generic tmp or data with something that tells a future reader exactly what’s happening.
- Add type hints. Even if you’re not a strict type‑checker fan, hints give IDEs a chance to spot mismatches early.
- Wrap I/O in try/except. Capture OSError, requests.RequestException, or any subprocess error and log a helpful message.
- Extract reusable pieces. If the generated code mixes parsing and side‑effects, split them into two pure functions – one returns data, the other mutates the system.
- Insert docstrings. A one‑sentence summary plus a brief “Args” / “Returns” block makes the function self‑documenting.
- Run a side‑by‑side test. Execute the original shell command, capture its stdout, then assert that the Python version produces the same result.
Does that sound like a lot? Not really – you’ll be ticking those boxes in under ten minutes once you get the rhythm.
Real‑world example: cleaning up a log‑rotation script
Imagine the AI gave you this snippet for rotating logs:
import subprocess, os, datetime, gzip, shutil

def rotate_logs(path):
    for f in os.listdir(path):
        if f.endswith('.log'):
            full = os.path.join(path, f)
            with open(full, 'rb') as src, gzip.open(full+'.gz', 'wb') as dst:
                shutil.copyfileobj(src, dst)
            os.remove(full)
At first glance it works, but notice the hard‑coded .log filter, the missing Path usage, and no error handling. Let’s apply the checklist:
- Rename path to log_dir: pathlib.Path.
- Add def rotate_logs(log_dir: pathlib.Path) -> None: with type hint.
- Wrap the file loop in try: except OSError as e: and log e.
- Extract the compression logic into def gzip_file(src: pathlib.Path) -> None.
- Write a docstring that mentions “rotates all *.log files older than 7 days”.
- Create a pytest that runs subprocess.check_output(‘ls *.log’, cwd=tmp_dir, shell=True) and compares the file list after rotate_logs runs.
After the rewrite the function looks like this:
import pathlib, gzip, shutil, logging, datetime

logger = logging.getLogger(__name__)

def gzip_file(src: pathlib.Path) -> None:
    """Compress a single log file in‑place."""
    dst = src.with_suffix('.log.gz')
    try:
        with src.open('rb') as s, gzip.open(dst, 'wb') as d:
            shutil.copyfileobj(s, d)
        src.unlink()
    except OSError as exc:
        logger.error("Failed to gzip %s: %s", src, exc)
        raise

def rotate_logs(log_dir: pathlib.Path, days: int = 7) -> None:
    """
    Compress *.log files older than *days* in *log_dir*.
    """
    cutoff = datetime.datetime.now() - datetime.timedelta(days=days)
    for file in log_dir.glob('*.log'):
        if datetime.datetime.fromtimestamp(file.stat().st_mtime) < cutoff:
            gzip_file(file)
Notice how the new version is easier to unit‑test, logs errors, and respects a configurable age threshold. That’s the power of a quick refinement pass.
Performance and readability trade‑offs
One common misconception is that the AI will always pick the fastest library. In practice, you’ll sometimes see subprocess.run(…, shell=True) where a native pathlib walk would be leaner. According to a Stack Overflow discussion, “the shell makes common and simple actions really simple, but Python shines for maintainability and complex logic”. Use that insight to replace any lingering os.system calls with pure Python equivalents.
Do you ever wonder whether a generator expression could save memory? If the original script processes thousands of lines, swapping a list comprehension for (line for line in file) keeps the memory footprint tiny and mirrors the streaming nature of Unix pipelines.
Tool‑assisted polishing
SwapCode’s platform itself offers a “Improve” button that will run the code through a linting model, suggest PEP‑8 fixes, and even add missing imports. But don’t rely on it blindly – give the AI a concrete prompt like “add type hints and a logging wrapper” and you’ll get a cleaner result in seconds.
For those who love visual aids, the C++ to Python Converter page demonstrates the same refinement workflow for a different language, reinforcing the idea that the pattern works across any conversion.
Quick reference table
| Refinement Area | What to Check | Typical Fix |
|---|---|---|
| Naming | Generic variable names | Rename to domain‑specific identifiers |
| Error handling | Missing try/except | Wrap I/O in specific exception blocks and log |
| Modularity | Mixed parsing & side‑effects | Split into pure function + action function |
So, what’s the next move? Grab the AI‑generated snippet, run through the checklist, add the tests, and commit. In a half‑hour you’ve turned a raw dump into production‑ready code that even your future self will thank you for.
Step 5: Test and Debug the Python Script
Alright, you finally have a Python function that supposedly does what your one‑liner did. Does it actually work? That’s the moment we roll up our sleeves and put the code through its paces.
Why testing matters
Think of the original shell command as a trusted friend who’s always been there. When you replace that friend with a brand‑new Python script, you need proof that the friendship still holds – same output, same side effects, same edge‑case handling.
Skipping this step is like shipping a product without QA. You might catch a typo later, but the cost of a missed edge case can be far higher.
Start with a sanity‑check script
First, capture the exact output of the shell command. A quick subprocess.check_output(..., shell=True) into a variable gives you a baseline.
Then call the generated Python function with the same arguments and compare the two results. If they match, you’ve got a green light to move on.
Here’s a minimal example you can drop into a temporary test file:
import subprocess
from pathlib import Path
from mymodule import find_and_gzip  # the function SwapCode generated

def test_find_and_gzip(tmp_path: Path):
    # 1️⃣ Run the original shell pipeline
    shell_cmd = f"find . -type f -name '*.log' -mtime -7 -exec gzip {{}} \\;"
    shell_out = subprocess.check_output(shell_cmd, shell=True, cwd=tmp_path)

    # 2️⃣ Run the Python version
    find_and_gzip(str(tmp_path), "*.log", 7)

    # 3️⃣ Verify that every .log file now has a .gz counterpart
    gz_files = list(tmp_path.rglob("*.log.gz"))
    assert gz_files, "No gzip files were created – something went wrong"
    # optional: compare file sizes or checksums if you need exact fidelity
Running this with pytest -q gives you an instant pass/fail signal.
Layer in unit tests for edge cases
Now that the happy path works, think about the moments that usually trip people up:
- Empty directories – does the script crash or silently succeed?
- Permission errors – can you catch
OSErrorand log a helpful message? - Non‑ASCII filenames – are you handling Unicode correctly?
Write a separate test for each scenario. Use tmp_path fixtures to spin up directories with the exact conditions you want to simulate. This way you never rely on your personal workstation’s state.
Debugging tricks that save time
When a test fails, the first thing I do is add a few print or logging.debug statements right before the suspect line. It sounds old‑school, but seeing the actual values of variables at runtime often reveals a mismatch that static analysis misses.
If you’re dealing with subprocess calls inside the generated code, set capture_output=True and inspect result.stderr. Many “quiet” shell commands hide warnings that only surface when you pipe them through Python.
Another tip: use the pdb debugger or VS Code’s built‑in breakpoint feature. Drop a breakpoint() right after the function’s entry point and step through line by line. You’ll quickly spot where a list is being built incorrectly or a path is mis‑joined.
Automate the sanity check in CI
Once you’re confident the tests pass locally, push them to your CI pipeline. A simple GitHub Actions job that runs pytest on every pull request guarantees that future changes won’t break the conversion.
Here’s a tiny workflow snippet you can copy:
name: Test Converted Scripts

on: [push, pull_request]

jobs:
  test:
    runs-on: ubuntu-latest
    steps:
      - uses: actions/checkout@v3
      - name: Set up Python
        uses: actions/setup-python@v5
        with:
          python-version: "3.12"
      - run: pip install -r requirements.txt pytest
      - run: pytest -q
Now every time you tweak the AI‑generated code, the pipeline will shout out any regression before it lands in production.
What to do when things still don’t line up
Sometimes the shell command uses quirks that the AI missed – for example, a GNU‑specific option or an implicit environment variable. In those cases, manually patch the generated function, then feed the corrected snippet back into SwapCode’s “Improve” button. The platform will learn from your edit and suggest a cleaner version next time.
Don’t forget to update your test suite after you make a manual fix. The whole point of testing is to lock in the behavior you just verified.

Bottom line: testing and debugging turn a promising conversion into a reliable piece of production code. By capturing the shell output, writing focused unit tests, and wiring everything into CI, you eliminate guesswork and gain confidence that you truly convert shell commands to python scripts automatically without surprises.
Step 6: Integrate into Your Automation Pipeline
We’ve got a clean function that mimics the original shell command. Now the real question is: how do we make sure that piece of code runs every time we need it, without us having to remember to press “run”?
Hook it into CI/CD
Think of your CI workflow as the guardrail that catches regressions before they hit production. Add a tiny test that calls the generated Python function, compares its output to the captured shell output, and let the pipeline fail if anything drifts.
In a GitHub Actions job you can drop a step that installs the script’s dependencies, runs pytest, and then publishes the results. The snippet below is a stripped‑down version you can copy straight into your .github/workflows/ci.yml:
name: Convert‑Check CI
on: [push, pull_request]
jobs:
  test:
    runs-on: ubuntu-latest
    steps:
      - uses: actions/checkout@v3
      - name: Set up Python
        uses: actions/setup-python@v5
        with:
          python-version: "3.12"
      - name: Install deps
        run: |
          python -m pip install --upgrade pip
          pip install -r requirements.txt
      - name: Run conversion tests
        run: pytest -q
That tiny block does three things: spins up a clean environment, guarantees you have the exact packages your script needs, and runs the sanity‑check test we wrote in the previous step.
But what if a new developer clones the repo and forgets to generate a requirements.txt? You can make the script self‑aware and install missing packages on the fly – there’s a neat trick on Stack Overflow that shows how to automatically install missing Python packages when an ImportError occurs. Wrap your imports in a try/except, call subprocess.check_call([sys.executable, "-m", "pip", "install", pkg]), and you’ve turned a “run‑once” script into a truly portable snippet.
Schedule it for recurring runs
Many conversions are part of a nightly data‑refresh or a daily cleanup job. Rather than manually invoking the script, let the operating system’s scheduler do the heavy lifting. On Linux, a simple cron entry can fire the script at 2 AM every day:
0 2 * * * /usr/bin/python3 /path/to/your/convert_script.py >> /var/log/convert.log 2>&1If you live in the Jupyter world, you can even schedule notebook‑style runs with cron and nbconvert. The idea is the same: treat the conversion function as a module, call it from a tiny driver script, and let the scheduler handle timing.
Remember to keep the environment reproducible. Pin the Python version (we like 3.12), lock the dependencies in requirements.txt, and, if you’re using virtual environments, activate them inside the cron command:
* * * * * source /home/ci/venv/bin/activate && python /opt/convert/convert_script.pyBring it into your larger automation platform
Whether you’re using Jenkins, GitLab CI, or an internal orchestrator, the pattern stays consistent: a step that (1) pulls the latest shell‑to‑Python conversion, (2) runs the unit test we wrote, and (3) deploys the resulting script to the target environment.
Most platforms let you define reusable “templates”. Create a template that installs pip packages, runs the conversion test, and then archives the script as an artifact. Then any new pipeline can reference that template with a single line. It’s the “write once, reuse everywhere” mantra that keeps technical debt low.
Checklist before you commit
- ✅ Add a CI job that runs the conversion sanity test.
- ✅ Ensure
requirements.txtis up‑to‑date or use the auto‑install pattern. - ✅ Add a
cronor scheduler entry for recurring executions. - ✅ Document the environment (Python version, virtualenv activation).
- ✅ Archive the generated script as a build artifact for traceability.
Pro tip: keep the CI job name consistent across branches so you can trace which conversion version triggered a failure.
By weaving the generated Python code into your automation pipeline, you turn a one‑off conversion into a repeatable, trustworthy part of your delivery flow. The next time you spot a gnarly grep | awk pipeline, you’ll know exactly where to drop it, test it, and schedule it – all without breaking a sweat.
Conclusion
We’ve walked through the whole pipeline, from dissecting a gnarly one‑liner to letting SwapCode’s AI spin out clean Python that you can drop straight into your repo.
The biggest win? You no longer waste hours hand‑coding flag translations or chasing obscure quoting bugs – the conversion happens automatically, and you keep the logic you already know.
By adding a tiny sanity‑check test and wiring the generated script into your CI pipeline, you get the same confidence you had with the original shell command, but with versioned, reviewable code.
So, what should you do next? Grab the snippet you just built, push it through SwapCode’s free converter one more time, lock the test into your pull‑request workflow, and schedule the script to run on its own.
When the job passes every time, you’ve truly converted shell commands to python scripts automatically and turned a one‑off hack into a repeatable, maintainable piece of your automation toolkit.
Keep the checklist handy, revisit the CI job name if you branch, and remember that every new conversion gets safer as you add more tests – that’s the real power of automation.
And if you ever hit a quirky flag or an environment‑specific quirk, just feed the error back into SwapCode’s ‘Improve’ loop – the model learns fast, so your next conversion will be smoother than the last.
FAQ
How can I reliably convert shell commands to python scripts automatically without writing code manually?
Start by copying the exact one‑liner into SwapCode’s free AI converter and select “Shell → Python”. The tool parses flags, arguments, and pipelines, then spits out a ready‑to‑run function with proper imports and type hints. Because the conversion happens in a single click, you avoid hand‑crafting subprocess calls and can focus on tweaking the tiny wrapper that the AI generates.
What are the common pitfalls when using AI converters for shell‑to‑Python translation?
AI models sometimes preserve Bash‑specific shortcuts like “$HOME” or assume GNU‑only options. You might also see hard‑coded paths or missing error handling. The trick is to run a quick sanity‑check: compare the original command’s stdout with the Python function’s return value. If something looks off, edit the generated snippet and feed the corrected version back into the “Improve” loop.
Do I need to add tests after the conversion, and how should they look?
Absolutely. Write a small pytest that captures the shell output with subprocess.check_output, then invoke the generated function with the same arguments. Assert that the two results match, and add edge‑case tests for empty directories, permission errors, or Unicode filenames. Keeping the test suite in version control guarantees that future refactors won’t silently break the conversion.
Can the conversion handle environment variables and complex quoting?
Yes, but you have to surface those variables in the Python wrapper. Replace “$VAR” with a function parameter or read os.getenv inside the body. For nested quotes, the AI usually escapes them correctly, yet it’s worth double‑checking the resulting string literals. A quick manual run in a temporary virtual environment will reveal any quoting mismatches before you commit the code.
How do I integrate the generated Python script into my CI/CD pipeline?
Drop the function into a module, add the pytest we discussed, and create a CI job that installs the module’s requirements and runs pytest -q. Most pipelines (GitHub Actions, GitLab CI, Jenkins) let you define a step that calls the test script, so the conversion is verified on every pull request. Once the job passes, you can schedule the script with cron or a workflow trigger.
Is it safe to run the converted script in production straight away?
Treat the conversion as a prototype, not a production release. Even though the AI gives you syntactically correct code, you still need to add logging, explicit exception handling, and resource‑cleanup logic. Deploy the script to a staging environment first, run the same sanity‑check tests, and monitor its behavior under realistic load. When you’re confident the output matches the original shell command, promote it to production.
What should I do when the AI output misses a flag or produces a syntax error?
Open the generated file, locate the problematic line, and manually insert the missing flag as a function argument. Then hit the “Improve” button on SwapCode – the platform will re‑run the model with your correction and usually returns a cleaner version. Commit the fixed snippet and update your test suite to capture the new behavior, so the issue won’t reappear later.